
📖 Read Time: 8 Minutes
🏋️ Join the tribe of Movement & Calisthenics Athletes
People just like you that are working with their own body weight to get strength, lose fat, build muscle, recover from injuries and live their best lives!
Ring dips are an amazing exercise for developing your upper body pushing strength. While it takes a good deal of understanding and mastery of the basic calisthenics fundamentals to unlock ring dips, it’s not only what you need.💪
📌How to unlock ring dips: understanding the prerequisites and muscles used
🤜Mobility, particularly shoulder mobility, plays an important role if you want to unlock the full range of motion of ring dips for maximum strength potential.
We’ll be showing you some mobility exercises to help you achieve better ring dips.
💥Mobility requirement💥
✅Shoulder extension
When looking at the rings dip, one of the first things you’ll see is that it requires a significant range of shoulder extensions. So in the dip, the shoulder angle and its elbows track backward and it starts to create a stretch in the interior side of the shoulders. So right off the bat, you need to have a proper range of shoulder extension, which will also cross over with flexibility in your pectorals.
✅Scapular retraction mobility
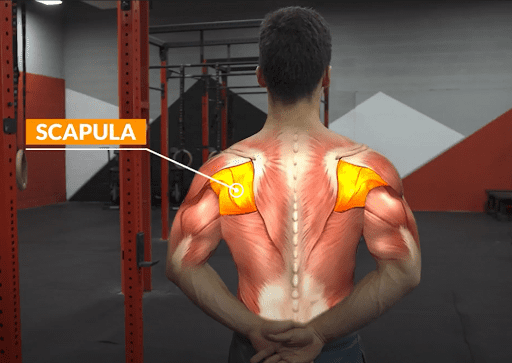
You also need to be able to have good scapular mobility. Because you need to retract your shoulders and push downwards. So mobility to be able to move your scapula is another important item. Without this, your dip is going to have far less range and you won’t get much out of it.
✅Cervical retraction
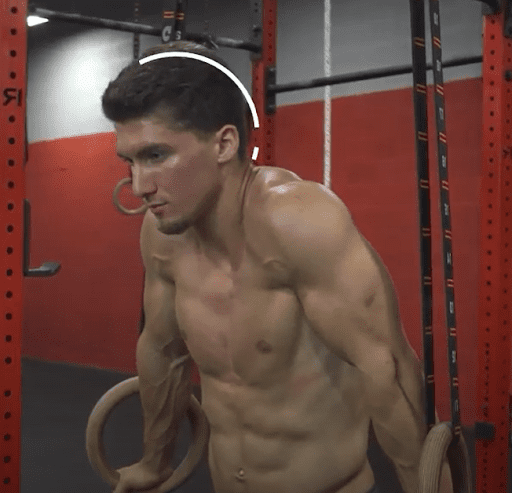
What lack of cervical spine mobility can result in.
You’ll also need to be able to have some cervical retraction. And that deals with head placement. We talked about having poor head placement in the proper form of dips (📌How to do ring dips: Proper form and technique guide), Being able to retract it and neutralize it can be done by improving the cervical spine which is connected to the head.
✅Thoracic extension
And then, of course, thoracic extension. Lack of this thoracic extension results in general poor posture in standing position. So being able to extend the upper body comfortably is a necessity to achieve a good posture in ring dips as well.
🏆 7 Mobility Exercises for unlocking Ring dips
We’ve got seven different exercises that will go over and you’ll be on your way to better dips. These mobility exercises will do a few things. They’re going to help introduce and make sure that your shoulders are moving in the correct pathways, and so they’re more mobile. It’s going to help reveal any weaknesses in a range of motion, and it’s also going to gradually introduce force and range into the dips.
📍Exercise 1: Soft Tissue Work
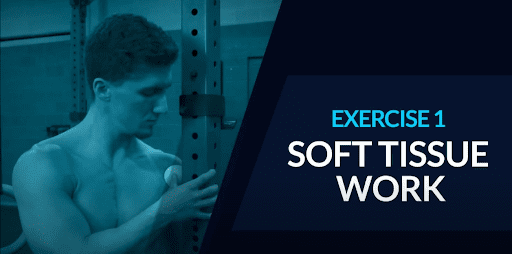
We’ll take a look at the first set of exercises, and this is for soft tissue work will be using lacrosse ball in this particular situation.
We’re going to be working on shoulder and pec (CHEST) desensitization, and we’re going to be integrating good breathing to signal to the brain that this is a normal movement and increases blood flow.
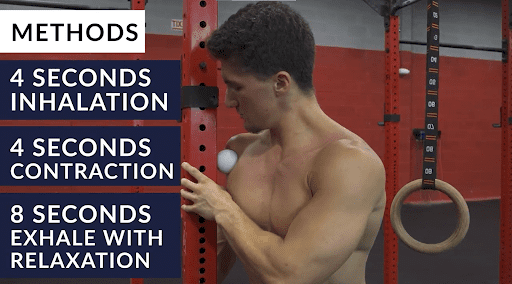
One of the methods we’ll be doing here will be with a lacrosse ball digging into the pecs. Coach Jeremy is doing this at a pole but this could also be done on a wall as long as your head is not in the way. It can also be on the floor. And one of the methods here is doing a four-second inhalation while you press your body into the ball.
He can do a four-second contraction where he’s contracting his muscles and tensing them and then eight-second exhalation and relaxation. That’s one of the methods. And of course, you want to make sure that it’s NOT excruciatingly painful. You want to be able to control your breathing properly. Aim for mild and bearable discomfort, not pain.
You don’t have to do it as a hold. You can slowly move it around and in different points of your shoulders and chest. Find sensitive points and work on them slowly. This will desensitize the targeted muscle and help the brain perceive that there’s no threat in the movement of the shoulder or chest. 📌
It’s going to help improve function. It can also be doing this in the interior, the lateral, or the posterior side of the shoulder. And a good maximum amount of time would be ten minutes per side. You’re not laying here all day digging into your body.
This exercise is fantastic for also mobilizing other muscle groups as well.
📍Exercise 2: 90 – 90 stretch
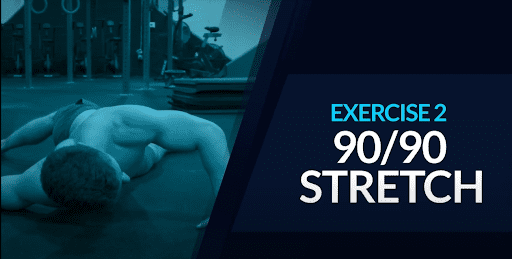
The next mobility exercise will be a 90-90 stretch. It’s called that because the elbow angle and the shoulder angle of the arm on the floor are both like the corner of a square 90 degrees. And the purpose of this stretch is to help open up and stretch the chest muscles.
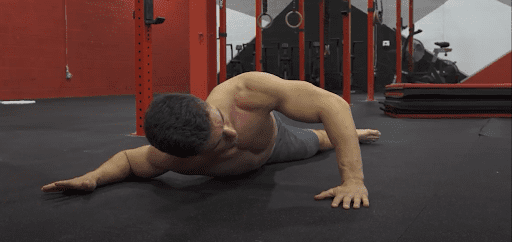
Coach Jeremy first started laying off on his stomach with one arm placed on the ground. The shoulder and elbow angle, as mentioned earlier, is a 90-degree then roll away from the floor towards the elbow. He’s breathing and he’s holding for a few seconds. The stretch should be felt in the shoulders and the chest. But of course, you don’t want to be experiencing pain in the shoulder.
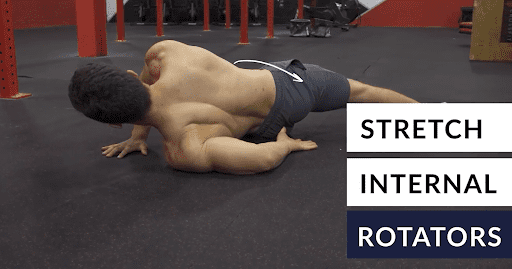
The secondary piece to the 90-90 stretches will be to flip the arm the other way so the palm is face up and it’s 90 degrees facing downwards towards his feet. Coach Jeremy will repeat the same kind of movement. He’s going to roll towards his arm and away from the floor. This is going to stretch the internal rotators of the shoulder.
It’s really easy to go too far into this one so it kind of just pops up out of nowhere. Go at a slow pace into it.
Pay attention to your breathing. You don’t want your brain and body to perceive this as a threat. So this is the 90-90 stretch with internal rotation.
📍Exercise 3: Shoulder circles & scapular retractions
The third mobility exercise will be shoulder circles and scapular.
Coach Jeremy is in the sitting position with his arms behind him and he’s just going to do various circular movements of his shoulders. He’s going backward. He can go forwards, he can retract them in the back. So it’s really just practicing this kind of movement and making sure it’s warmed up and ready and mobile.
To explain it simpler, retraction is the movement of the shoulder blades when you pinch them together. It’s quite similar to the feeling of opening up your chest, but the goal here is to move the shoulder backward. If you have enough scapular mobility, you can retract your shoulder blades while keeping a neutral position of the chest.
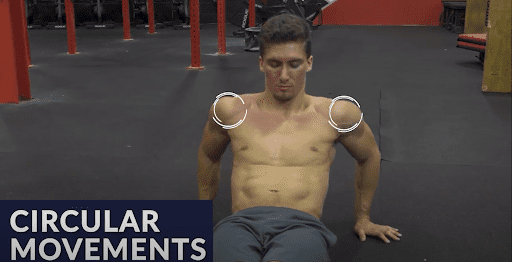
It’ll help improve posture for the ring dips. It’s gonna help you understand how to move the scapula for dips and again warm up the area.
So when you’re on the dips and we’re talking about retracting, you’ll at least know what kind of movement this is. The position will add stability to your ring dips.
📍Exercise 4: Hands behind back scapula pinches
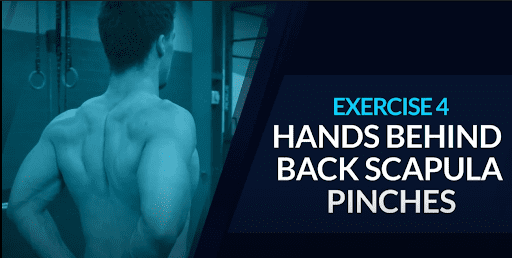
The fourth mobility exercise will be scapular pinches with the hands low behind the back. Coach Jeremy has his hands and the small of his back and he’s squeezing his scapula together, trying to get his elbows close to touching each other as hard as that is. Don’t let your shoulder rise up when squeezing the shoulder blades backward.
It’s more of an active flexibility moving from the previous exercise we did. They’ll help stretch out the pecs. And while you’re doing this, you might feel different things.
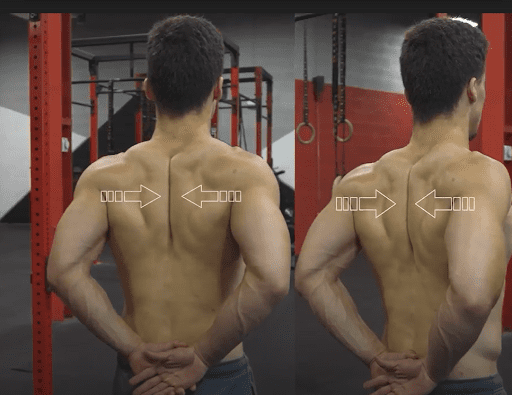
You might feel shoulder stretch, you might feel impingement, you might feel shoulder stretch. So again, this exposes where a weakness might be. And again, this is the scapular pinch with the hands low behind the back.
📍Exercise 5: Tall kneel shoulder extensions
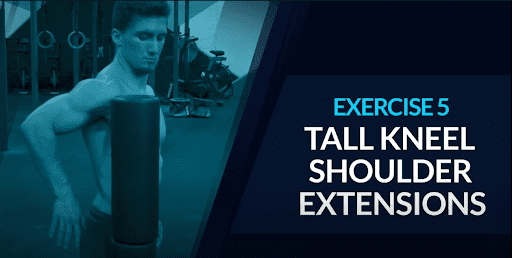
The fifth mobility exercise that will be going over is the tall kneel shoulder extension. So Coach Jeremy is sitting in what’s called the tall kneel position.
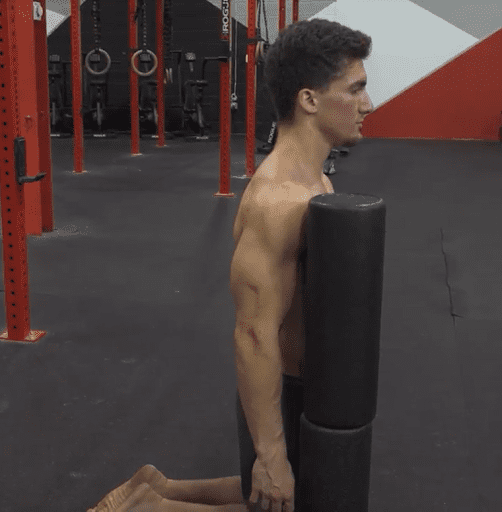
His hip line is straight and he’s right behind the foam roller. So what he’s going to do is move his arm to mimic the bottom portion of the dip position. And when he does this, he should not touch the rollers if done properly. So he’s just going to do this active flexibility movement.
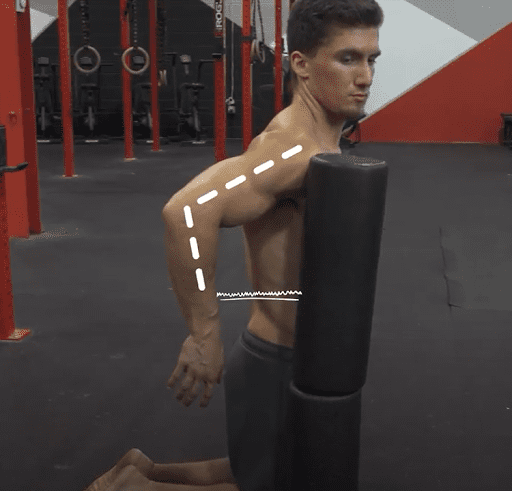
See how high he can raise it without touching the foam roller.
If he does this incorrectly, it means he’s got the mobility for the shoulders or maybe he’s leaning in the hips forwards. That’s not what you want in dips.
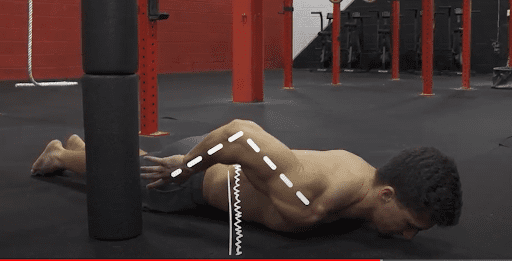
This can also be done in the prone position. And you can’t really cheat this one right because the floor is in the way.
So that’s bending the arms, just retracting and mimicking the bottom portion of the dip. He’s trying to pull it as far back as you can and actively move that range without breaking the form.
📍Exercise: 6 Eccentric push-ups (with deficit & dips)
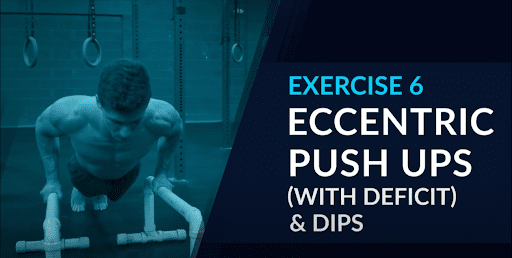
Next mobility exercise will be the eccentric push up. Here we have it with parallettes but it can be done on the trench with two boxes or on anything where he can get a deficit, meaning be lower than the surface.
Coach Jeremy is going to do a really slow control, from 6 seconds at least lowering below the level of his hands.
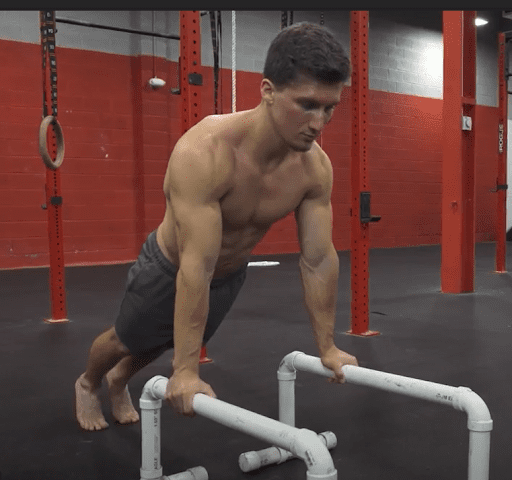
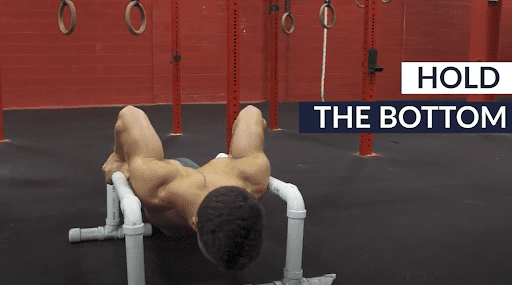
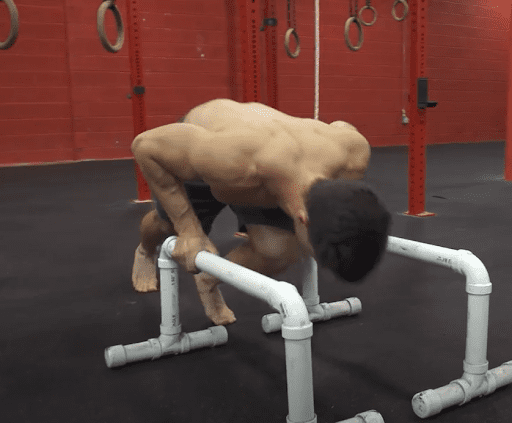
He can hold the bottom to add the difficulty. And then coming out of this, simply stepping back out to come back to the top. Repeat the motion for reps after that.
This will be a controlled stretch of the biceps, the pectorals, and the shoulders. The key here is to go lower than the stable surface to attain the stretch and simulate the bottom of the ring dip.
📍Exercise 7: Crab sliders
The last and 7th mobility exercise that we’ll show you are the crab sliders. In this particular example, we’ve just made a sliding surface that’s smooth enough and Coach Jeremy’s wearing socks so we can slide across the top of it.
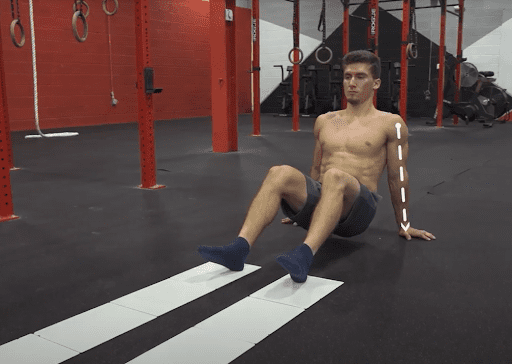
This exercise will start off in the crab position. He’s got straight arms and butt slightly off the floor. What he’ll do is heI’ll slowly extend his hips forwards while letting his heel slide forward for 5 seconds then hold the last position for another 5 seconds.
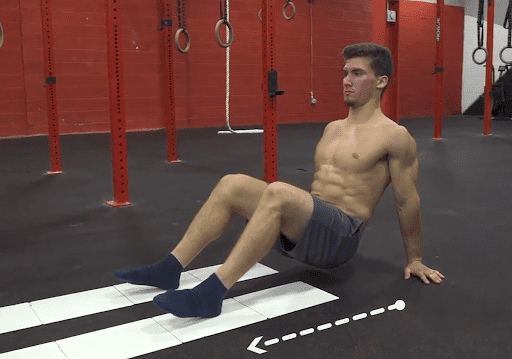
Then he can simply sit back down and then reposition for the next repetition. So pushing back up slowly, sliding forward, he’s going to feel shoulder stretch, a pec stretch, and a little bit of strain in the biceps, but that’s where you can keep the arm as bent if necessary.
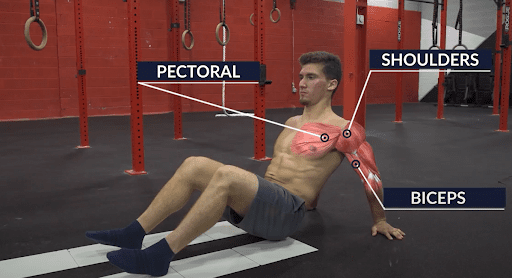
Extending for five, holding for five, and just repeating that particular active flexibility movement. This will help guard against injury and help promote good control throughout the ring dip movement.
You don’t need to get fancy with the set up. You can use furniture sliders on a rug. You can use socks on a hardwood surface. And like I said, in this case, we just found some white boards that are smooth. Put some socks on and slide forward, so you always get points for being resourceful.
📌THE ULTIMATE GUIDE TO CALISTHENICS EQUIPMENT
A couple more points about the crab sliders is that you want to do it, control them slowly. And the fact that your hips and glutes are so close to the floor is more like a safety net. If you slide too fast or too far, you simply just sit down. Take that weight off of your shoulders and hands immediately. So it’s really important that you gradually test the range you’re able to do and sit down immediately.
If there’s an emergency, you don’t want to be hurting your shoulders and sliding out too fast, then you can’t train any dips for a while. Move gradually and don’t overestimate your body.
Conclusion
🤜So here are again 7 MUST-DO Mobility Exercises to help you do better with your ring dips journey. These can be used as a warm-up before you start your training as well.
We covered muscle pre-activation and both active and passive flexibility, so these will also help expose weaknesses. 💯
Just pay attention to where your limitations are and where your weaknesses are and spend more time on those areas. Then you’ll find yourself with better ring dips soon after.
If you don’t know where to start with your training, you can check out our free assessment to get a personalized training plan based on your current fitness level.
Related Articles You’ll Love:
Ready to get started?
Get your free personalized training plan now
