📖 Read Time: 8 Minutes
🏋️ Join the tribe of Movement & Calisthenics Athletes
People just like you that are working with their own body weight to get strength, lose fat, build muscle, recover from injuries and live their best lives!
We learn from school what we would experience outside the “real world”. School prepares us for the unpredictability and challenges we might come across.
The same goes when you want to learn a skill. 🤸
The best way to 🔐unlock a skill is by first understanding what it needs and demands, so you can better prepare for it.
We’ll be analyzing the ideal ring dip, the prerequisites necessary, and answering any questions that you have about dips.
✊ Here we’ll be showing you the muscles involved for the ring dips and the prerequisites you’ll need to do before actually training the progressions of the ring dips.
The ring dip is essentially a squat for your arms. If you think about standing squat, your legs are straight, and then you eventually need to bend the hip joint and the knees.
This is similar in the fact that you’re supporting on top of the rings with straight arms. You’re dipping down by bending arms and then reversing it to come back up to the top.
🙌 Body requirements
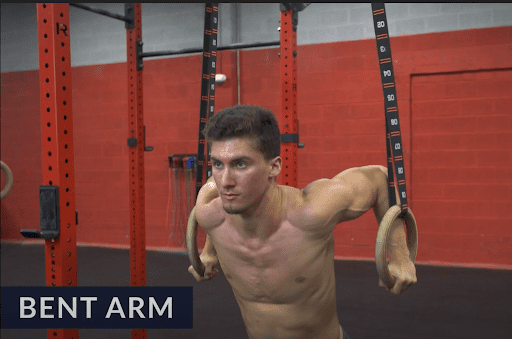
👉 The ring dips are an essential skill because you will be training a lot of bent-arm and lock-arm strength on an unstable surface. It’s going to recruit more muscle fibers because, again, you need to adjust, you need to stabilize, and it’s going to tax it more.
And of course, this further leads to many progressions on the rings, pressing movements, maybe through handstand, through planche, through different angles. Ring dip is an excellent critical initial movement on the gymnastics rings once you can prop yourself up and learn how to stabilize in support. ☝️
The prerequisites listed in our ring dip progressions guide are necessary because you need to initially have the strength for the range of motion to go through a dip. After all, if you don’t have that range, once you hop up on the rings, you’re not going to get into the starting position properly, or you might risk injury. So this is why prerequisites are a must. 💯
You should have done dips on stable ground first before attempting the ring dips. You need an appropriate level of strength to do the dip because it only gets more complicated from there when you’re on top of the ring. It’s essential to train the movement pathway because you will be mimicking it on the rings.
Just to make sure that there’s a smooth transition from stable to unstable surfaces, ☝️ make sure that you’re injury-free as possible so you can start learning this dip variation without wasting any time.
Strength 💪
Mastery of the dip on a stable surface is vital, but it doesn’t immediately translate to ring understanding.
✔️ Ring push-ups can teach valuable pushing basics on rings as you get yourself used to the instability. Your feet will be supported on the floor, and you’ll be getting more familiar with the bent and lock arm pushing phases on the rings. In addition, it will prepare the muscular strength component and the elbow joints, which act as a stabilizer in the hold position.
Mobility 💯
Ideally, you want to have a shoulder angle range going to about 70 to 80-degree position in this angle here.
🤜 You would need to train your shoulder extension to reach the range of motion safely.
You would also need to be able to have pectorals that are flexible enough because if you’re too tight, you won’t be able to open up your chest to do the dip. We also want you to be able to hold yourself up in the lock or position on top of the rings because that’s the starting point of the dip.
Skill 🤸
👊 We also want you to be able to hold yourself up in the lock or position on top of the rings because that’s the starting point of the dip. The movement pathway seems simple enough, but it requires understanding and creating good habits for safer and more efficient mastery.
We want you to be able to be familiar with dips from the movement. Not sure where to start? Take our free assessment to get a personalized training plan that includes many different progressions leading up to the full motion of the dips progression, which would be dips here on the parallel bars on a stable surface.
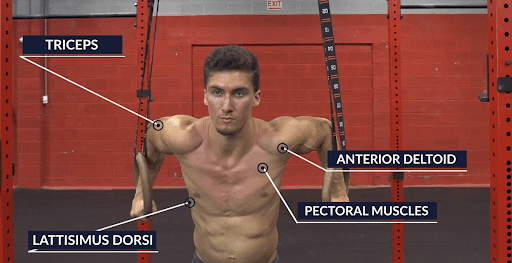
💪 Muscles used and developed
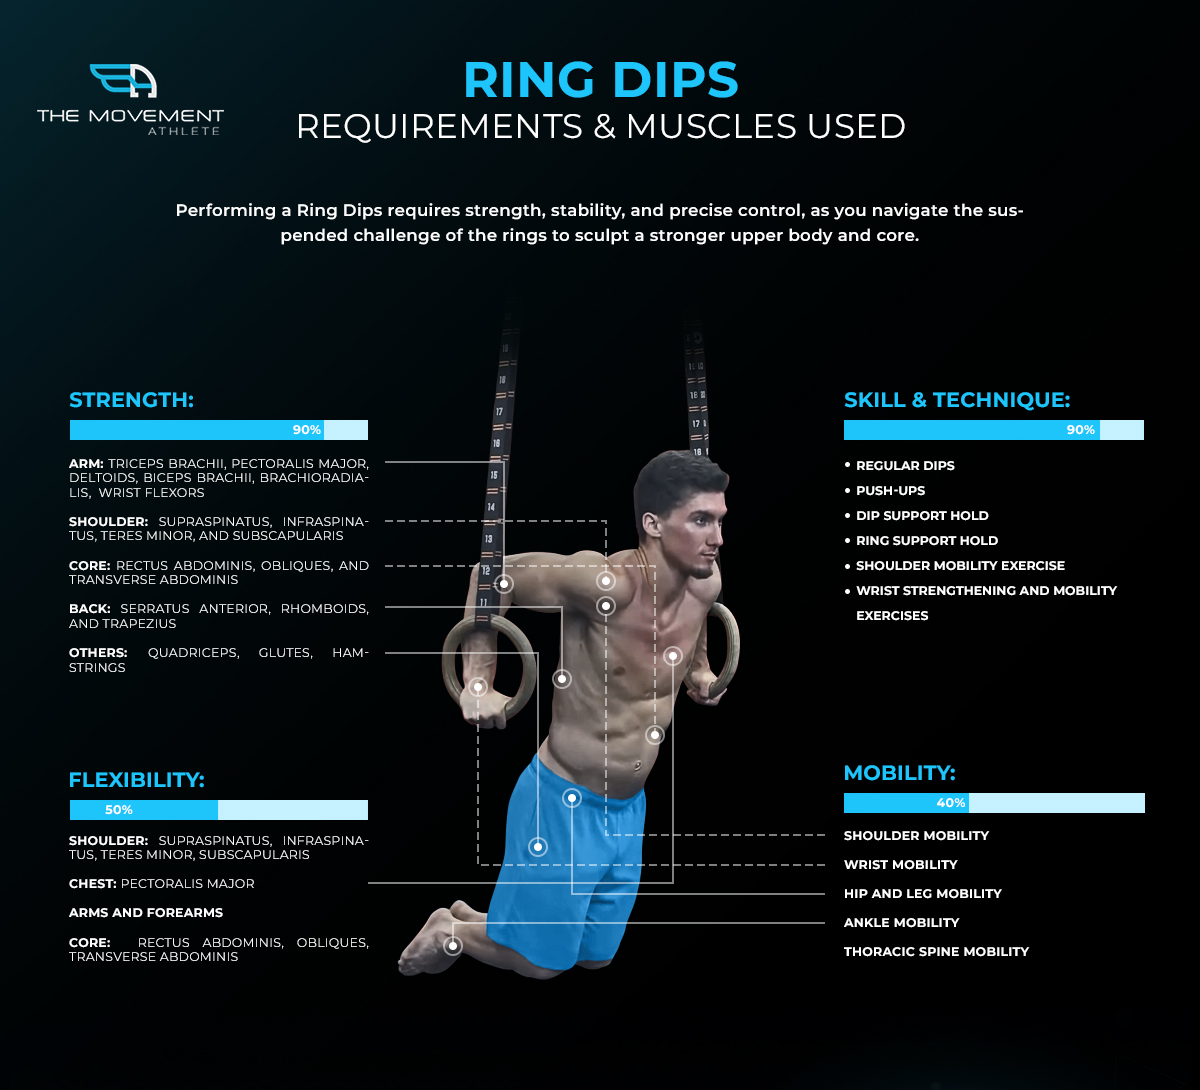
The ring dips are going to be targeting the anterior muscular chain, which are primary movers for pushing motions:
• ✊ Anterior deltoids
• ✊ Pectoralis
• ✊ Triceps
At the same time, it also requires some help from pulling muscles passive structures for additional stability in the position:
• ✅ Latissimus dorsi
• ✅ Rhomboids
• ✅ Biceps
• ✅ Tendons
☝️ You should train the ring dips because it’s one of the best high-intensity upper body exercises without adding weights. And of course, if you find yourself preparing for the ring dips and then going back to stable ground, it’s going to be a lot easier.
There will be a high increased motor unit recruitment, and all the muscles do the stabilization necessary. So it’s going to be suitable for the progressions later on, like for the muscle-up.
💥 Ring Dips Frequently Asked Questions
1. 🔎 How long to achieve ring dips?
The two main areas to focus on will be the shoulder range of motion and the stability of the rings. From there, it branches out and goes into more categories such as:
• Proper movement pathway
• Chest mobility
• Elbow joint readiness
• Correct muscle activation
And so on.
Don’t underestimate this seemingly simple movement. If you can do dips on a stable surface easily, then you already have cut a considerable time in your learning phase, but don’t expect to master ring dips immediately. The instability factor creates a massive disruption in what your body got used to when performing dips on a stable surface.
2. 🔎 Do I need to meet the prerequisites?
Of course, many people ask: “So do I really need to meet these prerequisites.?”
And the short answer is: if you want the best dip, of course! You don’t need to go through all of them precisely as they are. But what we’ve laid out will help you do an efficient dip. Well, if you skip “this”, you’ll be doing an inefficient dip.
You won’t be able to go low enough, or you’ll be hurting your shoulders or anything else that can fall apart technically from there, and it’ll just take longer.
3. 🔎 What if I can’t meet all prerequisites?
We love to tell athletes to work on their weaknesses. Rushing into a move can only lead to bad things.
If you lack flexibility and are strong enough, it would be wise to work on the range of motion because you’ll get a fuller range. You’ll get more out of your dips.
A poor level of prerequisites will just lead to poor dips down the road. So the previous prerequisites where progression is leading up to this point, the movement pathways will be very similar.
So if you are learning the dips on the parallel bars or, again, just a stable surface, it got to file the same movement pathway as it will on the rings, meaning that the elbows need to track back to get low enough, you need to finish with a lockout. So you want to be able to accomplish that movement before coming to the rings.
Not working on your weaknesses slows down your progress and even increases the rate of injury.
Prerequisite exercises: What you need to master first 🎯
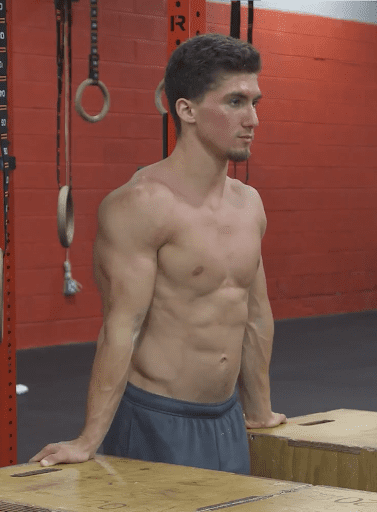
Prerequisite exercise 1: ✅ Parallel bar dips
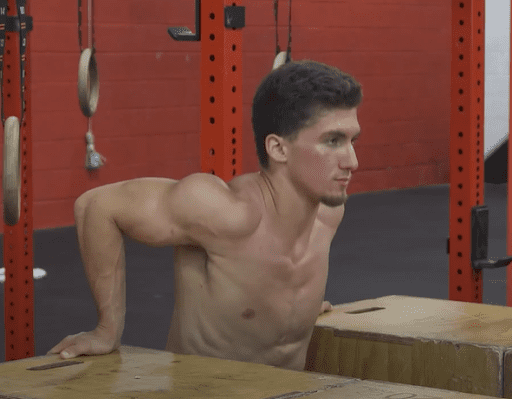
Now we’ll be heading into the prerequisite exercises for the rings dip. Our training system gives you a lot of progressions that will end up at the parallel bar dip or, in this case, box dips.
🎯 We’re going to be on stable ground in the point. This can be two chairs, two boxes, parallel bars, anything that’s stable. Coach Jeremy is showing the box dips in this case.
It’s similar to ring dips. Hop on a stable surface, then lock out the arms at the top position. Next, lower down the body by bending the elbows and keeping it close to the body, then reverse the motion. It’s going to look exactly like it needs to on the rings, right.
But he’s stable here. The elbows are checking backward. The upper torso is upright; there’s no forward lean.
You need to be comfortable with doing 8 to 12 dips. 💪
We want you to be able to do eight to twelve dips because that’s the overlapping range of strength and hypertrophy. So if you can do the dips here, that means you have a decent level of strength to eventually advance into the ring itself because it gets a lot harder once you’re on the unstable surface.
So this is definitely a prerequisite. You’re showing you can do it on the stable surface, and then we’ll have a few more movements for you, and eventually, it’ll end up on the ring itself.
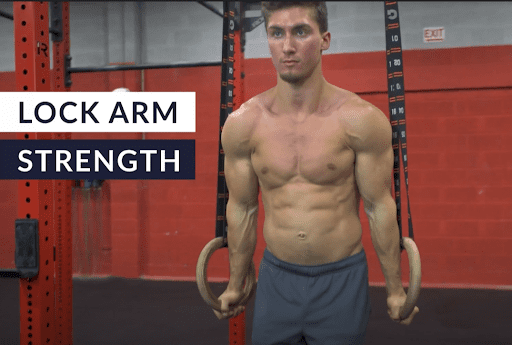
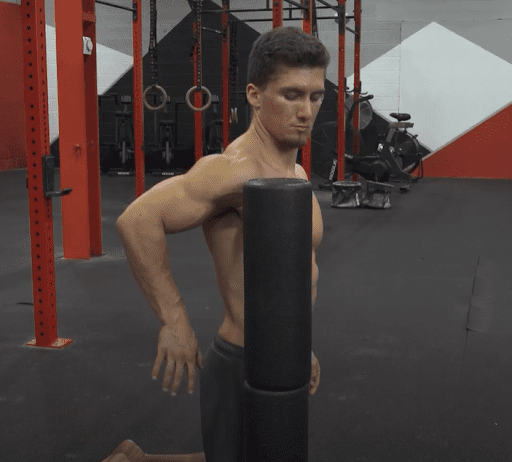
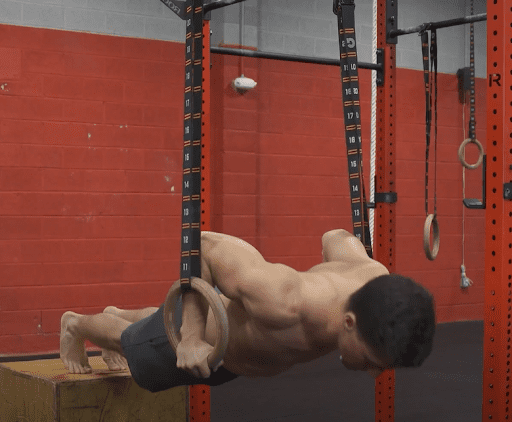
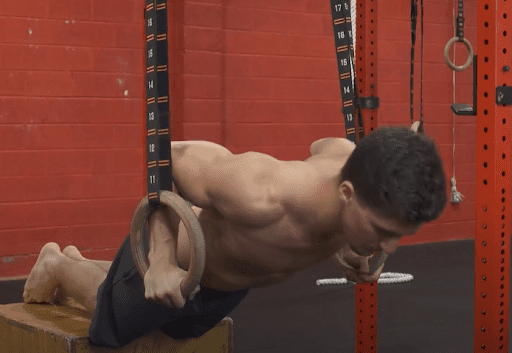
Prerequisite exercise 2: ✅ Support position on the rings
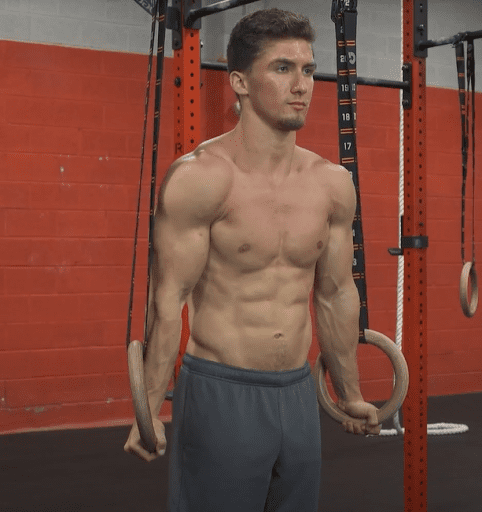
✊ The second essential prerequisite for the rings dip is going to be the support position on the ring. Coach Jeremy is showing in the photo above how it should look like. You can see it here from top to bottom:
• Head neutral
• Shoulders depressed and retracted
• Arms locked out and turned outwards
• Upright torso
• Engaged core
• Straight bodyline
The rings are further away from his body, keeping the body as straight as possible. We want you to be able to hold this for about at least 13 seconds. Ideally, it’s 13 to 18 seconds, and the reason for that is because you don’t want to operate at a one rep Max. Right. If you could only hold this for about 2 seconds, 3 seconds, you’re not going to be able to be on the rings for long enough to do the dips, and the dips will take several seconds.
So holding a good support position between 13 and 18 seconds would be ideal before starting to head into the actual dips itself.
Why is the support position important? 🤔
The support position is so crucial on the rings because that’s where the skill starts needs to start in a stable support position on the rings before lowering and doing the skill.
☝️ If you’re starting off in an unstable support position, you’ve already started doing the skill incorrectly. So you need that stability in that position.
☝️ If we give an example into the weight training world, just think about standing before squatting. If you can’t even stand, and then you go into a squat, it’s going to break down immediately. So just trying to relate the two together support position is like standing. You want that stable before you do the dip.
Prerequisite exercise 3: ✅ Ring push-up
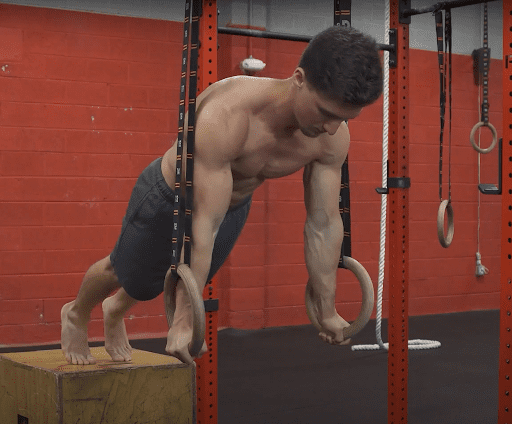
🤜 Prerequisite number three will be the ring push-ups to help you get the ring dips. Coach Jeremy starts off in the block arm position and support, and it’s basically performing regular push-ups. You push up as you would on the floor so you can see he’s keeping the body line straight, neutral head. Lock the arms at the top position on each rep. He’s trying to have the elbows track backward instead of sidewards, so it’s going to follow all the same ideal positions of a push-up.
You don’t want to be sagging in the shoulders. You don’t want to be arching or piking. So finishing the lockout is very important. It’s also keeping the ring stable. If he were new to this, maybe the rings would be shaking all over the place, and the technique would break down quite soon. And we can also look at a bent-legged version.
👆 We can regress this further backward and do this on the knees as well, so we can further press the ring push-ups by simply going on the knees so he could be on a low set of floorings. Or in this case, we have elevated the box for Coach Jeremy to be leaning on to so he’s more in line with the rings for the push-up. Just follow the same technique. The hip angle is straight even though he’s on his knees, neutral head going through the bent arm and lock arm phases he’s controlled.
👍 You need to be comfortable with doing 8 to 12 reps for the overlapping range for strength and hypertrophy. And this shows you have enough strength to move on to the progressions of the rings dip.
⚡️ Conclusion
That’s an overview of the prerequisites before heading into the actual ring dip progressions.
☝️ You would want to be able to do what we showed you here. We spoke about shoulder range of motion, elbow preparation, and of course, the pecs being flexible and strong enough to go through the range.
If you’re unsure about your current skill and level of fitness, you can always take a step back and check out our assessment so you can determine where you currently are with your fitness journey.
🏆 A proper assessment lets you get an idea of what your body is capable of to get a more personalised training that is catered to your specific needs and wants.
Related Articles You’ll Love:
Ready to get started?
Get your free personalized training plan now