📖 Read Time: 8 Minutes
🏋️ Join the tribe of Movement & Calisthenics Athletes
People just like you that are working with their own body weight to get strength, lose fat, build muscle, recover from injuries and live their best lives!
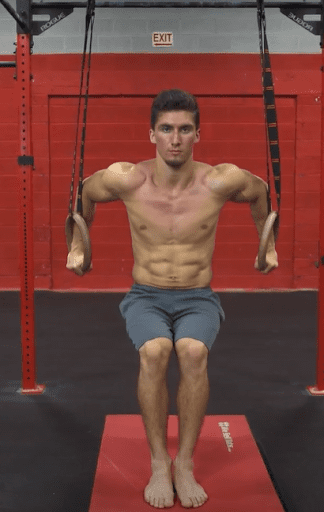
Can’t wait to master the ring dips? 😤
Then you 👊 have to follow the proper progressions for the fastest progress safely and efficiently.
We’ve broken them down to six different pathways of varying loads and levels of difficulties, and we’ve highlighted the ones that will be efficient.
🎯 We want to train smart and make it quite simple how do you actually get these ring dips. We don’t need to get too complicated and go through all the hundreds of variations of it. What are the most efficient ones? We’re going to go through those today.
🥇1st step: meeting the prerequisites
Before proceeding with the progression, you should always make sure that you have already mastered the prerequisites of ring dips. Check out the article below to learn more about what you need to master first before attempting the ring dip progression.
📌 How to unlock ring dips: understanding the prerequisites and muscles used
After having achieved the prerequisites, we can now get into the progressions for the dip.
Make sure you have a solid base level of strength and mobility so you can progress faster and safer at the same time. Moving too early to the ring dip progression could only lead you to frustration or injury.
What are progressions?
✨You might be confused about what progressions are? These are basically sets of exercises that lead up to the exercise goal; in our case, it’s the ring dip.
So in the ring dip progression, different exercises gradually increase the level of difficulty after each stage. It breaks down the exercise into simpler and easier forms. It lets you tackle different aspects of an exercise so you can gradually build up the demands leading to the goal.
🤜Progressions are specific to the exercise. While you can train bench press to increase general strength, it won’t help you achieve ring dips. It might help a bit in terms of pushing capacity, but that is all.
With progressions, you master not only the strength, but also other elements such as mobility, movement pathways, and more. It’s kind of like a step by step guide to ring dips.
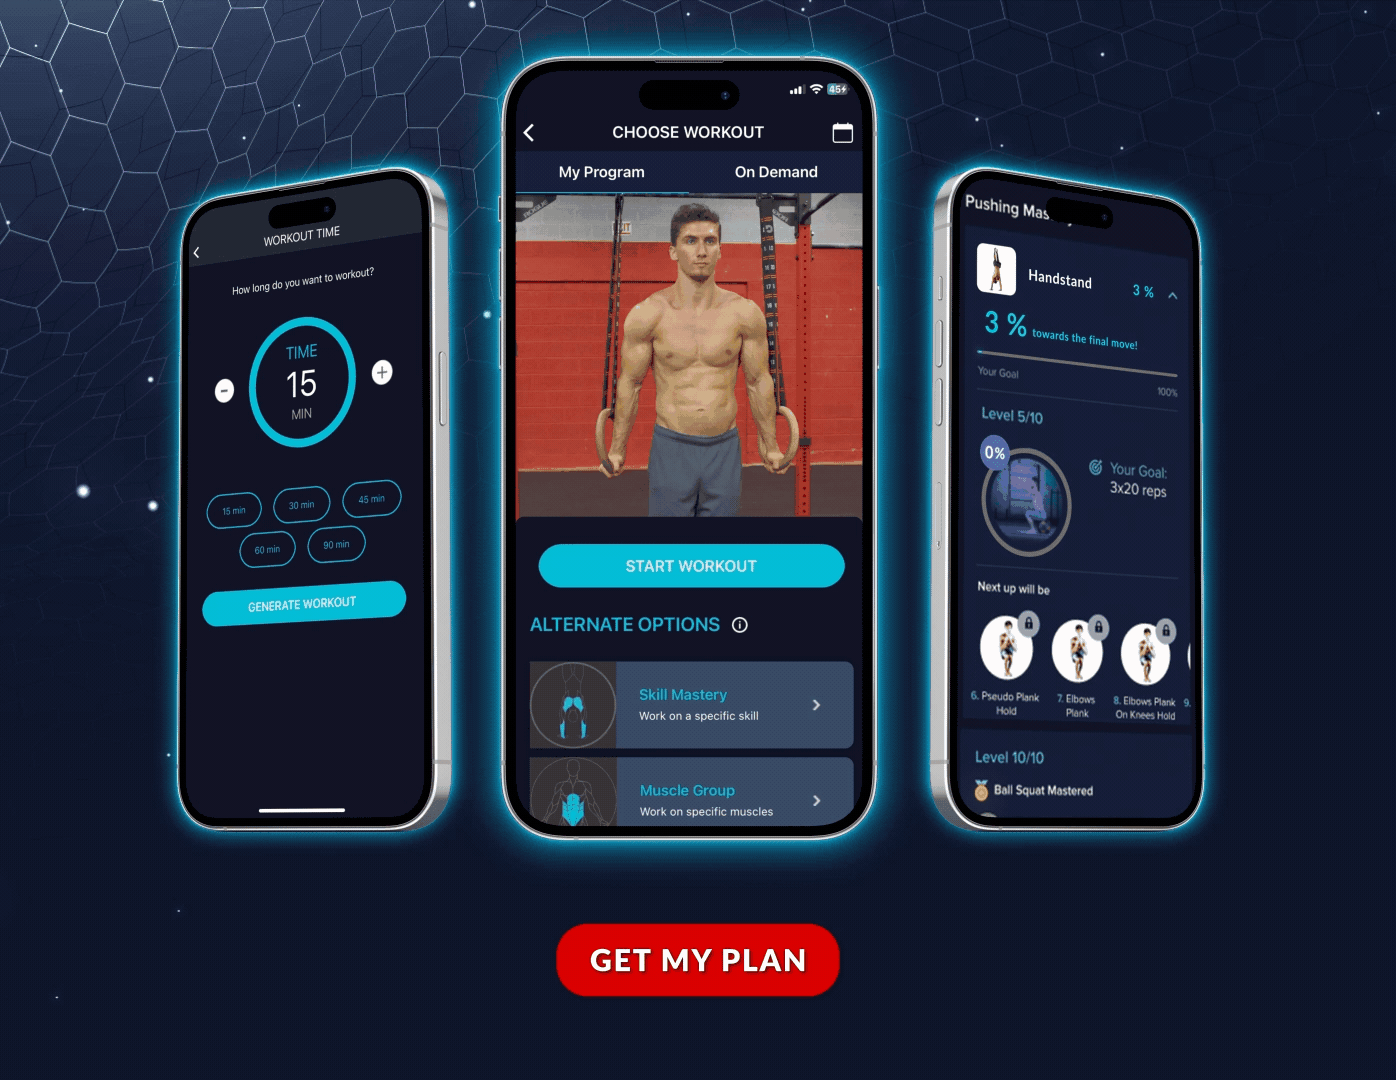
Progressions are part of the progressive style of calisthenics. If you’re new to calisthenics, take our free assessment to get a personalized training plan based on your current fitness level.
Ring dip progressions: How to learn them step by step
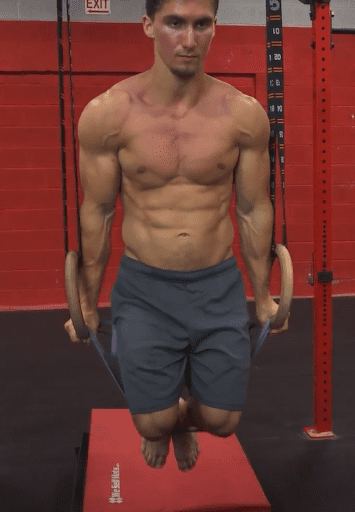
🏆Progression 1: Leg assisted/unassisted static hold at the bottom of the dip

The first one we’ll be looking at is getting comfortable at the bottom of the dip.
Coach Jeremy is going to show this in a few different ways. There are varying levels of difficulties that we can go at this. Let’s take a look at a few of them.
📍Variation 1: Feet backward in bottom dip position
We’ve got the rings low to the ground, and you can do a variation where the legs are behind you. This is practicing the bottom of the dip. He’s not having contact with the straps. The angle of his shoulder is correct. And again, the postures good, neutral head, all of those things that we’re abiding by.
📍Variation 2: Feet forward in bottom dip position
Another variation would be the legs are in front. This might feel better. And again, same idea, the bottom of the dip. He’s trying to take off some weight from the upper body with the legs on the floor but still focusing on placing the weight on the arms.
You can use more legs if you have to. You can push less with the legs to add more weight on the upper body or the other way around if that’s too difficult. Again, the varying levels of difficulty built in with this first exercise.
📍Variation 3: Unassisted bottom dip position
And then, of course, once you get that, there’s the unassisted bottom of the dip. At this point, he’s at the bottom and holding his legs off the ground.
Same exact same position. He’s at the bottom of the dip, showing strength and stability, comfortability. The aim of this progression is to get comfortable at the bottom of the dip. It’s got the varying levels of difficulty built-in. And if you achieve this holding around for that twelve to a 30-second range or more, then you’ll be in a great position on your dip journey.
If you get comfortable at the bottom of your dip, you’re already setting your way up for success in your ring dip journey.
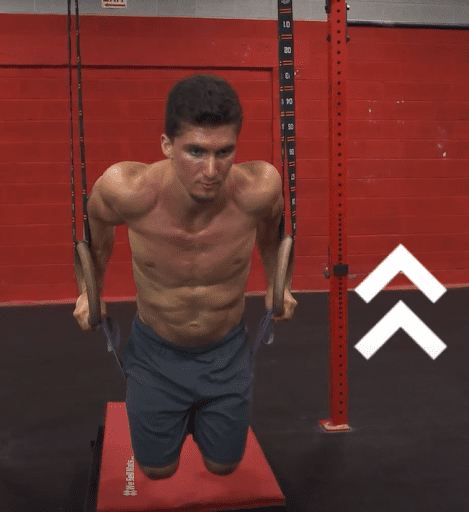
🏆Progression 2: Leg assisted dips/ chair ring dips
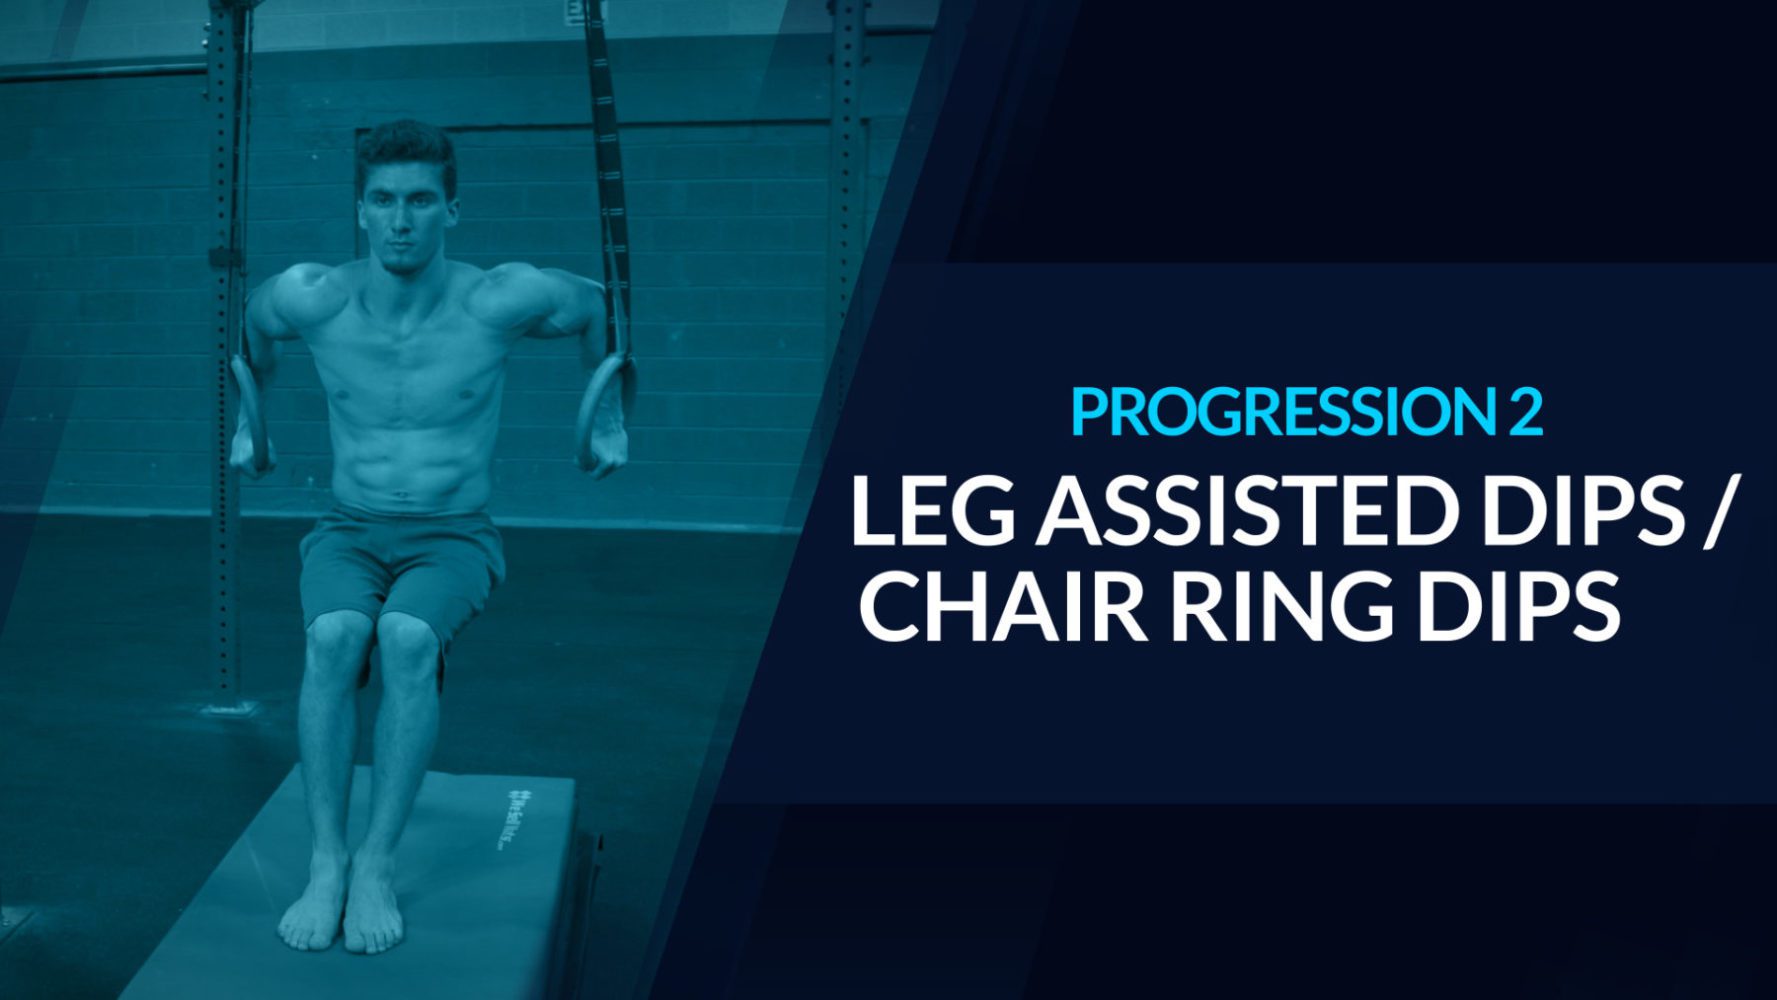
The next progression that we’ll be looking at is the leg-assisted dip. This is called the chair dip. And you’ll see why. So we’ve got the surface raised a little bit higher than we have in the previous ones.
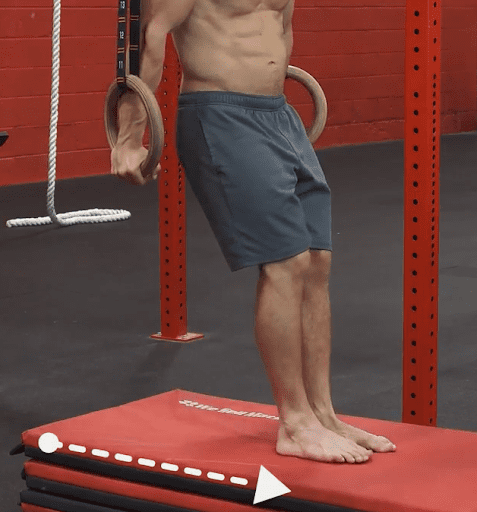
So Coach Jeremy is going to walk out for his feet in front, and you can see the top position is him now with his feet support already.
We’re just going to go through; it looks like a squat as if he’s going to sit in the chair and he’s doing the leg-assisted rings dip right here, pulling all the same rules as the initial demonstrations.
✊This one’s easier compared to the regular ring dips, of course, because the legs are bearing some of the weight. It’s going to help with taking the load off and making the rings more stable.
This is the ring dip’s great progression because you’re going through a full range of motion, as you will later on when you achieve the dip. And this is just taking some of the weight off. So for the leg-assisted chair dips, we’re looking for the eight to twelve rep range. This is the overlap of strength, hypertrophy.
🏆Progression 3: Ring dip eccentric (Negatives)
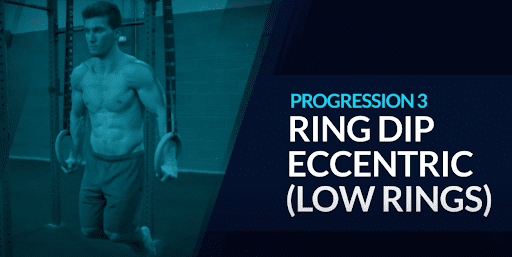
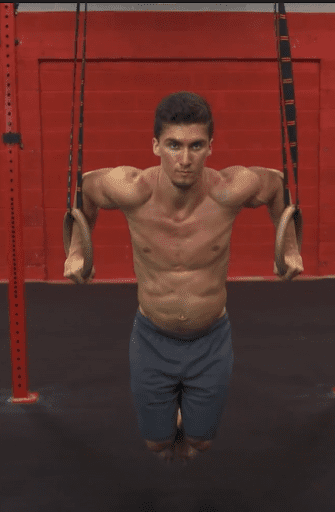
The third progression that we’ll be looking at for the rings dip is the eccentric rings dip full body weight.
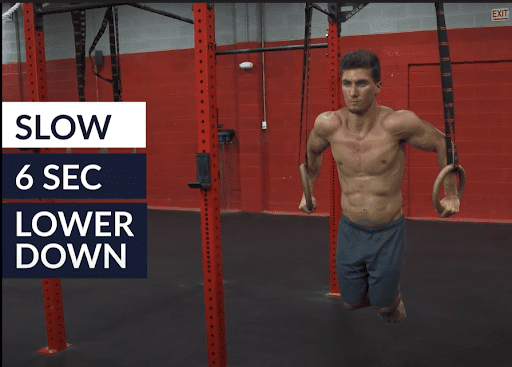
He’s going to start in the lockout position and do a slow six-second lower down, right. So he’s going slowly with control, taking 6 seconds to reach the bottom.
And once he does, he puts his feet down and simply jumps back to the top and repeats each rep, following all the same technical items.
Head position, the arm is being locked to the top, elbows check backward, trying to avoid the straps, keeping good posture with the hips. It’s perfect for building strength and muscle because you’re already handling your entire body weight, and it’s half the exercise. After that, it’s just the lowering portion.
Any eccentric training is highly taxing on the nervous system. So again, just going from top to bottom, full-body weight and going through the exact range of motion you will be when you do the full range, coming back to the top with the concentric portion later on.
🏆Progression 4: Combinations of previous progressions

The fourth progression of the rings dip is more like a bit of a challenge that we have for you. So we’ll be compassing previous progressions basically into one sequence.
Combination 1
We’ll start at the top support hold. We’re going to start off holding the support position for 10 seconds or so. And after 10 seconds, we’re going to do this slow six-second lower down, the eccentric portion of the dip, and then we’re going to hold the bottom for 6 seconds. After we hold for 6 seconds, we put the feet back down and do the chair dip to return to the top.
So we’re encompassing the previous progressions all in one piece.
We’re hitting up a great top position. We’re doing the eccentric portion of the dip. We’re getting comfortable and strong at the bottom of the dip. And then we’re doing the concentric phase to return back to the top.
This is going to increase the time under tension, and it’s going to help with muscular endurance as well. So we’re hitting up the whole dip in a way that you’ll be able to do by this point.
Feel free to play around with the combination and work on your weaknesses to develop a stronger base for the entire ring dips.
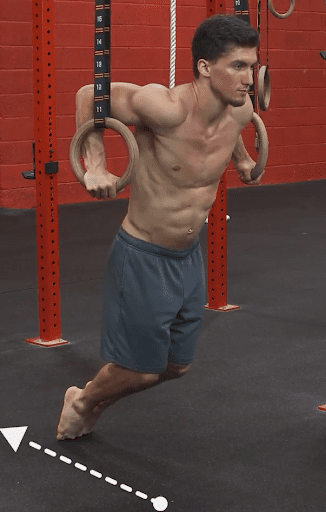
🏆Progression 5: Full range assisted ring dips: Banded assistance & loop-around cables
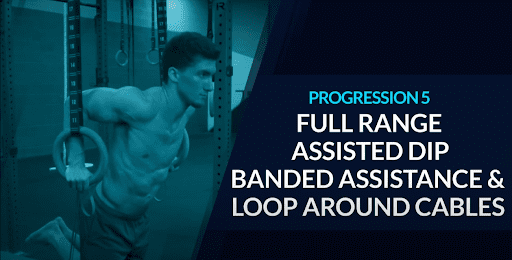
The next progression that we have for your rings dip journey is the assisted dip, which can be done in a few different ways.
📍Variation 1: Resistance band
The first one we have is with a band, and I’ll show you a couple of other ones later on.
Before you even get into this, you must be familiar enough with bands because if you use this incorrectly, it can snap back up at you, and you don’t want that.
So you have to make sure that you place your hands firmly on the band, which is on top of the rings first.
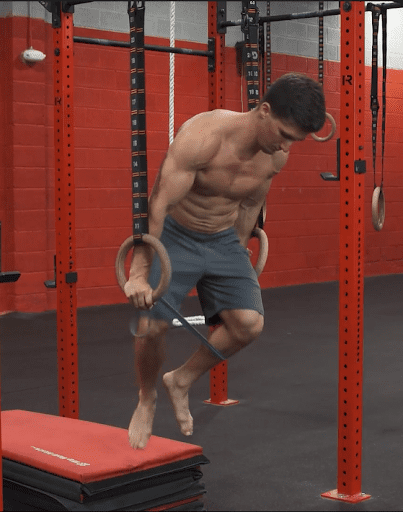
Here’s Coach Jeremy’s got this little pop up behind him. The transition into it is not jumping right. He’s going to place one leg carefully, then the other leg with it’s just good. So now he’s going to simply do the full dip from the support hold position with less load, thanks to the band.
He’s going to go low down to the bottom, then presses back up to the top. And obviously, the band is assisting necessary if you do not have strength for the full ring dip. He can just simply verses back out the way he came in.
It’s also important to note that the height of the straps will make a difference here. If these rings were attached to the ceiling, the difficulty of the exercise could massively increase.
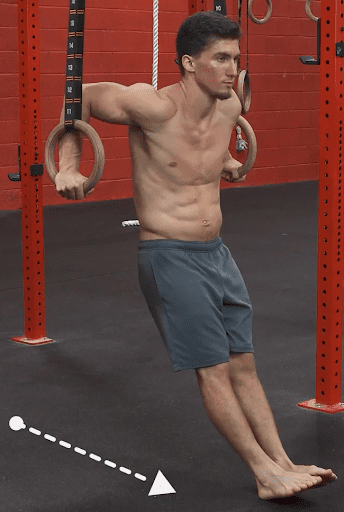
📍Variation 2: Strap assistance

Another version of the assisted dip will simply be with the loop that we’ve attached up here. In the photo Coach Jeremy is showing, we have a thicker fabric holding the straps together. It’s just reducing the height of the straps.
You can use anything you have to keep it together, like a shirt, a belt, or rope. Alternatively, you can also simply shorten the height of the rings using the adjustable buckle if your gymnastics rings permit you.
So the shorter the strap is, the more stable it is. So it takes out a lot of the instability, and he’s simply just going to do the full range dip, and it’ll be a lot easier because you’re going to be less, far, less shaking, easier to support and stabilize.
✊This is an excellent progression to help stabilize the rings before doing the whole ring dip.
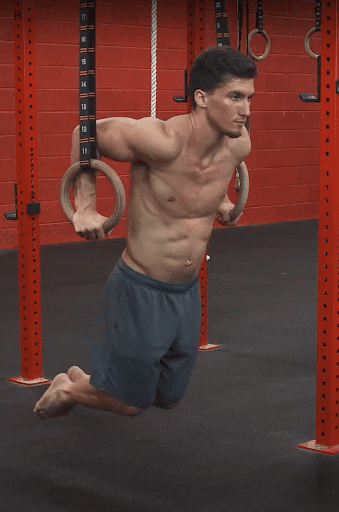
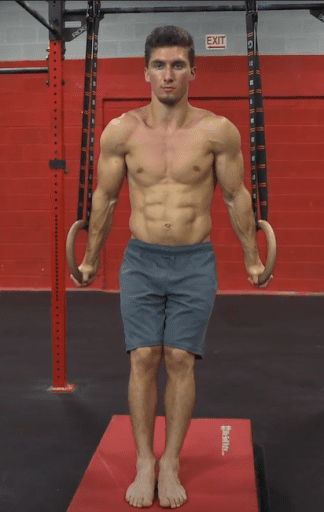
🏆Progression 6: Full ring dip with complete bodyweight
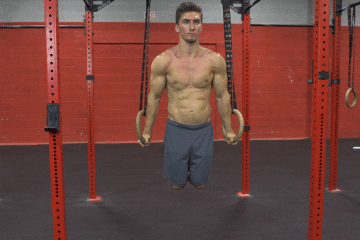
The 6th and final progression is the actual skill: the full ring dip on the rings with complete bodyweight.
By this point, you should have enough strength to hold the top, lower through the dip, slowly hold the bottom and then come back up in the lock arm position.
Master the perfect form with our complete ring dips technique guide.
As I said, if you had gone through the previous progressions, you should be at a point where you can do the complete ring dip.
And if not, you would want to fix some of the technical elements you might be missing. So you have those five previous exercises to work on and improve whatever is necessary from there.
Although this might seem like an ending point, it’s only the beginning of another set of exercises you will unlock.
✊You can also play with the ring dips by adjusting the tempo, adding pauses and hold, or even weights to further increase your strength, muscle, and control with the exercise.
Conclusion
👊The ring dip is a beast of an exercise that will put your upper body strength and muscle to the next level. Like any other calisthenics exercise, if you want to learn it, you need to go through its progressions, and there’s no way around it.
Move through the progressions, and you will soon master ring dips that will unlock so much potential of your body. 💯
Aside from mastering the progressions, be sure that you should also know the mistakes you might make when performing ring dips. This will allow you to stay very aware even if you are currently in the earlier stages of your ring dip journey.
Train smart and stay patient when progressing through the calisthenics journey. 🤸
Ready to build a structured training plan? Take our free assessment to get a personalized program that includes ring dip progressions based on your current fitness level.
Related Articles You’ll Love:
Ready to get started?
Get your free personalized training plan now