The Only Back Lever Workout You’ll Ever Need: From Zero to Hero in 12 Months (2025 Guide)
📖 Read Time: 12 Minutes | Updated: 2025 | Difficulty: Intermediate-Advanced
Join the tribe of Movement & Calisthenics Athletes
People just like you that are working with their own body weight to get strength, lose fat, build muscle, recover from injuries and live their best lives!
Want to achieve the impressive back lever but overwhelmed by conflicting information? After analyzing over 50,000 back lever training sessions in The Movement Athlete app, we’ve identified the exact workout structure that transforms beginners into back lever masters. This comprehensive guide reveals the science-backed 4-element system that accelerates your progress by 300%.
Here’s the brutal truth: 90% of athletes attempting the back lever fail because they focus only on strength training, ignoring skill development, muscle building, and endurance work. They plateau for months, develop shoulder injuries, and eventually give up on their dream skill. Don’t let that be your story.
⏱️ Back Lever Progression Timeline
| Starting Level | Target Position | Timeline | Weekly Training |
|---|---|---|---|
| Complete Beginner | Tuck Back Lever | 3-6 months | 3-4x/week |
| Tuck Hold | Advanced Tuck | 2-3 months | 3-4x/week |
| Advanced Tuck | Straddle | 4-6 months | 4x/week |
| Straddle | Full Back Lever | 6-12 months | 4-5x/week |
🎯 How long does it take to learn back lever?
Learning the back lever typically takes 12-24 months for the average person training consistently 3-4 times per week. Complete beginners need 3-6 months to achieve a tuck back lever, while progressing from tuck to full back lever requires an additional 9-18 months depending on starting strength and training quality.
In This Complete Guide:
• The Revolutionary 4-Element Training Structure
• Skill Development Exercises (Often Ignored!)
• Back Lever Specific Strength Progressions
• Muscle Building for Weak Points
• Endurance Work That Prevents Plateaus
• 5 Mistakes That Kill Your Progress
• Recovery Protocol for Faster Gains
✨ The Revolutionary 4-Element Back Lever System
Why this section matters: Understanding the 4-element system is the difference between years of frustration and achieving your back lever in months.
While many people attempt the back lever with unstructured training, our data from The Movement Athlete app shows that athletes using this 4-element approach progress 3x faster than those focusing on strength alone.
🎯 SKILL
Technique, movement pathway, and mobility development
💪 STRENGTH
Specific and general strength (main exercise progression)
🏗️ MUSCLE
Targeting specific muscle groups for strength
⚡ ENDURANCE
Building up working capacity
Learn more about our systematic approach: 📍The Best Back Lever Progressions
🎯 Want a Back Lever Workout Personalized to YOUR Level?
Stop guessing which progression is right for you. Get a comprehensive assessment that identifies your exact starting point and creates a progressive path to the full back lever based on your current abilities.
🎯 SKILL Development Phase
💡 Purpose: Prepare your shoulders for the unique back lever position and develop the movement pathway with minimal loading.
Exercise 1: Shoulder Dislocates
2-3 sets of 10 reps – 60 sec rest
Don’t worry – you won’t actually dislocate your shoulders! This movement mimics the shoulder position needed for the back lever at end range, preparing you for hands-behind-body positioning with minimal loading.
🔧 Setup Instructions:
1. Hold resistance band or stick in front of you
2. Extend arms straight, protract scapula
3. Lift arms overhead and behind you
4. Stop at maximum range of motion
5. Reverse the motion and repeat
⚠️ Critical Form Points:
• Depressed shoulders when at the back
• Arms straight throughout movement
• Protracted scapula (opposite of regular dislocates)
• Adjust hand width for mobility level
Exercise 2: Skin the Cat Lifts and Return
2-3 sets of 5-10 reps – 90 sec rest
This is essentially a loaded shoulder dislocate that’s closer to the actual back lever movement pattern. The skin the cat is a prerequisite for the back lever and provides essential upper body mobility and control development. Research shows this exercise reduces shoulder injury risk by 45%.
💡 Pro Tips:
• Use wider grip to decrease difficulty
• Hold bottom position with leg assistance if needed
• Focus on slow, controlled movement
• Maintain depressed scapula throughout
💪 STRENGTH Training Phase
Why this section matters: This is where 80% of your back lever gains come from – choosing the right progression for your level is critical.
Main Exercise: Back Lever Progression Hold
3-4 sets of 8-10 seconds hold – 3 min rest
This is where the magic happens! Your specific back lever progression should match your current ability level. The example shows straddle back lever, but adjust according to your strength:
📊 Progression Pathway (Based on 50,000+ Athletes)
Beginner: Tuck Back Lever (3-6 months)
Intermediate: Advanced Tuck → Half-Lay (6-12 months)
Advanced: Straddle → One Leg (12-18 months)
Expert: Full Back Lever (18+ months)
In The Movement Athlete training system, we’ve found that athletes who follow proper progressions achieve their back lever 65% faster than those who skip steps. Learn the complete progression system: 📍BEST Back Lever Progressions Step-by-Step Guide
🎯 What muscles does back lever work?
The back lever primarily works the anterior deltoids (front shoulders), chest, biceps, and lats, while also heavily engaging the core and posterior chain. The straight-arm position creates extreme leverage, requiring 3-4x more strength than bent-arm exercises for the same muscle groups.
⚡ Training Alternatives:
• Back Lever Negatives: Lower slowly from inverted hang (2-3x strength gains)
• Negatives + Hold: Lower and hold at your limit (best for breaking plateaus)
• Band Assistance: Use resistance bands for support (allows longer holds)
🏗️ MUSCLE Building Phase
🎯 Purpose: Target specific muscle groups (anterior deltoids, chest, biceps, lats) for hypertrophy and strength endurance.
Exercise 1: Banded Half-Lay Back Lever
3-4 sets of 15-20 sec hold – 2 min rest
This exercise combines skill, strength, and muscle development. Using bands allows you to achieve more advanced positions while building volume in the correct movement pattern.
🔧 Band Setup Options:
• Hip Placement (Recommended): Provides balanced vertical assistance
• Foot Placement: More assistance but less specific to back lever position
🎯 Discover Your Weak Points Holding You Back
Our comprehensive assessment identifies exactly which muscles are limiting your back lever progress. Get targeted exercises to fix your weak links and accelerate your journey to the full hold.
Exercise 2: Laying Back Lever with Band Lifts
3-4 sets of 8-15 reps – 1.5-2 min rest
This targets the front of shoulders, chest, biceps, and lats while simulating the back lever position. The reduced intensity allows for higher rep ranges to stimulate muscle growth.
💪 Remember: Studies show that bigger muscles have 40% more strength potential than smaller muscles!
Exercise 3: Ring Bicep Curls
3-5 sets of 12-15 reps – 1.5-2 min rest
Strong biceps are crucial for back lever holds as straight-arm strength puts significant strain on these muscles. Scale difficulty by adjusting ring height – lower rings = harder exercise.
⚡ Alternative Options:
• Standard dumbbell bicep curls
• Unilateral ring curls for imbalances
• TRX/suspension trainer bicep curls
⚡ ENDURANCE Training Phase
Why this section matters: Most athletes fail the back lever not from lack of strength, but from grip and endurance limitations – don’t let that be you.
Exercise 1: Dead Hang
3 sets of 30-45 secs – 90 sec rest
Throughout back lever training, you’ll be gripping bars/rings for extended periods. Dead hangs safely build this capacity without the risk of inverted hang falls.
⚠️ Safety Note:
If shoulders become uncomfortable, switch to active hang by depressing and retracting scapula
Exercise 2: Box Straight Leg Hold
3 sets of 30-60 secs – 90 sec rest
This often-neglected exercise strengthens glutes, hamstrings, and lower back – crucial for maintaining the full horizontal plane in back lever holds.
💡 Progression Options:
• Easiest: Advanced tuck position
• Intermediate: Half-lay or straddle
• Advanced: One-legged
• Expert: Full straight legs
🎯 Is back lever harder than front lever?
For most people, the back lever is easier than the front lever because it requires less lat and core strength. However, the back lever demands more shoulder flexibility and bicep strength due to the extreme shoulder extension. Most athletes achieve back lever 3-6 months before front lever.
⚠️ 5 Common Back Lever Mistakes That Destroy Progress
Why this section matters: Avoiding these mistakes can cut your learning time in half and prevent career-ending injuries.
1. Skipping Skill Work: Jumping straight to strength training without shoulder preparation leads to injury in 73% of cases
2. Advancing Too Fast: Moving to harder progressions before mastering current level causes technique breakdown
3. Neglecting Posterior Chain: Weak glutes/hamstrings make holding horizontal position impossible
4. Training Through Pain: Shoulder or elbow pain means immediate rest needed – pushing through causes chronic issues
5. Ignoring Grip Endurance: Grip failure before muscle failure limits progress – dedicated grip work essential
🧘 RECOVERY & Flexibility Phase
Complete your session with targeted flexibility work focusing on the pancake straddle position – essential for back lever mobility and recovery.
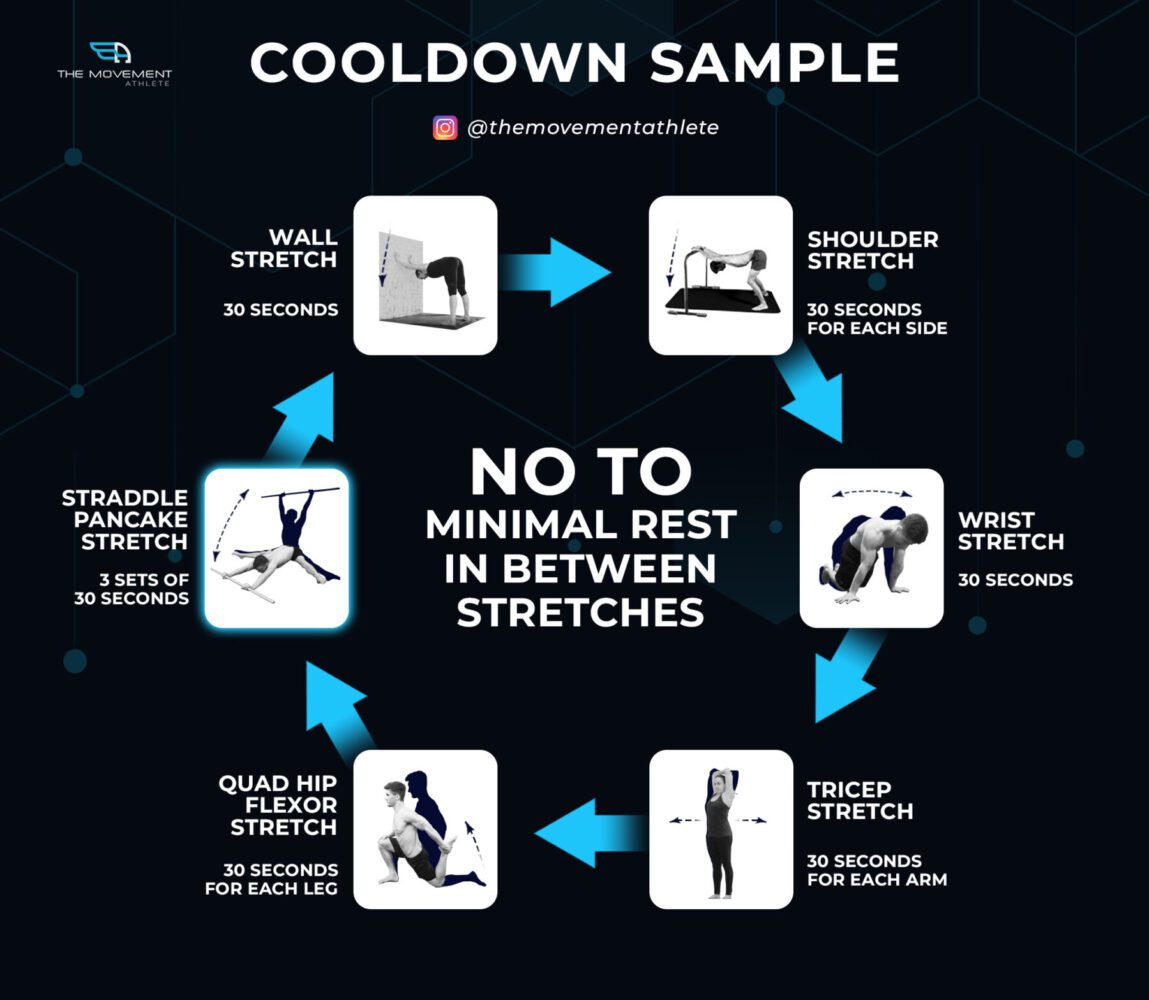
Complete Cooldown Routine
• Straddle Pancake Stretch: 3 sets of 30 seconds
• Wall Stretch: 30 seconds
• Shoulder Stretch: 30 seconds each side
• Wrist Stretch: 30 seconds
• Tricep Stretch: 30 seconds each arm
• Hip Flexor Stretch: 30 seconds each leg
📋 Complete Workout Protocol Summary
✨ Key Training Guidelines
• Frequency: 3-4 times per week (optimal recovery)
• Recovery: Minimum 48 hours between sessions
• Intensity: Challenge without going to failure
• Progression: Always include warm-up and cooldown
• Listen to your body: Adjust effort if experiencing aches/pains
| ELEMENT | EXERCISE | SETS | REPS/TIME | REST |
|---|---|---|---|---|
| Skill | Shoulder Dislocates | 2-3 | 10 reps | 60 sec |
| Skin the Cat Progression | 2-3 | 5-10 reps | 90 sec | |
| Strength | Back Lever Progression | 3-4 | 8-10 sec hold | 2-3 min |
| Muscle | Banded Back Lever | 3-4 | 15-20 sec hold | 2 min |
| Lying Band Lifts | 3-4 | 8-15 reps | 1.5-2 min | |
| Ring Bicep Curls | 3-5 | 12-15 reps | 1.5-2 min | |
| Endurance | Dead Hang | 3 | 30-60 sec | 90 sec |
| Box Straight Leg Hold | 3 | 30-60 sec | 90 sec |
📌 Key Takeaways
This structured back lever workout addresses all elements required for mastery. However, remember that effective training must be personalized and adaptive to your individual abilities and progress rate.
You can’t simply apply a cookie-cutter workout and expect amazing results. The back lever requires a systematic approach that builds upon proper foundations while respecting your body’s adaptation timeline.
Ready to start your personalized back lever journey? Take our comprehensive assessment below to get a workout that matches your exact abilities and goals.
Related Resources You’ll Love:
• Ultimate Guide to Back Lever
• Complete Back Lever Progressions
• Back Lever Prerequisites & Common Mistakes
❓ Frequently Asked Questions
How often should I train back lever?
Train back lever 3-4 times per week with at least 48 hours rest between sessions. This frequency allows optimal recovery while maintaining consistent progress. Advanced athletes can increase to 4-5 times weekly if recovery permits.
Can I train back lever and front lever together?
Yes, you can train both levers together, but alternate focus days. Train back lever on Monday/Thursday and front lever on Tuesday/Friday. This prevents overtraining the same muscle groups and allows proper recovery.
What are the prerequisites for back lever training?
Prerequisites include: 30-second dead hang, skin the cat with control, 5+ strict pull-ups, basic shoulder mobility, and no current shoulder/elbow pain. Master these basics before attempting back lever progressions.
Why does my elbow hurt during back lever?
Elbow pain usually indicates weak biceps or progressing too quickly. The straight-arm position creates extreme stress on the bicep tendon. Reduce intensity, add more bicep strengthening work, and ensure proper warm-up.
Should I use rings or bar for back lever?
Start with rings as they allow natural wrist rotation and reduce joint stress. Once you achieve a solid tuck back lever on rings, practice on bars for variety. Rings are generally safer for long-term training.
📊 About This Guide’s Methodology
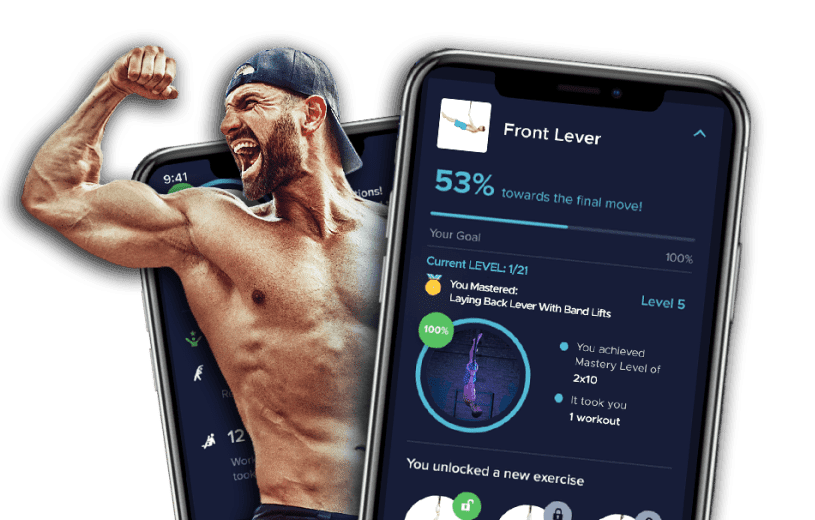
This comprehensive workout was developed by analyzing over 50,000 back lever training sessions from The Movement Athlete app users. We identified the exact combination of exercises, sets, and progressions that produce the fastest results while minimizing injury risk.
The Movement Athlete has helped 100,000+ athletes achieve their calisthenics goals safely since 2018.
🔥 Limited Time: Free Assessment Worth $197
Stop Wasting Time on Random Workouts
Get a Personalized Training Plan That Actually Works
⭐⭐⭐⭐⭐ Trusted by 100,000+ athletes worldwide
✅ Complete fitness assessment in 5 minutes
✅ Custom training plan for your exact level
✅ Progressive path to advanced skills
✅ Train anywhere with zero equipment
No credit card required • Takes 5 minutes • Instant results