📖 Read Time: 8 Minutes
🏋️ Join the tribe of Movement & Calisthenics Athletes
People just like you that are working with their own body weight to get strength, lose fat, build muscle, recover from injuries and live their best lives!
😱Do you want to take your calisthenics training to the next level and add a bigger challenge? The back lever is an impressive free-hanging bodyweight strength move requiring immense upper-body control and amazing shoulder mobility. 💪
It’s no easy feat, but with intentional practice, dedication, and knowledge of the target muscles used in this exercise, anyone can learn how to do a back lever! 💯 Only through proper technique will you be able to achieve maximum efficiency and effectiveness- so let’s discuss what exactly it takes to perform one.
Instructors will often classify the back lever as an intermediate or advanced bodyweight feat. 👊It requires balanced strength from multiple muscle groups and postural mobility throughout your entire body– so knowing these muscles used and their prerequisites is key to mastering this move! In this post, I’ll help walk through everything you need to know before attempting a back lever.
It’s one of the most impressive movements out there and can be quite daunting if you’re just getting started. But once you understand the back lever requirements — like which muscles are used, specific prerequisites for success, and more — you’ll have a better chance of mastering this challenging move! 😎
Ready? Let’s get going!
You can also watch it here: 📍How to Perform a PERFECT Back Lever: Technique and Muscles Used
💪Muscles Used
In reality, the back lever is a full body workout on its own. Muscles act in a complex manner, and especially in calisthenics, multiple muscle groups work together to perform these complex movements, including the back lever.
Without getting too deep into the anatomical side, here are the main muscle groups that we get to train when working on the back lever.
🔥Deltoids
When performing the shoulder flexion, we get to primarily work on the front of the shoulders, known as the anterior deltoids. But take note that the chest, biceps, and serratus anterior also assists in the shoulder flexion motion.
🔥Latissimus Dorsi
Commonly known as the lats, this large muscle group plays a crucial role in pulling down the scapula into depression. As mentioned earlier, better scapula depression allows for maximum pushing effort from your shoulders to better hold the back lever. Alongside that is the activation of the chest, lower traps, and serratus anterior.
🔥Glutes
While the back lever is mainly an upper-body exercise, proper lower-body activation, and strength is crucial to achieving the horizontal line in the back lever.
🔥Pectoralis Major
The pec or chest muscles play an active role in pushing down to maintain the position while keeping your arms externally rotated. It works in conjunction with the muscle below.
🔥Serratus anterior
This muscle group wraps around your rib cage and attaches to your pec and scapular muscles. So from this statement alone, you can already imagine the big role it hance since both the chest muscles and scaps are prime movers for the back lever.
✨Prerequisites for Back Lever
Learn the prerequisites in action here: 4 Exercises You Must Master Before Training Back Lever: Prerequisites
✅Prerequisite 1: Shoulder Extension
A clear requirement for the back lever, is a relatively high degree of shoulder and chest flexibility to achieve shoulder extension to flexion. Without this, entering the back lever is impossible and potentially dangerous if you have tight shoulders and chest.
So our first prerequisite for the back lever is the shoulder extension stretch. This screens your body’s ability if can get you into the back lever position safely.
Holding a simple shoulder flexion stretch should be a good indicator that you have enough shoulder passive flexibility in the end range similar to a back lever.
👍How to perform:
- Begin sitting on the floor.
- Place your arms as far back as you can go.
- Walk your feet forward and try to slide your butt as far as you can go.
- Extend your legs and hips.
- Hold your end range for at least 30 seconds per set.
🎯Coaching Pointers
• You can scale this exercise by placing your butt close to your hands in the beginning, then gradually move it away from your hands as you develop more flexibility
• Aim to keep your hands as close to each other as possible but a wider hand placement is more of a realistic starting point for most. A shoulder-width hand position could also be sufficient
• Fingers pointing backward
• Arms lock out straight
• Shoulders depressed and retracted
✅Prerequisite 2: Back Lever Push
Aside from the shoulder extension flexibility, you should be able to move from extension to flexion to resist you from falling from out of the back lever position.
The back lever push uses a stick to simulate the back lever effort execution from extension to flexion push. In this exercise, you need help from someone who can pull the stick up to counter your push down. The upward resistance acts as the opposite force to help you build strength in this specific range of motion.
This exercise builds shoulder mobility which is crucial for the back lever. Mobility is the manifestation of strength in a specific range. In this particular case, we’re building strength during the exact position of the back lever hold. You need to activate the upper body muscles, such as the lats, triceps, biceps, shoulders, and chest, to push down the stick while also engaging your core and the lower body to maintain the correct back lever position. You’re engaging your whole body and acting as one unit to perform the exercise, just like how you will perform the back lever. The back lever push with a stick trains the correct neural pathways of which muscles need to be engaged during the back lever without the high intensity of the full position.
This exercise is highly scalable, so you can ask your friend to assist with the amount of upward force to resistance and how high you can raise the stick.
👍How to perform:
- Begin by lying on the floor in a prone position with your chest facing the floor.
- Ask your partner to help you hold the stick.
- While holding the stick with straight arms, ask your partner to lift up the stick until your arms are around 45 degrees from the body.
- Push down the stick while your partner resists your downward position.
- Maintain the push while breathing for time.
🎯Coaching pointers
• Straight, lockout arms
• Full body engagement
• Depressed and protracted scapula
• Triceps close to your lats
• Pointed toes for additional lower body tension
• Core engaged
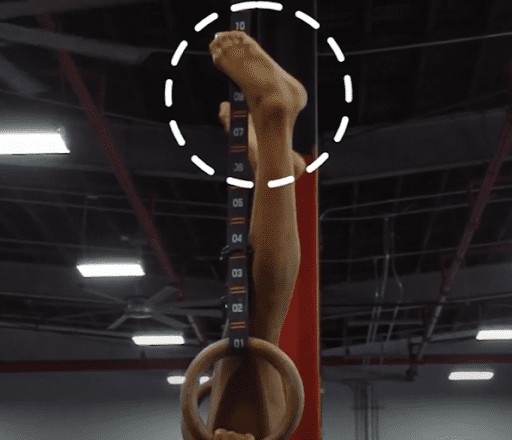
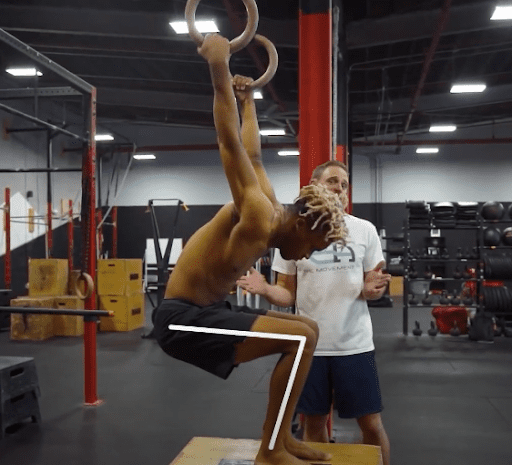
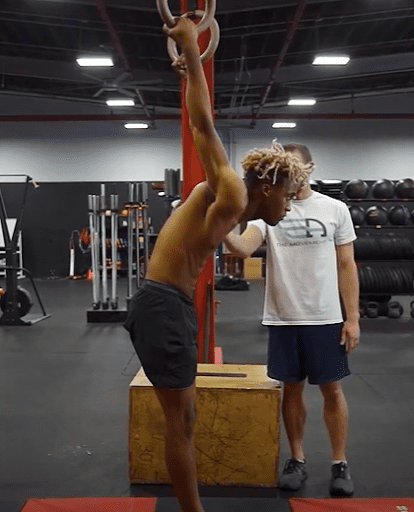
✅Prerequisite 3: Inverted Hang
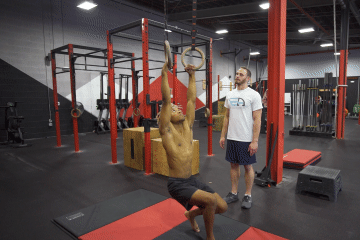
The inverted hang is the starting point for the back lever. This is the only easy entry for the back lever because most other entries require more mobility, strength, or power, such as jumping right into a back lever from standing on the floor. The inverted hang lets you ease in slowly into the correct position.
The back lever, on its own, develops your grip strength and your body awareness in the inverted position. If you’re not used to being upside-down through your handstands or headstands, you might get confused with your orientation when entering the inverted hang. This exercise helps you get comfortable in the inverted position for entry.
Aim to build at least 15 seconds of comfortable inverted hang. If you can get a longer time hold, the better because it builds you the endurance for your grip. If your back lever is shaky, you can’t hold a straight bodyline, or you’re easily losing your grip, then take a step back before trying out the back lever progressions and work on this exercise first.
Scaling the exercise
Training the exact position of the inverted hang could be too much for most beginners, so we can scale down the exercise to make the exercise much easier. We can do this by altering first the body lever. Starting in a more tucked position makes the exercise lighter and requires less balance. From there, you can slowly extend your body until fully straight.
During extension, you can also wrap your feet around the strap or push your legs against the straps for assistance while you’re still building up your strength and balance. As you get more comfortable with the position, you can slowly move away from the straps and squeeze your legs into a closed-leg position to achieve a straight body line. And if you’re getting wobbly, you can find the straps again to gain additional control.
You can also start with lower rings where your head can fit comfortably close to the ground with soft matting if you’re totally new to the exercise and uncomfortable with the inverted position. The key here is to gradually progress towards the full inverted hang as safely and comfortably as possible.
If you also have a qualified spotter, you can ask them to assist you in getting into the progression you’re working with, so you can also correct possible weaknesses and incorrect forms.
Now you can also train this exercise on a bar. However, you’ll find a bit more restriction because you can’t get a full inversion due to the bar blocking your body, so you will be tipping either one way or another. This requires more muscle activation since passive tension is stronger in the fully inverted position. The inverted hang is definitely more difficult on the bar compared to performing it on the rings.
👍How to perform:
- Begin to dead hang on the rings.
- Pull your knees close to your chest.
- Roll over into the inverted hang with your knees close to your chest.
- Extend your legs into the straight inverted hang.
- Hold the inverted hang for time.
🎯Coaching Pointers
• Straight lockout arms
• Depressed and protracted shoulders
• Fully engaged body
• Pointed toes
• Look forward
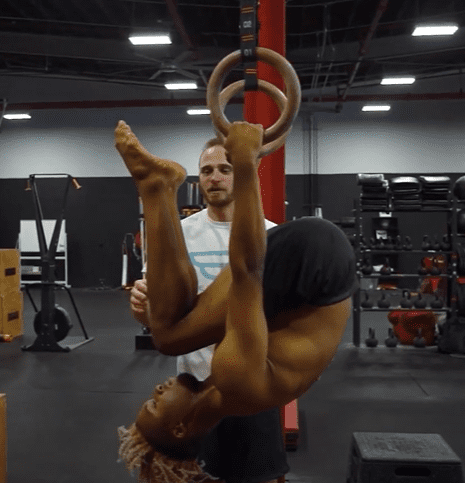
✅Prerequisite 4: Skin the Cat/ German Hang
Now let’s cover the opposite and the exit point of a back lever when you’re getting exhausted. This exercise is called skin the cat (no cats were harmed during this exercise) or German hang. But in some sources, the German hang refers to the bottom position, while skin the cat refers to moving in and out of the German hang position. Regardless, we’re aiming to develop both motions, which are equally important for the back lever.
In this exercise, we develop the full shoulder extension. The overextension allows you to keep your shoulders safe when exiting or training the back lever. When you’re pushing with your back lever into exhaustion, you will naturally go down into a German hang. It’s the common end point of the back lever so having a skin the cat will let you slowly and safely exit out of the back lever. If you don’t have the skin the cat, you might drop down too fast from the back lever and easily hurt yourself. Our aim here is to achieve at least 15 seconds of the full German hang.
The shoulder stretch is similar to what’s happening with the prerequisite one, but you can get into a more intense position with a higher loading thanks to the hanging position. The beauty of this exercise goes past beyond the back lever. It helps strengthen and mobilize your shoulders for better daily function and avoid stiffness and pains caused by weaknesses.
Scaling the exercise
You can start the exercise with a low starting point with your legs supporting you in the position. Enter the german hang by pushing the shoulders outwards into extension and legs planted on the floor. The more you bend your legs, the less assistance you get and the more stretch you will feel. You can either use an elevated surface or lower the rings closer to the floor to achieve the German hang easily. This is the intro to the German hang position.
The full version puts a lot more stress on the shoulders since you will support your full body weight without assistance. You can also perform isotonic of the german hang in a full range of motion by moving into the bottom position and then reversing the motion for reps instead of holding for time.
👍How to perform:
- Begin in a hanging position but make sure your legs can touch the floor or close to the floor.
- Tuck your knees towards your chest.
- Pull your weight over to go over and circle around into the inverted hang position.
- Extend your lower body.
- Hold the bottom of the german hang for time.
🎯Coaching Pointers
• Straight lockout arms
• Open hips
• Extended spine and body
• Head looking straight
• Full body tension
• Breathe
• Let go of the rings for dismount, making sure that your feet are already beneath you before letting go.
💡 Key Takeaway: Prerequisites are foundations to a new skill you want to learn. It makes progress more efficient at a much safer manner so you don’t get frustrated and injured. 🏆
If you want to learn the back lever, then these exercises above are your go-to after mastering the calisthenics fundamentals. 🎯
The next step after mastering the prerequisites is to learn the progressions.
Read here to learn more: 👇
BEST Back Lever Progressions You Need – Step-by-Step Guide
Ready to start your back lever journey? Take our free assessment to get a personalized training plan that will safely guide you through these prerequisites and beyond!
Related Articles You’ll Love:
Ready to get started?
Get your free personalized training plan now