📖 Read Time: 12 Minutes
🏆 Join the Tribe!
Join the tribe of Movement & Calisthenics Athletes – people just like you that are working with their own body weight to get strength, lose fat build muscle, recover from injuries and live their best lives!
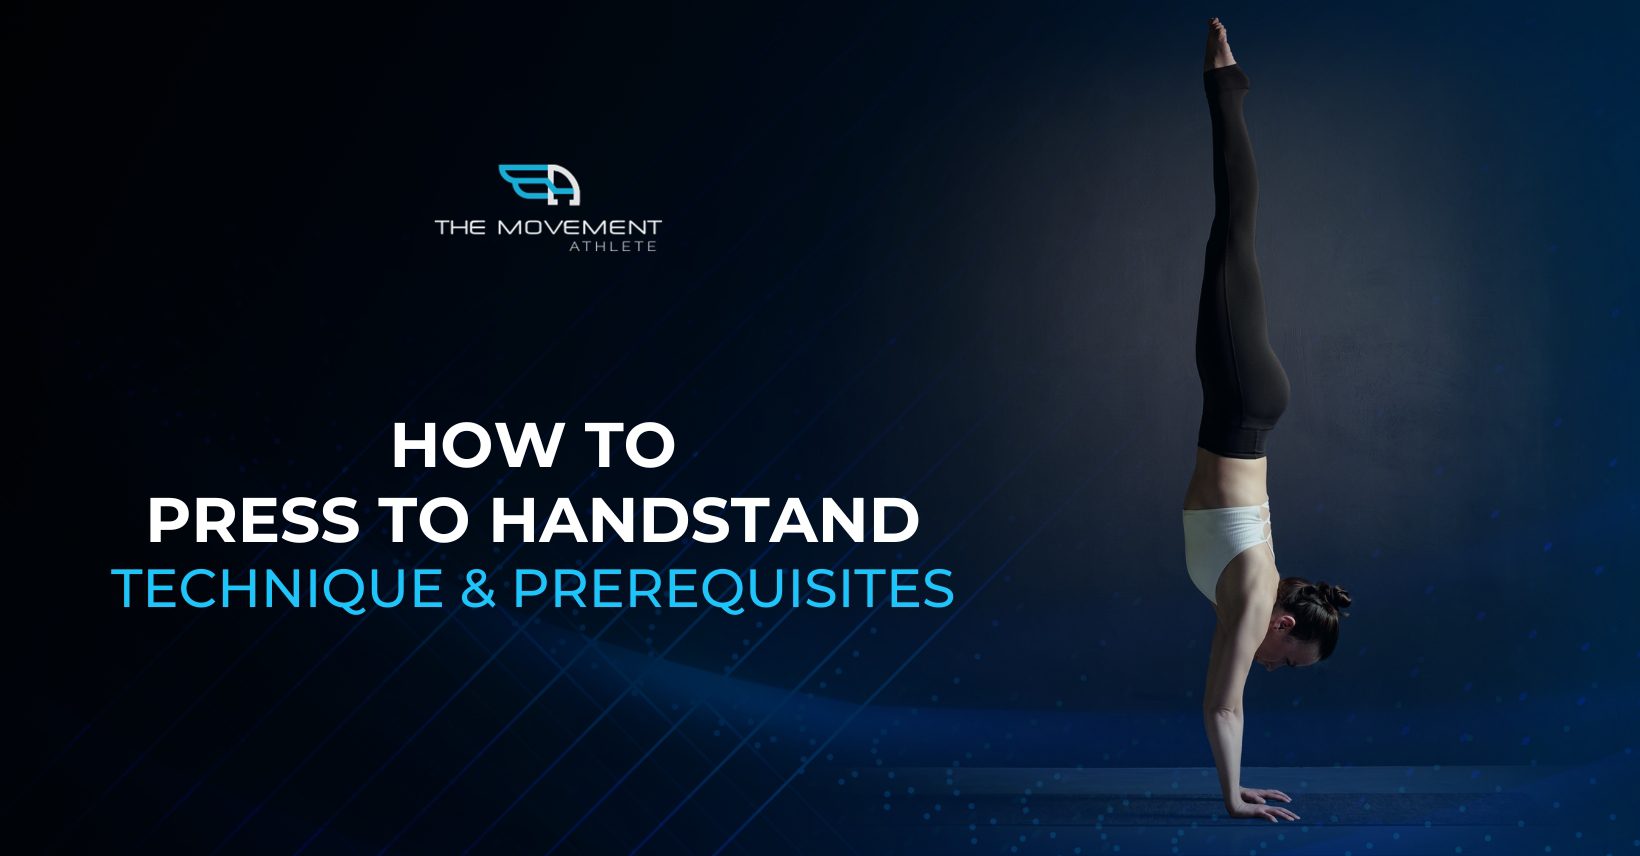
🤔Want to further improve your handstand mastery? Then learn press to handstands.
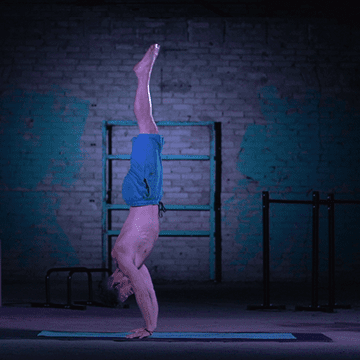
Press to handstand is a handstand entrance variation that shows strong handstand control, combination of strength, flexibility, and mobility. Instead of the traditional way of jumping into a handstand, the press is a slow movement into a handstand.
In general, there are two main components to the press to handstand which the name of exercise already gives away: the press and the handstand hold.
The press is the transition from the floor as your pull your legs into the handstand while the handstand is the end point of holding a standing position with your hands.
This skill is featured in many other disciplines such as gymnastics, acrobatics, yoga, and crossfit. Although there are very small differences in execution, general technique is the same.
📌Muscles Used
Press to handstands work multiple muscle groups. The primary movers, or the muscles that work the most to facilitate the movement, are the following:👇
✅ Anterior deltoids (front of shoulders)
✅ Trapezius
✅ Lower back
✅ Hip flexors
✅ Hamstrings
✅ Ab muscles

Those are already a lot of muscles working together. However, there any many more that help stabilize you in the position such as the biceps, triceps, glutes, rhomboids, serratus anterior, chest and more.
The press to handstand is a full body workout itself which is also why we love them!
🔥Why You Would Want to Train Press to Handstand
1. 🤸Better handstand control – During the pressing motion, you’re basically starting a handstand with a different shape. It has a lower center of mass when you lift your feet off the ground, but it’s much heavier. Training this will further improve your handstand for different shapes, entrances, and variations.
2. 💪Stronger core – The demands on your core are much higher compared to the straight handstand. The core works from compression even as you extend to the end range. Your core stabilizes you through the movement and you don’t only get to work on your abs. This movement stimulates your obliques and lower back as well.
3. 🙌Better mobility and flexibility – If you’re dedicated on working towards this exercise, then you’ll inevitably work on your mobility and flexibility as well. The pike compression is crucial efficient exercise execution. In addition, you’ll inherently work on your overhead shoulder mobility too.
4. 🏃Full body workout – As mentioned above, there’s a lot of acting muscles to execute the press to handstand. Each phase of the press fires up the whole body.
5. 🎯Improves coordination – The strength and mobility developed from the movement helps improve your coordination. Also, pressing up isn’t as straight forward as it seems. You get to improve your proprioception or your body’s ability to move better in space.
✨Types of Press to Handstand
You can learn many press to handstand variations. Each offer a higher level of difficulty in which we arranged below from the easiest variation to the most difficult ones.
⚡️Tuck
Like many bodyweight exercises such as the planche, the press to handstand acts as a lever. So by manipulating the body to shorten the lever, we can make the exercise much easier.
The tuck press to handstand is the shortest lever making it the easiest among the press to handstand variations.
⚡️Straddle
The straddle press to handstand is a cool looking press variation. In this article, we’ll be focusing on this variation since it the most base of foundation of pressing that will translate better towards more advanced variations.
The straddle leg position slightly shortens the lever, but decreases the difficulty of massive amounts compared to the full pike press.
⚡️Pike

The next level after straddle is the pike press. The pike press is done with legs straight and together. This is the longest lever so it’s also the most difficult press among the standing variations from the floor.
⚡️Straddler
The straddler press is an advanced pressing variation that requires a higher level of compression strength, mobility, and shoulder strength.
The starting straddle sit already puts a high demand on your hip flexors and quads. This mechanically disadvantageous position is difficult to get out of. You will need more compression strength and shoulder strength to be able to press up.
What makes this even more difficult is that it can be done on the floor. Performing the straddler on paralletes is a bit easier because your legs can easily pass through the sitting position. The floor version, however, requires you to full compress to gain enough clearance for your lower body to pull up.
⚡️Planche press
Reserved for the advanced high-level athletes, the planche press to handstand is something you can work on for more gains and advanced transitioning.
This press combines both the full planche and the pressing motion into a handstand. This means that you need to have mastered the full planche first before attempting the skill.
For planche mastery, check this out: 📍The Ultimate Guide to Planche
🧐Where to Practice Press to Handstand
Press to handstands can be done on different equipment. You’re not limited performing them on the floor.
Starting the press on the floor is crucial. The floor provides immediate feedback for quick adjustments and better control.
However, once you’ve gained mastery of the skill on the floor, you can play around paralettes, handstand canes, or even gymnastics rings.
Gymnastics ring press to handstand is crazy difficult. You have to stabilize yourself while pressing at the same time. This requires high level of control on rings. Consider this variation once you’ve become comfortable on rings.
Learn more: 📍Ultimate Guide to Calisthenics Equipment
💥Technique and Form
There are general rules to be followed if you want to press into a handstand as efficient as possible. This means relying less on strength (although strength it a large part of it) and focusing more on mobility and proper movement pathway.
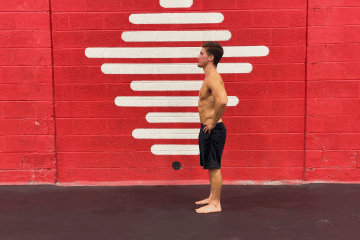
✊Finding the center of gravity
The key to be able to press your legs upwards into a handstand is to first find the balance before lifting the legs up.
There are two things to keep in mind to easily find that sweet spot.
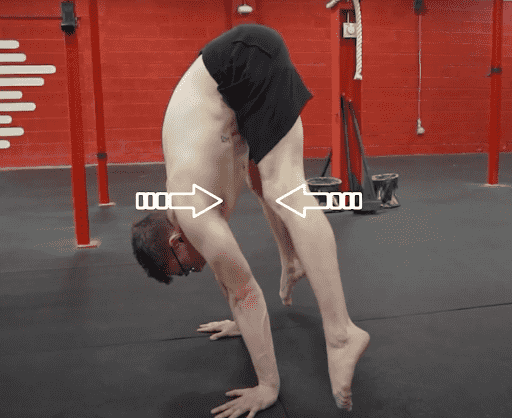
Forward lean – Similar to planche, you need to lean forward. The forward lean allows you to create clearance so that you can move your hips into a better position for balance.
Your center of gravity is near your core or hips. Without the forward lean, your center of gravity will be too far away from your hands and you won’t be able to stack your center of gravity on top of your hands to create balance for the press. The downward force will be too far back and it will be too difficult to press.
However, if you can lean far enough, you can press without needing compression or mobility. But developing the strength enough to do this is much more difficult compared to improving your mobility.
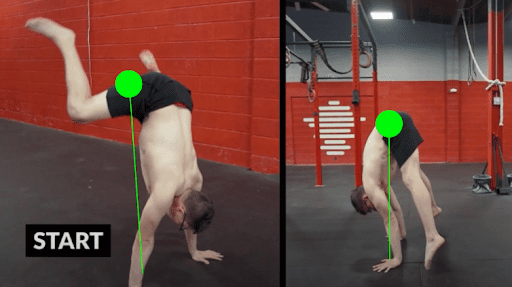
Hips stacked over the hands – Once you achieve enough forward lean, the next step is to pull your hips forward. Doing so will move majority of your body mass (center of mass) forward. If you don’t pull it forward, the weight at the back will be difficult to press into.
Stacking the hips is much easier if you have enough lower body mobility which is why we put greater emphasis on this aspect.
Notice the photo comparison above. The Movement Athlete coach pulls his hips to align directly on top of his hands on the right photo. In the left photo, the hips are still far too back which causes the coach to fall back.
Once you’ve leaned enough forward and stacked your hips over your hands, then you’ll feel weightlessness on your legs. That’s the only time you should press your legs up into a handstand.
☝️How to perform
1. From a standing position, bend over and plant your hands in front of your body around shoulder-width apart.
2. Shift your weight forward so that your shoulders are in front of your hands.
3. Pull your hips forward until you have stacked your hips over your hands.
4. Find the right balance of forward lean and hip position so you feel weightlessness with your legs.
5. While full weight is on your hands, straddle your legs outwards then upwards into a handstand.
6. Realign your shoulders into a complete straight freestanding handstand.
🎯Coaching pointers
• Hips stacked over your shoulders
• Lower body compressed as close as possible to your upper body
• Arms locked out straight
• Full body tension
• Lift your legs upward only when hips is over the shoulders
• Shoulders elevated and externally rotated
• Legs follow an outward pathway
👊How long does it takes
For most athletes, it will takes year. But don’t get discourage. If you follow the necessary progressions and perform the accessory exercises that contribute well towards this goal, then you can improve your learning time.
Athletes with developed hamstring flexibility and strong hip flexors and shoulders tend to learn the movement much faster. They can get into the right position and will find their balance better. Because of the mobility and strength, the movement pattern will be the only thing higher level athletes need to worry about.
If you have enough starting flexibility/mobility and strength, then expect to learn the movement in a matter of months or even weeks.
Press to handstand, especially when starting on the floor with straddle legs, is achievable for all athletes that are consistent with the specific work needed for the movement.
💯Prerequisites
Before mastering press to handstand, you first need to learn the prerequisites. This will allow you to learn the movement faster and safer.
Skipping the prerequisites will increase the risk of injuries and will stagnant your progress.
☑️ Freestanding handstand
If you can’t hold a solid handstand without a wall, then press to handstand is not something you need to work on.
🤯BUILD A SOLID FOUNDATION WITH FREESTANDING HANDSTAND FIRST.
There’s no sense in learning the pressing motion if you lack this exercise. The freestanding handstand prepares your basic strength mobility, balance, and control.
If you can’t do this move, then you’re setting yourself up to injuries. You’ll probably face plant to the ground when lacking the foundation.
Even if you have enough shoulder strength but lack the balance for the freestanding handstand, you won’t be able to get to the end point either.
Mastering the freestanding handstand also prepares other aspects of foundation such as core strength, balance, coordination, and overhead shoulder mobility.
Master your handstand before attempting any presses.
Learn more here: 📍Ultimate Guide to Freestanding Handstand
☑️ Shoulder pressing strength
The basic shoulder strength is develop through handstand training. However, straight-arm strength gained from a regular handstand alone (freestanding or not) is not enough.
A forward lean is required to be able to press into a handstand and demands a higher level of pushing strength.
The forward lean simulates a planche position which puts extra force on your anterior deltoids or the front of your shoulders.
If you’re strong enough, you can even press into a handstand with minimal compression. But this places you in a crooked planche which is extremely tough compared to the proper press to handstand.
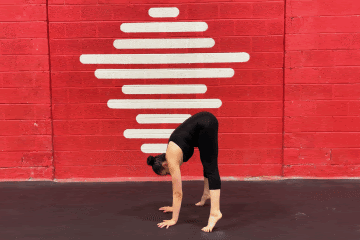
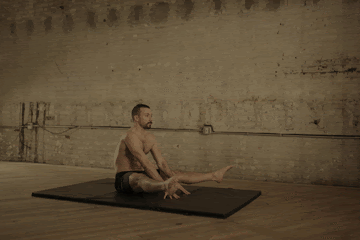
☑️ Compression strength
Compression strength is a combination of core strength and lower body mobility. You need to be able to compress your lower body towards your chest by piking in the hips. This requires quad mobility, hamstring flexibility, and hip flexor mobility. Add that your core strength must be sufficient to sustain the pancake position while balancing on your hands.
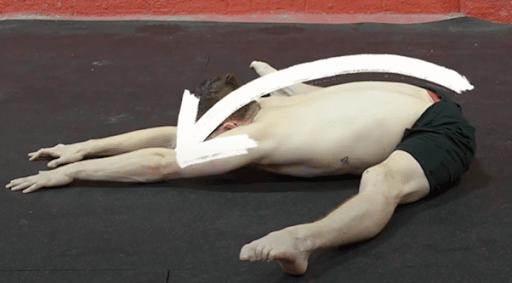
Training this in the straddle position as seen above will help you improve your straddle presses.
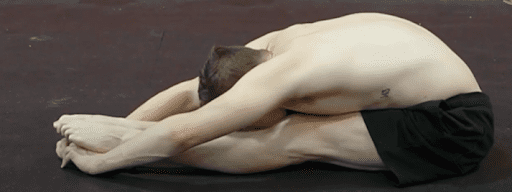
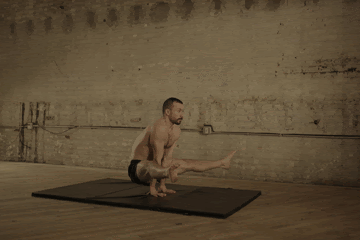
You can also work with straight piked legs for pike press to handstand as seen in the photo below.
🤜Having enough compression strength does two things:
1. It will help you shift your center of gravity over your shoulders to make balancing feasible.
2. It will make your press to handstand look so much cooler.
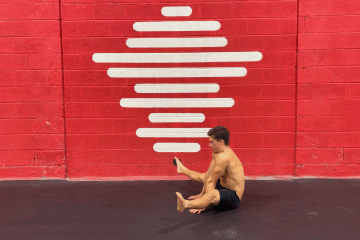
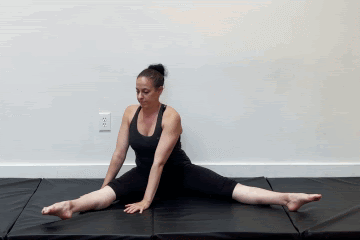
👍Another way to develop mobility and flexibility for your hamstrings and hip flexors are seated leg lifts.
This is a compression movement in which you train your lower body to move towards your chest with control and with no assistance from gravity.
It’s much more difficult compared to flexibility work because with this movement, you’re going to fight against gravity. From a sitting straddle or pike position, you just have to lift your legs with straight legs.
There are many variations to work on this exercise. You can hold the top end range, do the full range of motion, use one leg at a time. Do what works for you.
Below are examples of leg lift variations.⏬
When first working on the exercise, expect heavy cramping. Don’t worry. It’s only natural. Your body is just not used to the demand of the motion.
To avoid the cramps, perform the range of motion you can do with a straight back. Gradually increase the range of motion.
📌Takeaway
The press to handstand is a great to further improve your handstand and general bodyweight mastery. This movement doesn’t only serve as an alternative entrance to a handstand, but can help transition different positions towards the handstand.
If you’re interested in learning more about how to train for the press to handstand, continue to the next article:
📍 Best Press to Handstand Progressions
GET A FREE CUSTOMIZED TRAINING PLAN!
Start your life-changing journey with calisthenics and get lean, strong and mobile while unlocking and mastering over 100 new gymnastics & calisthenics skills.
It only takes 5 minutes, and no credit card is required!