Best Handstand Training Equipment: Complete Guide for 2024
📖 Read Time: 8 Minutes | Updated: 2024
Join the tribe of Movement & Calisthenics Athletes
People just like you that are working with their own body weight to get strength, lose fat build muscle, recover from injuries and live their best lives!
Mastering the handstand requires more than just practice – the right equipment can accelerate your progress, prevent injuries, and unlock advanced variations you never thought possible.
Different handstand training equipment serves specific purposes: from protecting your wrists to challenging your balance, each tool offers unique benefits for building strength, stability, and skill progression.
In this comprehensive guide, we’ll explore the 6 essential pieces of handstand equipment, ranked by difficulty and effectiveness:
- ☑️ Floor
- ☑️ Parallettes
- ☑️ Canes
- ☑️ Blocks
- ☑️ Ring
- ☑️ Unstable surface handstand
🏆 Equipment Comparison at a Glance
Choose the right equipment for your skill level and goals:
| Equipment | Difficulty | Wrist Impact | Balance Challenge | Best For |
|---|---|---|---|---|
| Floor | 🔥 Basic | High | Low | Beginners, form focus |
| Parallettes | 🔥 Basic | Low | Low | Wrist relief, strength |
| Blocks | 🔥 Basic | Medium | Medium | Grip strength, control |
| Canes | 🔥🔥 Intermediate | Low | High | Advanced balance, circus style |
| Rings | 🔥🔥🔥 Advanced | Medium | Extreme | Masters, instability training |
| Unstable Surface | 🔥🔥 Intermediate | Variable | Extreme | Challenge seekers |
💡 Pro Tip: Master each level before advancing. Most injuries occur when jumping difficulty levels too quickly.
🚀 Quick Start Guide: Choosing Your First Equipment
✅ Complete Beginner
Start with: Hard floor
Why: Focus on form and alignment
Duration: 2-3 months minimum
⚡ Wrist Issues
Start with: Parallettes or blocks
Why: Reduces wrist extension
Benefit: Train pain-free while healing
🔥 Experienced
Ready for: Canes or rings
Requirements: 30+ second handstand
Goal: Advanced skills and variations
💥 Handstand Equipment: From Basic to Advanced
🤜FLOOR
DIFFICULTY LEVEL: BASIC🔥
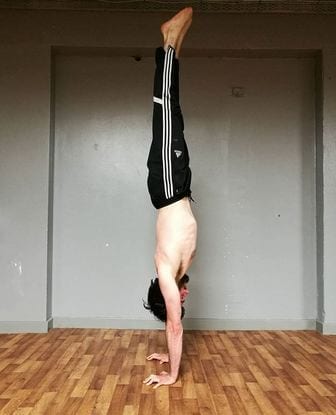
Training on a hard solid floor is the most basic and probably the easiest surface to train on. It eliminates the factor of your adjusting to the surface so you can focus on distributing your weight and holding your handstand with proper form.
Though it would give you more strain on your wrists, there are exercises to prepare for your wrists on the stress it will be experiencing. If you don’t have any wrist condition, The hard floor would be an excellent option.
Soft surfaces such as grass or mats could give you a feeling of safety, but it doesn’t help with your balance. Training there, you’ll have to adjust to the surfaces as well as it is soft and uneven so you’ll have another thing to focus on. These soft surfaces are great once you’ve got your other elements of handstand in check.
🤜PARALLETTES/ P-BAR
DIFFICULTY LEVEL: BASIC🔥

Parallettes are gymnastic-based equipment simulating the parallel bars on men’s artistic gymnastics category.
Using parallettes relieves some load off your wrists allowing you to focus on training other aspects of the handstand. This is due to having neutral grip on the bar. You’ll need to get used to this feeling if you’ve been training on a hard flat surface for quite some time.
Parallettes are also excellent for additional difficulty on some strength training exercises and allows you to train moves that are too difficult to do on the floor
It could just be a tad scary starting out since you’re further away from the ground, but fear is your only enemy.
🤜BLOCK
DIFFICULTY LEVEL: BASIC🔥
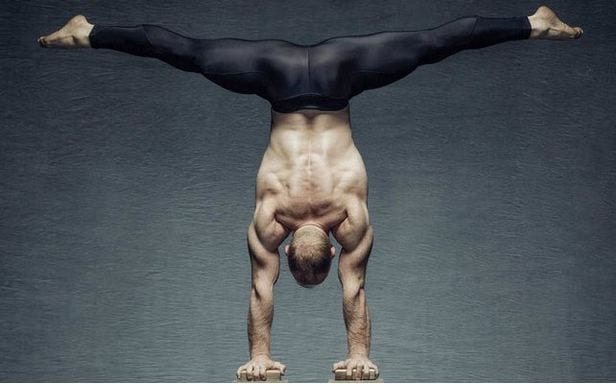
It’s very similar with the parallettes and relieves your wrists from less stress. When using incline blocks, you’ll get less wrist flexion which put less stress on your wrists.
Praciting on blocks also helps you get a strong grip since your fingers will cover the blocks. From there you’ll control your handstand. You’ll also get stronger forearms and wrists as well.
It’s a matter of preference when choosing your blocks. There are different shapes of wooden blocks you can use. It’s commonly rectangular or square, but you can also find circular shapes of blocks.
🤜CANES
DIFFICULTY LEVEL: INTERMEDIATE🔥🔥
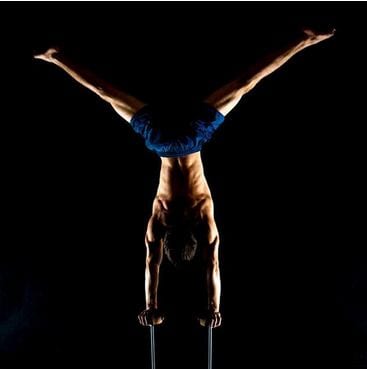
Handstand canes are based on circus training. It’s quite intimidating to train with at first because of the considerably high elevation. This requires you to put more effort on pressing or jumping up to a handstand. So be careful at your first try.
Handstand canes allows you to grip better for better handstand control. There will also be slight swaying on handstand canes which can assist in balance once you’ve mastered how to use it.
🤜UNSTABLE SURFACE HANDSTAND
Want to get challenged even more?
📍 https://calisthenics.school/shop/balance-rocker/
📍 https://calisthenics.school/shop/springs-canes/
Most of the challenge when training in this equipment would be the fear of height. You can overcome it by solidifying your handstand. You won’t have to be worried about falling over even with the height since you can control your handstand perfectly.
You can use the canes as an extension of your arms for better control. If you’re a beginner, you might find it difficult at first. Training regularly will fix this!
Entry to handstand is just a bit more difficult. Either you jump with the precise control or press up slowly into position.
🤜RINGS
DIFFICULTY LEVEL: ADVANCED 🔥🔥🔥
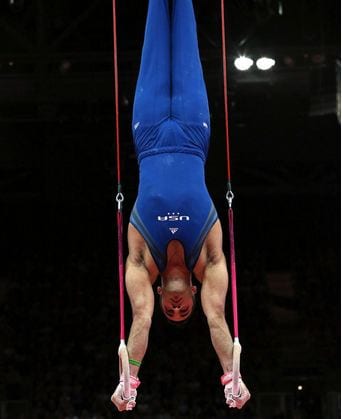
Rings handstand should be the last on your list among other surfaces. This is the most difficult surface you can encounter. Be sure to master a very solid handstand on floor and parallel bars first before attempting the ring handstand. You should also have the basic ring strength. It’s great if you can also press to handstand because you’ll need so much control when trying out the rings.
Rings provide so much instability that you need excellent upper body strength to control it. You’ll move in all directions so it would be very difficult controlling it at first.
We’ve learned from the basics of handstand that relying too much on shoulder strength is a no-no. On the rings, you have no choice because of the said instability. Massive shoulder strength is a must backed up with a solid hollow body core strength. Should mobility should not be forgotten to perfect the ring handstand.
Train on every surface 💪💪💪
Whether you train on soft, grass, using equipment, don’t get too comfortable on a single surface. Explore with different surfaces so you can solidify your handstand even more.
Do it everywhere as long as you and the others are safe.
GET A FREE CUSTOMIZED TRAINING PLAN!
Start your life-changing journey with calisthenics and get lean, strong and mobile while unlocking and mastering over 100 new gymnastics & calisthenics skills.
It only takes 5 minutes, and no credit card is required!