
Join the tribe of Movement & Calisthenics Athletes – people just like you that are working with their own body weight to get strength, lose fat build muscle, recover from injuries and live their best lives!
🔥Ring dip is one of the best exercises to get strong, build muscle, and learn more advanced skills on gymnastics rings.
We cannot dispute the numerous advantages that ring dips can offer our upper body. (Introduction to Ring Dips: The exercises guide and benefits). It’s a must-have exercise for any calisthenics athlete (or for even general fitness enthusiast!)💯
But before jumping on the rings and pumping out some reps, you must first evaluate your capacity and form on the rings.
You can only get the most out of the exercise if you’re doing it with the correct technique.
👇In this article, we’ll be going over common mistakes that people make when training the ring dips. We’re going to talk about:
✅ How to identify them
✅ Why it happens
✅ How to fix them
Making mistakes will not only hinder our progress, but it will also build bad habits that could lead to injuries, and nobody wants that!
Typically, I see seven different mistakes. When people are training ring dips, identifying and improving the errors will enhance your performance in the dip and, of course, lead to progress, more challenging, impressive skills on the rings.
The first step: Dip fundamental ✔️
The many reasons why you might not be able to do a ring dip is because you probably have to go backward in the regressions.
Go back to a stable surface and perform a technically good dip on a stable surface. Two boxes or chairs will do effectively.

Master the dipping motion on a stable surface first.
Getting that movement pathway and fundamental solidified is a great idea.
You also need to be able to be strong💪 and stable at the top of the ring dip, of course, and the bottom of the ring dip. The start and the end phase of it, Tempo work, moving slowly through it and having that control.
⚡️ Doing the dips with the correct form allows for maximum performance; hence, better gains. This also translates to a safer path in your ring dips preventing injuries, primarily shoulder impingements.
Why you can’t do a ring dip
The reasons why you might not be able to do your ring dips can come down to a few things.
In a general perspective, here are possible reasons why you can’t do ring dips:
📌Lack of understanding of the ring dip – The first step is learning how the ring dips work. Understanding its concepts, principles, and techniques will enhance your execution once you try it out.
For better understanding, check out the following articles:
- Introduction to Ring dips: The exercises guide and benefits
- How to unlock Ring dips: Understanding the prerequisites and muscles used
- How to do Ring dips: Proper form and technique guide
📌Lack of awareness in your movement pathway – There are specific cues you might be missing out on. That’s why it’s best first to learn the dips in-depth and master the fundamentals of stable-surface dips before moving into this progression.
📌Incorrect training execution – Training fatigued and doing too many reps with low-quality movement will produce poor results in your dips.
📌Presence of weaknesses – You might not be mobile or strong enough for the ring dips. Or your foundations might not be as solid as you think.
Now, we’re going to dive into these general mistakes and break them down into more specific, possible reasons why you can’t do a ring dip and what you can do about it.
If you’re interested, read on.
7 Mistakes you need to avoid to execute perfect ring dips for maximum gains
📍Mistake 1: Bent arm support position
How to identify the problem☝️
This is one of the first faults, so you can see in the photo below, coach Jeremy’s arms are just stuck in a bent position during the support hold. Right?
This is often where people start and finish their dips. The way to fix this, of course, is to simply lockout.
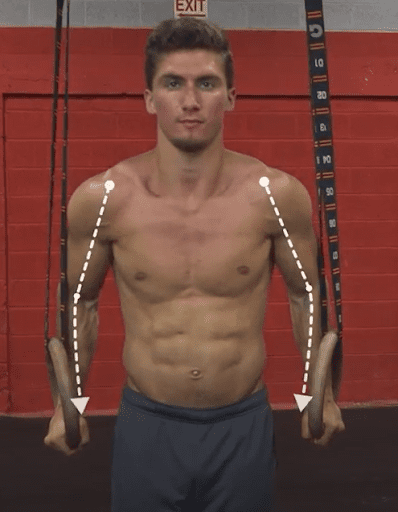
Movement Athlete coach Jeremy is demonstrating the wrong position at the top support hold.
🔎Why it happens
People might be stuck in this Bent arm position because number one, they can lack understanding. They might not know that they’re bent. Second, it could be because they haven’t practiced this enough.
It could be because of elbow pain (check with your local physio about this), it might be hyperextending, the elbows, and it’s uncomfortable and feels better to bend it.
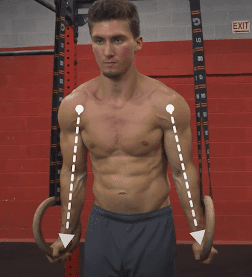
Proper position with straight and locked out elbows
How to fix it
Let’s hop back up, and we’ll go from this bent arm position and then fix it of what would happen.
Coach Jeremy is going to just push down harder on the rings and straighten his arms as much as possible. You can see he’s straighter. He’s taller now and he’s got that controlled support.
So that’s what it should look like, going from bent to straight. That’s just the simple fix, right?
It could be a cue. It could just be understanding.
If you’re still having trouble with this, we highly suggest going back to stable ground, like the two chairs or parallel bars, something that’s stable, and practicing this lockout with less of a load.
Again, MASTER THE FUNDAMENTALS.
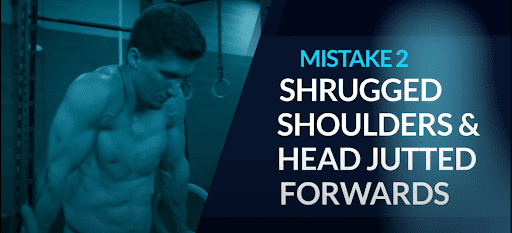
📍Mistake 2: Shrugged shoulder and head jutted forward
How to identify the problem☝️
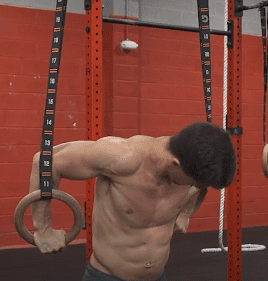
So the next fault that we’ll be looking at is still a postural issue. And this will be when the head is jutted forward when the shoulders are shrugged up to the top.
Here’s the incorrect form of the support position, shoulders are shrugged. The Head is forward.


Left is the incorrect form. Push down your shoulders to achieve the correct form in the right photo.
🔎Why it happens
This might be happening because the muscles for retraction and depression are a little weaker, or maybe there’s, again, a lack of understanding.
If so, you need to strengthen the elbow joints, rhomboids, rear deltoid, triceps, and pecs to push down and retract the shoulders to be stabilized and tall.
How to fix it
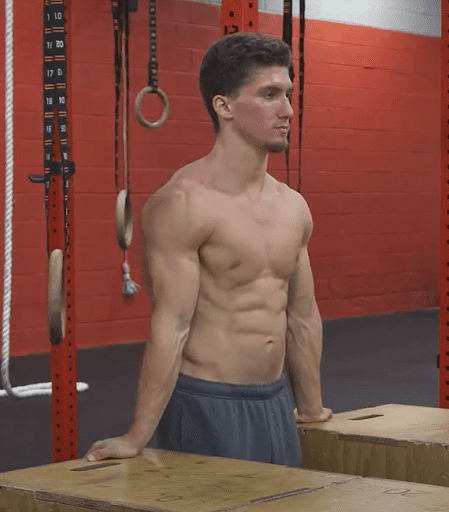
On the right is what it looks like to fix it.
Of course. Pushing tall again neutralizing the head position. It’s tucked back or tilted forward. Keep it neutral.
You can first condition muscles and joints by regressing the support hold into a ring push-up support hold.
You may also go back to stabilizing and strengthening yourself on stable surface dips.
For more drills to further help you get ring drips, check out this article:
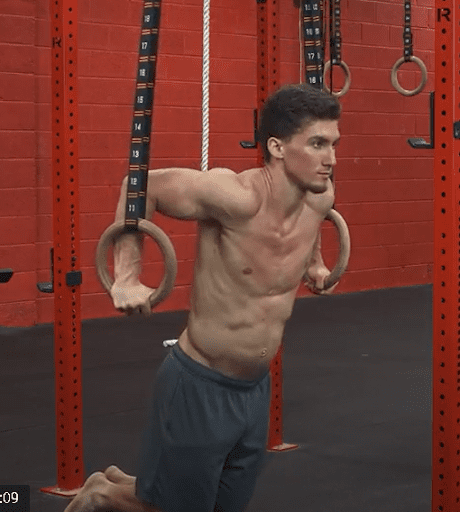
📍Mistake 3: Resting on straps

How to identify the problem☝️
The next fault that we’ll be looking at with the ring dips is touching the straps. This can happen in the support phase and throughout the whole dip.
This is probably one of the biggest and most common faults.
Let’s take a look at what this is. So coach Jeremy is starting in the support hold in the bottom photo. You can see the straps are completely resting on his forearms and his triceps a little bit.

Strap contact on support hold.
And this can even happen during the dip motion, very common in the whole dip itself. Your body will be just resting on the straps then lessens the loading of the exercise. This is a big error. You’re going to be reducing your strength gains.
Not only that, but you can also get some burns from the friction of your skin and straps which could cause you to stop training the dips.
Forearms still resting on the straps through the movement. This is not the optimal form.
Why it happens 🔎
Maybe there’s a lack of understanding of the position or weakness in the stabilizing muscles.
Or maybe you didn’t know you had to turn the rings out.
How to fix it
If there’s weakness, it’s natural to really just turn the rings in. The solution is to strengthen the external rotation of the shoulders and those muscles that supinate into this position.
Notice the external rotation, elbow pits facing forward even on the stable surface.
A great idea would be to practice dips on the parallel bars, or boxes with the correct turnout. And basically, the pin of the elbows should be forward that way. As you get stronger, it will be easier for you to hold the correct turnout and distance of your hands from the straps.
You’re not resting on the straps when you rotate anywhere, it’s ready. So you have to retract and keep it away from the straps.
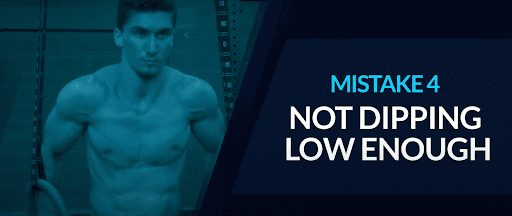
📍Mistake 4: Not dipping low enough
How to identify the problem☝️
So the next common fault that we’ll be looking at is when you don’t do low enough. The form might be good, but it just might not be in a full range. Coach Jeremy is going to show us what that looks like.
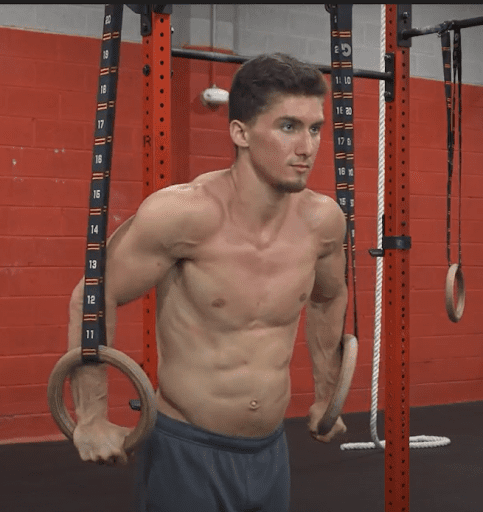
This shouldn’t be the bottom position of your dips!
An incomplete form might just look like a mini dip. It’s going about halfway down.
Why it happens🔎
This might happen because there could be a lack of the range of motion that we spoke about before.
Maybe you’re just not able to get into this position in the first place. Signaling your body that you’re not mobile enough or not strong enough.
You need to spend a lot of time being comfortable at the bottom of a dip.
Correct bottom form.
How to fix it
Again, relating this to squats. If you are not comfortable at the bottom of your squat, squats are not going to go so well. So dips, the same thing. You need to be comfortable at the bottom of a dip solid and stable, and then be able to press back up to the top again.
📍Mistake 5: Moving too fast
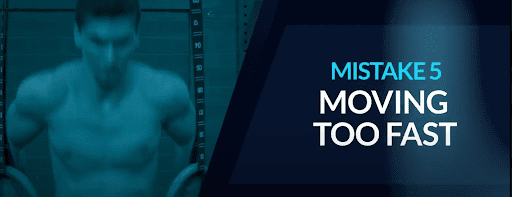
How to identify the problem☝️
The next fault that we’ll be looking at is when the dips are too fast. Just rush through it, and you’re probably skipping the whole range, and you’re not finishing the lockout.
With very fast reps, you’ll be prone to not finishing the whole lockout. Also, it increases the risks of other mistakes since you won’t be able to focus on your form as you’re moving through the motions. It’s too fast.
And again, if this is happening in the learning phase, you’re really missing a lot of bang for your buck here. But everybody, almost everybody, likes to rush the reps.
Why it happens🔎
We want to get the workout done fast enough, or we like to use momentum. If you’re going fast enough, there’s more momentum. And oftentimes, it’s easier because less strength is involved and more momentum instead.
How to fix it
So deal with training tempo work, meaning going slower, getting the control to go through the whole range of motion rather than rushing through it. Because again, momentum can hide the fact that there might be a weakness that you want to be addressing.
And if you take a step back and go through tempo work with these kinds of things, you’ll notice how much harder it is. As said earlier, this moving too fast through a dip is kind of a gateway to more errors immediately. That’s another common error that we see that we see.
📍Mistake 6: Lats and tricep contact
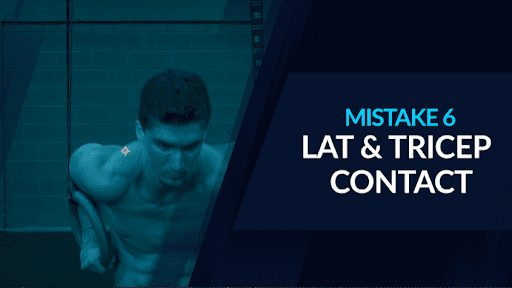
How to identify the problem☝️
Another fault that we see in the ring dips is when you contact the triceps and lats and kind of just sandwich it together to make more contact and help with stability in the whole dip itself. You’re taking away from your gain.
Coach Jeremy is going to show us what that tends to look like. He starts off really close together, and he’s sandwiching his arms close to his triceps and his laps. There’s just too much contact, right? They’re not free enough.


Of course, the way to correct this is you need to be more comfortable away from the rings. You’re losing a lot of the gains with the additional support, so that has to be a little bit further away, and practicing that dip with less contact as possible.
Coach Jeremy, of course, got that classic triangle built as gymnastic ring specialists tend to have. Everybody’s body is slightly different, but always aim to create enough space between the rings and your body.
Why it happens🔎
Usually, this problem occurs due to the lack of strength to stabilize yourself in the wider stance position.
How to fix it
An option to fix this would be to train wider with parallel bar dips.
Again, going back to the stable surface and training wider dips to get rid of that contact.
For this one, we’re definitely going to want to get a closer look at it because some of you are thinking, “well, that looked like a good dip anyway.”
If you look closer, there’s a big difference in the distance between the photos above and the example done at the bottom photos. And you will feel the difference even more compared to the visual comparison.


He’s moving the rings further away from them and you can see there’s less to no contact in these dips. It might feel like a wider dip. It really is a wider dip, right?
But not so much that it’s like an iron cross, of course, but not sandwiching your arms to your torso.
Don’t cheat yourself on the potential gains you could be getting!
📍Mistake 7: Not finishing the lockout
How to identify the problem ☝️
The last major fault that we see is not completing the lockout during the dips.
The dip might start off in the correct position. But then, after each rep, maybe it doesn’t return back to its original starting point.
Let’s take a close look at some of the ones that are incorrect and then we’ll look at the correct ones.
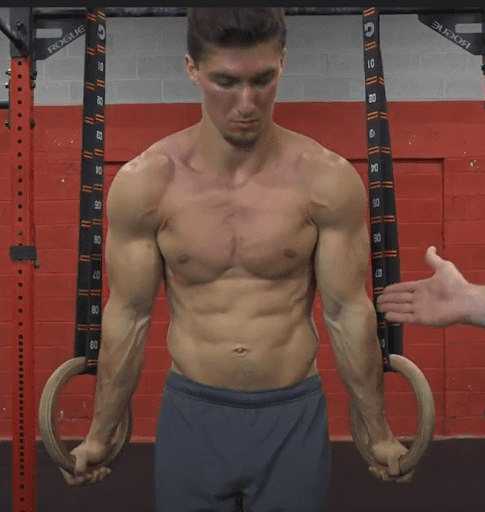
Coach Jeremy starts off locked. He’s going to do a couple of dips and you’ll notice he doesn’t return back to the top. He’s just short of it.


Why it happens🔎
You might be starting off in the correct position, but later on, maybe you’re fatigued. Maybe there’s a lack of awareness when performing the exercise.
It would be great to use a mirror then you can see if you’re doing the right positions or a video, but just practicing this. And again, as we get fatigued, it’s really common just to start or not finish to lockout.
Example of a perfect lockout that should be present in every rep.
How to fix it
You can clearly see the elbows are good there. He’s got that right. Every after rep, the lockout should be achieved if you want to maximize your gains from ring dips.
If you find yourself losing the lockout after a few reps, then you should first assess your situation.
How many can we do? How many can we fit in? And there’s should be enough attention to detail when executing this movement.
Focus on quality reps rather than rushing and aiming for quantity. You gain more by following the proper technique slowly than moving fast and carelessly.
In Summary🧐
And we always want to be training to the highest standard for maximum gains in each training session.
Those are the common faults that we tend to see in ring dips. And of course, there’s going to be a whole combination of all of these in one. So a lot of them tend to be postural based, lack stability, or it can just turn into a variety.
☝️There can be a whole combination of all these errors. These are the most common, and it can just go on from there.
We want to be rested, informed, prepared, controlled, and trained to the highest standards, so we’re not practicing the mistakes which could hinder our progress or, even worse, lead to injuries.
If you guys like what you saw here, please click the link in the description below. It’ll take you to a free course. It’s got a lot of guides, challenges, and resources for how to learn more calisthenic and bodyweight training skills.
It’s going to help you get stronger, fitter, more mobile, happier. And it’ll help you achieve your fitness goals. So see you inside.

GET A FREE CUSTOMIZED TRAINING PLAN!
Start your life-changing journey with calisthenics and get lean, strong and mobile while unlocking and mastering over 100 new gymnastics & calisthenics skills.
It only takes 5 minutes, and no credit card is required!