Free Forearm Stand Hip and Leg Extension: Master Your Headstand Control in 2025
📖 Read Time: 8 Minutes | 🎯 Difficulty: Intermediate-Advanced | 💪 Focus: Core & Balance | 📅 Updated: January 2025
Join the tribe of Movement & Calisthenics Athletes
People just like you that are working with their own body weight to get strength, lose fat, build muscle, recover from injuries and live their best lives!
Want a headstand so solid that no winds and weather can blow you down? The free forearm stand hip and leg extension is your secret weapon for building unshakeable headstand control and core strength that transfers to all your calisthenics skills.
What You’ll Master in This Guide:
- ✅ The exact technique breakdown for perfect form
- ✅ Common mistakes that sabotage your progress
- ✅ Progression timeline from beginner to advanced
- ✅ How this exercise builds transferable core strength
- ✅ Safety prerequisites before attempting
Why This Exercise is a Game-Changer
As the name suggests, the free forearm stand hip and leg extension has 2 distinct movements. Starting from the basic tripod hold, you perform one hip extension followed by a leg extension. This breakdown allows you to master every range of motion your body passes through to achieve a full freestanding headstand.
Since you haven’t yet fully mastered a solid freestanding headstand, this exercise lets you feel the full position briefly before returning through extended hips to the tripod position. It’s like training wheels that actually make you stronger!
🎯 Primary Purpose
This exercise primarily targets your core and obliques while building the specific strength patterns needed for a rock-solid headstand. Think of it as a complex core workout that teaches balance, control, and confidence simultaneously.
👍 Prerequisites: When It’s Safe to Attempt
⚠️ Essential Prerequisites
You MUST have a solid tripod hold hip extension before attempting this skill. This prerequisite develops the core strength, balance, and confidence required for the full movement. The tripod hold hip extension is basically one component of this exercise, so master it first!
✅ Key Benefits You’ll Gain
- 💪 Strong obliques for rotational power
- 🎯 Bulletproof core transferable to all calisthenics
- ⚖️ Enhanced balance and spatial awareness
- 🧠 Body control and proprioception
- 🤸 Movement coordination patterns
- 😎 Confidence for advanced inversions
💪 Step-by-Step Technique Breakdown
📋 Detailed Movement Steps
- From kneeling, place hands shoulder-width apart on the mat
- Lean forward, placing your head between your hands on the mat
- Rise into tripod position, bring knees together tucked to chest, toes pointed
- Let knees come away from chest, pointing outward at 90-degree hip angle
- Extend hips upward while keeping legs bent – feet stack over body
- Extend legs fully to complete headstand position (brief hold)
- Return knees to bent position, then back to 90-degree angle
- Tuck knees back to chest and repeat for reps
📍 Coaching Points for Perfect Form
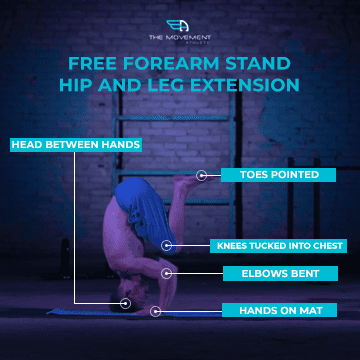
Starting Position:
- Head between hands
- Hands on mat
- Elbows bent
- Knees tucked to chest
- Toes pointed
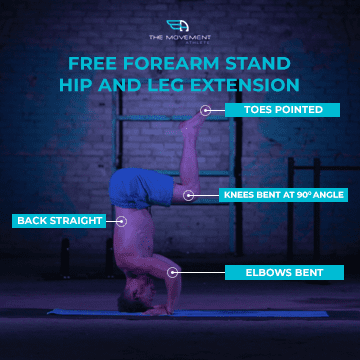
Movement Position:
- Elbows bent
- Hips extended
- Back straight
- Core engaged
- Toes pointed

Finish Position:
- Elbows bent
- Legs straight
- Knees extended
- Abdominals tight
- Back straight
- Toes pointed
👉 Critical Tips to Remember
⚡ Controlled Movement is KEY
This dynamic exercise involves 2 extensions and returns. Move in a controlled manner rather than using momentum. It’s tempting to rush through the “cool” skill, but this won’t deliver the benefits you want. Keep everything tight and move slowly – this translates to much better strength gains!
🦵 Keep Your Legs Flexed
There’s a reason we point our toes throughout! This engages your legs during the entire movement. While it seems like headstands only need core strength for balance, unengaged legs will throw you off. Keep your legs tight – but really, keep everything tight!
📈 Expected Progress Timeline
| Stage | Timeline | Milestone |
|---|---|---|
| Beginner | Weeks 1-2 | 3-5 controlled reps with hip extension only |
| Intermediate | Weeks 3-4 | 5-8 reps with brief leg extension |
| Advanced | Weeks 5-6 | 10+ reps with 2-3 second hold at full extension |
| Master | Week 6+ | Smooth transitions, ready for freestanding work |
💡 Pro Tips for Faster Progress
✅ DO: Practice against a wall first for safety and confidence
❌ DON’T: Use momentum to “kick” into position
✅ DO: Film yourself to check alignment
❌ DON’T: Hold your breath – breathe steadily
🚀 Ready to Master Your Headstand?
Master this movement to achieve a headstand as sturdy as a statue! Remember, consistency beats intensity – practice 3-4 times per week with proper rest between sessions for optimal results.
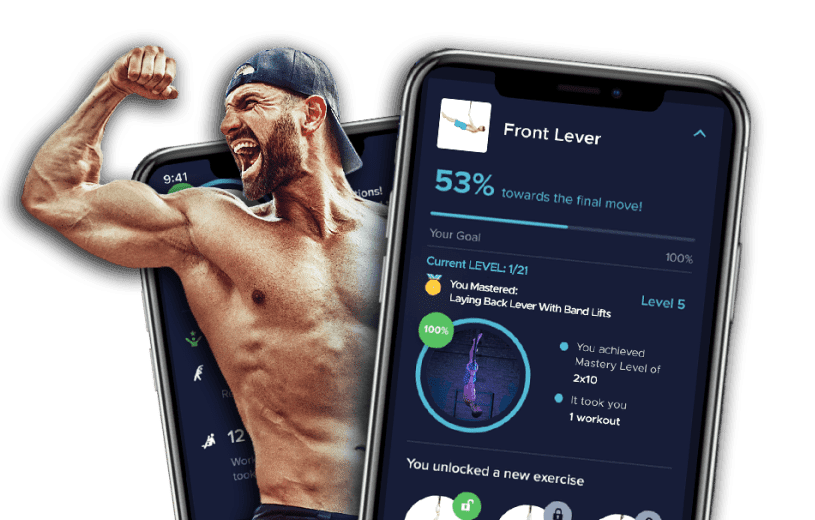
GET A FREE CUSTOMIZED TRAINING PLAN!
Start your life-changing journey with calisthenics and get lean, strong and mobile while unlocking and mastering over 100 new gymnastics & calisthenics skills.
It only takes 5 minutes, and no credit card is required!