[et_pb_section fb_built=”1″ fullwidth=”on” _builder_version=”4.16″ collapsed=”off” global_colors_info=”{}”][et_pb_fullwidth_image src=”https://themovementathlete.com/wp-content/uploads/TMA-6-Effective-Tips-and-Drills-of-Ring-Dip.jpg” alt=”TMA 6 Effective Tips and Drills of Ring Dip” title_text=”TMA 6 Effective Tips and Drills of Ring Dip” module_id=”_cm_image” _builder_version=”4.16″ height_tablet=”auto” height_phone=”auto” height_last_edited=”on|phone” global_colors_info=”{}” custom_css_main_element_last_edited=”on|phone”][/et_pb_fullwidth_image][/et_pb_section][et_pb_section fb_built=”1″ fullwidth=”on” custom_padding_last_edited=”on|phone” admin_label=”Middle Arrow” _builder_version=”4.16″ custom_padding=”0px|0px|0px|0px” custom_padding_tablet=”” custom_padding_phone=”” custom_css_main_element=”margin: 0px !important;” transparent_background=”off” collapsed=”on” global_colors_info=”{}”][et_pb_fullwidth_image src=”https://themovementathlete.com/wp-content/uploads/2017/02/arrow-2.png” admin_label=”Middle Arrow” _builder_version=”4.16″ custom_margin=”0px|0px|0px|0px” custom_css_main_element=”padding: 0px !important;” animation=”off” use_border_color=”off” border_color=”#ffffff” border_style=”solid” global_colors_info=”{}”]
[/et_pb_fullwidth_image][/et_pb_section][et_pb_section fb_built=”1″ admin_label=”First Content Section (Light Background)” _builder_version=”4.24.2″ custom_padding=”54px|0px|0|0px|false|false” hover_enabled=”0″ custom_css_main_element=”max-width:1100px !important;||margin:auto !important;” transparent_background=”off” collapsed=”off” global_colors_info=”{}” background_enable_color=”off” sticky_enabled=”0″][et_pb_row _builder_version=”4.16″ background_size=”initial” background_position=”top_left” background_repeat=”repeat” custom_margin=”||0px|” custom_padding=”20px||0||false|false” global_colors_info=”{}”][et_pb_column type=”4_4″ _builder_version=”4.16″ custom_padding=”|||” global_colors_info=”{}” custom_padding__hover=”|||”][et_pb_text admin_label=”Join the Tribe” module_class=”content-literature” _builder_version=”4.16″ text_font=”Raleway||||” text_font_size=”24″ background_size=”initial” background_position=”top_left” background_repeat=”repeat” text_font_size_tablet=”” text_font_size_phone=”16″ text_font_size_last_edited=”on|phone” custom_css_main_element=” line-height: 35px;” use_border_color=”off” border_color=”#ffffff” border_style=”solid” saved_tabs=”all” global_colors_info=”{}”]
Join the tribe of Movement & Calisthenics Athletes – people just like you that are working with their own body weight to get strength, lose fat build muscle, recover from injuries and live their best lives!
[/et_pb_text][/et_pb_column][/et_pb_row][et_pb_row _builder_version=”4.16″ background_size=”initial” background_position=”top_left” background_repeat=”repeat” global_colors_info=”{}”][et_pb_column type=”4_4″ _builder_version=”4.16″ custom_padding=”|||” global_colors_info=”{}” custom_padding__hover=”|||”][et_pb_text admin_label=”Intro / Tip 1: Dips with Supination” module_class=”content-literature” _builder_version=”4.16″ text_font=”Raleway||||” text_font_size=”24″ header_font_size=”50px” header_2_font_size=”40px” header_3_font_size=”30px” background_size=”initial” background_position=”top_left” background_repeat=”repeat” custom_padding=”20px||0px|||” text_font_size_tablet=”” text_font_size_phone=”16″ text_font_size_last_edited=”on|phone” custom_css_main_element=” line-height: 35px;” use_border_color=”off” border_color=”#ffffff” border_style=”solid” global_colors_info=”{}”]
You might be frustrated with why you still can’t do a good ring dip.
Don’t worry. The Movement Athlete has got you covered.
We’ll be showing👀 you some tips and drills to help improve your ring dip.
You might be worried about the rings a little bit high and hop up and you get a little shaky. Maybe even fall through the rings because it’s such an unstable surface. You might have a lack of control and you don’t want to hurt yourself.🤕
All of these issues are valid and you could possibly encounter them when training with the ring dip. Of course, all of them can also be addressed.☝️
We’ll be looking at a few tips and drills to reduce the load to help you do better ring dips and of course, stay safe.
Tip1: Dips with supination on a STABLE surface
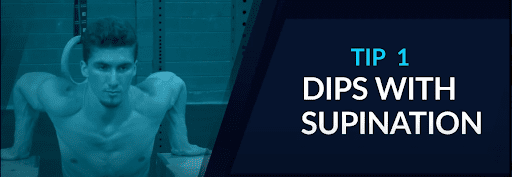
📌The first tip to help improve the dip that we have for you will be to perform it on a stable surface.
✊What our Movement Athlete coach Jeremy will show us here is a dip with supination. And this is the idea of supination is just externally rotating the shoulders so that pit of the elbow is facing forwards and then the elbows will track backward. On a stable surface, it is MUCH easier than on rings, so this is a great place to work on this movement.
[/et_pb_text][/et_pb_column][/et_pb_row][et_pb_row column_structure=”1_2,1_2″ _builder_version=”4.16″ _module_preset=”default” custom_padding=”||4px|||” global_colors_info=”{}”][et_pb_column type=”1_2″ _builder_version=”4.16″ _module_preset=”default” global_colors_info=”{}”][et_pb_image src=”https://themovementathlete.com/wp-content/uploads/TMA-Dips-with-Supination2.png” alt=”TMA Dips with Supination2″ title_text=”TMA Dips with Supination2″ _builder_version=”4.16″ _module_preset=”default” max_width=”80%” custom_padding=”0px|||||” global_colors_info=”{}”][/et_pb_image][/et_pb_column][et_pb_column type=”1_2″ _builder_version=”4.16″ _module_preset=”default” global_colors_info=”{}”][et_pb_image src=”https://themovementathlete.com/wp-content/uploads/TMA-Dips-with-Supination3.png” alt=”TMA Dips with Supination3″ title_text=”TMA Dips with Supination3″ _builder_version=”4.16″ _module_preset=”default” max_width=”74%” custom_padding=”|||0px||” global_colors_info=”{}”][/et_pb_image][/et_pb_column][/et_pb_row][et_pb_row _builder_version=”4.16″ _module_preset=”default” custom_padding=”3px|||||” global_colors_info=”{}”][et_pb_column type=”4_4″ _builder_version=”4.16″ _module_preset=”default” global_colors_info=”{}”][et_pb_text admin_label=”Tip 2: Penguin Dips” module_class=”content-literature” _builder_version=”4.16″ text_font=”Raleway||||” text_font_size=”24″ header_font_size=”50px” header_2_font_size=”40px” header_3_font_size=”30px” background_size=”initial” background_position=”top_left” background_repeat=”repeat” custom_padding=”20px||0px|||” text_font_size_tablet=”” text_font_size_phone=”16″ text_font_size_last_edited=”on|phone” custom_css_main_element=” line-height: 35px;” use_border_color=”off” border_color=”#ffffff” border_style=”solid” global_colors_info=”{}”]
Coach Jeremy will show us you can see that as palms are flat on the box, as fingers are behind him, his elbows are all tracking backward. He’s keeping good posture and going to the low position of about 90 degrees, finishing the lockout of them.
🎯The idea is to have a good movement pathway here. We don’t want to be training this with this internal rotation and elbows going sidewards. So this table surface is the perfect place to work on turn out on the dips.
☑️Coaching pointers :
- Focus on shoulder external rotation with lockout arms at the top
- Avoid flaring of elbows
- Go to the maximum range of motion
Tip 2: Penguin Dips
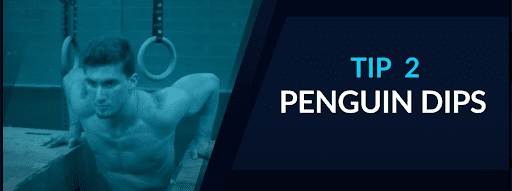
📌The next tip that we have for you is to help improve your ring dip is (it’s a fun one!) called Penguin dips.
What you’re going to do is start off on top of the boxes. You’re going to do basically a dip and then walk after each rep.
[/et_pb_text][/et_pb_column][/et_pb_row][et_pb_row column_structure=”1_2,1_2″ _builder_version=”4.16″ _module_preset=”default” custom_padding=”||4px|||” global_colors_info=”{}”][et_pb_column type=”1_2″ _builder_version=”4.16″ _module_preset=”default” global_colors_info=”{}”][et_pb_image src=”https://themovementathlete.com/wp-content/uploads/TMA-Dips-Penguin-dips2.png” alt=”TMA Dips Penguin dips2″ title_text=”TMA Dips Penguin dips2″ _builder_version=”4.16″ _module_preset=”default” max_width=”74%” custom_padding=”0px|||||” global_colors_info=”{}”][/et_pb_image][et_pb_image src=”https://themovementathlete.com/wp-content/uploads/TMA-Dips-Penguin-dips4.png” alt=”TMA Dips Penguin dips4″ title_text=”TMA Dips Penguin dips4″ _builder_version=”4.16″ _module_preset=”default” max_width=”74%” global_colors_info=”{}”][/et_pb_image][et_pb_image src=”https://themovementathlete.com/wp-content/uploads/TMA-Dips-Penguin-dips6.png” alt=”TMA Dips Penguin dips6″ title_text=”TMA Dips Penguin dips6″ _builder_version=”4.16″ _module_preset=”default” max_width=”74%” global_colors_info=”{}”][/et_pb_image][/et_pb_column][et_pb_column type=”1_2″ _builder_version=”4.16″ _module_preset=”default” global_colors_info=”{}”][et_pb_image src=”https://themovementathlete.com/wp-content/uploads/TMA-Dips-Penguin-dips3.png” alt=”TMA Dips Penguin dips3″ title_text=”TMA Dips Penguin dips3″ _builder_version=”4.16″ _module_preset=”default” max_width=”74%” max_height=”453px” custom_padding=”|||0px||” global_colors_info=”{}”][/et_pb_image][et_pb_image src=”https://themovementathlete.com/wp-content/uploads/TMA-Dips-Penguin-dips5.png” alt=”TMA Dips Penguin dips5″ title_text=”TMA Dips Penguin dips5″ _builder_version=”4.16″ _module_preset=”default” max_width=”74%” max_height=”428px” global_colors_info=”{}”][/et_pb_image][et_pb_image src=”https://themovementathlete.com/wp-content/uploads/TMA-Dips-Penguin-dips7.png” alt=”TMA Dips Penguin dips7″ title_text=”TMA Dips Penguin dips7″ _builder_version=”4.16″ _module_preset=”default” max_width=”74%” max_height=”371px” global_colors_info=”{}”][/et_pb_image][/et_pb_column][/et_pb_row][et_pb_row _builder_version=”4.16″ _module_preset=”default” custom_padding=”3px|||||” global_colors_info=”{}”][et_pb_column type=”4_4″ _builder_version=”4.16″ _module_preset=”default” global_colors_info=”{}”][et_pb_text admin_label=”Tip 3: Band assisted dips” module_class=”content-literature” _builder_version=”4.16″ text_font=”Raleway||||” text_font_size=”24″ header_font_size=”50px” header_2_font_size=”40px” header_3_font_size=”30px” background_size=”initial” background_position=”top_left” background_repeat=”repeat” custom_padding=”20px||0px|0px||” text_font_size_tablet=”” text_font_size_phone=”16″ text_font_size_last_edited=”on|phone” custom_css_main_element=” line-height: 35px;” use_border_color=”off” border_color=”#ffffff” border_style=”solid” global_colors_info=”{}”]
Here’s coach Jeremy showing us how this looks like.
He starts off in support, does a dip, and every time he pushes up to the support hold position, he moves an arm forward then finishes to the dip, then carries on with the other side.
He’s doing some weight transferring. He’s taxing the body in a slightly different way because it’s a different movement pathway and the fact that it might be a little uneven on each side.
☑️Coaching pointers :
- Transfer weight on one arm then walk your other arm forward
- Focus on equal distribution of movement for both sides
- Proper lockout at the top position every time before transferring weight
- Move forward and backward on your surface
Tip 3: Band assisted dips

📌The third tip that we have for you to help improve your ring dip would be to use a band for the band-assisted dip.
So in this particular exercise, you’ll put the band and put it through each side of the rings. Your hands will go on top of the band, which is on the rings. You’ll step into it and below your knees will be contacting this and you’ll be performing the dip with assistance from the band. This will do a couple of things.
[/et_pb_text][/et_pb_column][/et_pb_row][et_pb_row column_structure=”1_2,1_2″ _builder_version=”4.16″ _module_preset=”default” custom_padding=”||4px|||” global_colors_info=”{}”][et_pb_column type=”1_2″ _builder_version=”4.16″ _module_preset=”default” global_colors_info=”{}”][et_pb_image src=”https://themovementathlete.com/wp-content/uploads/Band-assisted-dips1.png” alt=”Band assisted dips1″ title_text=”Band assisted dips1″ _builder_version=”4.16″ _module_preset=”default” max_width=”80%” max_height=”439px” custom_padding=”0px|||||” global_colors_info=”{}”][/et_pb_image][/et_pb_column][et_pb_column type=”1_2″ _builder_version=”4.16″ _module_preset=”default” global_colors_info=”{}”][et_pb_image src=”https://themovementathlete.com/wp-content/uploads/Band-assisted-dips2.png” alt=”Band assisted dips2″ title_text=”Band assisted dips2″ _builder_version=”4.16″ _module_preset=”default” max_width=”74%” custom_padding=”|||0px||” global_colors_info=”{}”][/et_pb_image][/et_pb_column][/et_pb_row][et_pb_row _builder_version=”4.16″ _module_preset=”default” custom_padding=”3px|||||” global_colors_info=”{}”][et_pb_column type=”4_4″ _builder_version=”4.16″ _module_preset=”default” global_colors_info=”{}”][et_pb_text admin_label=”TIP 4: Dips with assistance on straps” module_class=”content-literature” _builder_version=”4.16″ text_font=”Raleway||||” text_font_size=”24″ header_font_size=”50px” header_2_font_size=”40px” header_3_font_size=”30px” background_size=”initial” background_position=”top_left” background_repeat=”repeat” custom_padding=”20px||0px|||” text_font_size_tablet=”” text_font_size_phone=”16″ text_font_size_last_edited=”on|phone” custom_css_main_element=” line-height: 35px;” use_border_color=”off” border_color=”#ffffff” border_style=”solid” global_colors_info=”{}”]
- It’s going to help stabilize the rings because they’re less free to move on their own.
- The band is going to give you some assistance on the way down and the way back upward in the whole dip band.
☑️Coaching pointers
- Maintain other essential dip techniques and posture such as scapula position and range of motion
- Use the band difficulty that will provide a challenge without letting you break down form or making the exercise too easy
- Make sure that you start from an elevated surface so you can easily position into support hold without jumping
TIP 4: Dips with assistance on straps
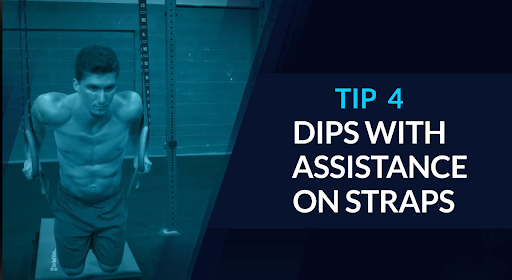
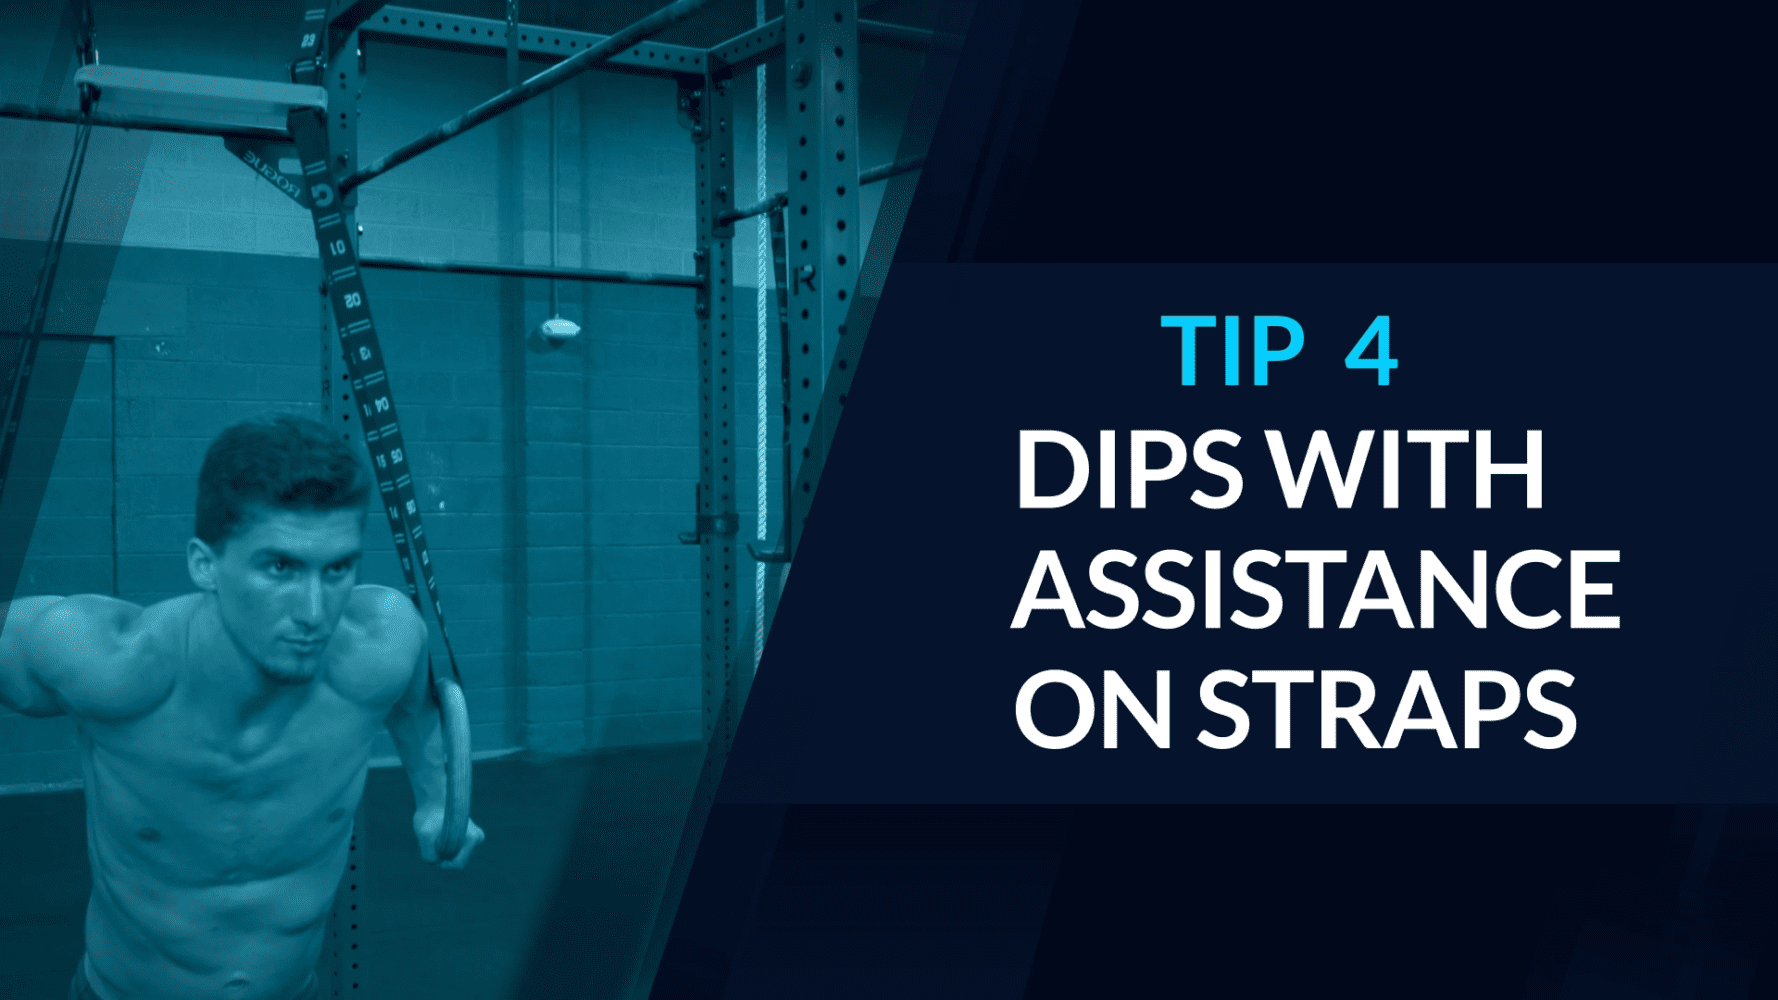
📌The fourth one will be assistance from the strap. So as I mentioned before, reducing the length of the straps is going to make the ring dip. There’s less stability. So this can be done in a few ways.
🤜The green loop is just a fabric used to hold the rings to add stability. Any item can tie at the top of the rings OR just make the rings shorter.
You can use a loop and just kind to bring the loop up and place it on top somewhere on the straps.
This will basically make the strap itself shorter. Or if you have adjustable rings just shorten the length of the actual straps on the rings. This will make sure that it’s more stable and easier to do the ring dip.
If they’re longer, it’s going to be more unstable. That’s the fourth tip that we have for you to help improve your ring dips by making the load a tad bit more manageable.
☑️Coaching pointers
- Use adjustable ring straps for convenience
- Any item such as a shirt or a rope can help tie a loop at the top of the straps
- Follow the standard ring dip techniques
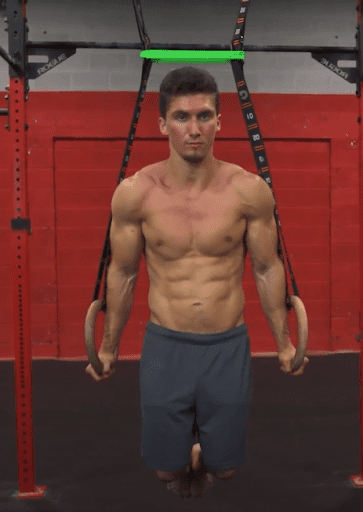
TIP 5: Shoulder depression/elevation + Ring turn in and out
📌The fifth tip that we have for you to help improve your ring dip is more of a challenge, and we’re going to combine a couple of things together in the support position.
So there’ll be a combination of just for the depression and elevation of the shoulders with a ring turnout and a turn in. So depending on the length of the straps or if there’s a swivel, this might be easier or more difficult.
We’re gonna take a look at this. We’ll do a set up five and five.
[/et_pb_text][/et_pb_column][/et_pb_row][et_pb_row column_structure=”1_2,1_2″ _builder_version=”4.16″ _module_preset=”default” custom_padding=”||4px|||” global_colors_info=”{}”][et_pb_column type=”1_2″ _builder_version=”4.16″ _module_preset=”default” global_colors_info=”{}”][et_pb_image src=”https://themovementathlete.com/wp-content/uploads/TMA-Shoulder-depression_elevation_Ring-turn1.png” alt=”Band assisted dips1″ title_text=”TMA Shoulder depression_elevation_Ring turn1″ _builder_version=”4.16″ _module_preset=”default” max_width=”80%” max_height=”360px” custom_padding=”0px|||||” global_colors_info=”{}”][/et_pb_image][/et_pb_column][et_pb_column type=”1_2″ _builder_version=”4.16″ _module_preset=”default” global_colors_info=”{}”][et_pb_image src=”https://themovementathlete.com/wp-content/uploads/TMA-Shoulder-depression_elevation_Ring-turn2.png” alt=”TMA Shoulder depression_elevation_Ring turn2″ title_text=”TMA Shoulder depression_elevation_Ring turn2″ _builder_version=”4.16″ _module_preset=”default” max_width=”74%” custom_padding=”|||0px||” global_colors_info=”{}”][/et_pb_image][/et_pb_column][/et_pb_row][et_pb_row _builder_version=”4.16″ _module_preset=”default” custom_padding=”3px|||||” global_colors_info=”{}”][et_pb_column type=”4_4″ _builder_version=”4.16″ _module_preset=”default” global_colors_info=”{}”][et_pb_text admin_label=”TIP 5: Shoulder depression_elevation_RingTurn” module_class=”content-literature” _builder_version=”4.16″ text_font=”Raleway||||” text_font_size=”24″ header_font_size=”50px” header_2_font_size=”40px” header_3_font_size=”30px” background_size=”initial” background_position=”top_left” background_repeat=”repeat” custom_padding=”20px||0px|0px||” text_font_size_tablet=”” text_font_size_phone=”16″ text_font_size_last_edited=”on|phone” custom_css_main_element=” line-height: 35px;” use_border_color=”off” border_color=”#ffffff” border_style=”solid” global_colors_info=”{}”]
Coach Jeremy is going to hop up with straight-arm support. He’s going to do a depression and elevation of his shoulders just like a shrugging motion. So we’ll go about five reps.
[/et_pb_text][/et_pb_column][/et_pb_row][et_pb_row column_structure=”1_2,1_2″ _builder_version=”4.16″ _module_preset=”default” custom_padding=”||4px|||” global_colors_info=”{}”][et_pb_column type=”1_2″ _builder_version=”4.16″ _module_preset=”default” global_colors_info=”{}”][et_pb_image src=”https://themovementathlete.com/wp-content/uploads/TMA-Shoulder-depression_elevation_Ring-turn3.png” alt=”TMA Shoulder depression_elevation_Ring turn3″ title_text=”TMA Shoulder depression_elevation_Ring turn3″ _builder_version=”4.16″ _module_preset=”default” max_width=”80%” custom_padding=”0px|||||” global_colors_info=”{}”][/et_pb_image][/et_pb_column][et_pb_column type=”1_2″ _builder_version=”4.16″ _module_preset=”default” global_colors_info=”{}”][et_pb_image src=”https://themovementathlete.com/wp-content/uploads/TMA-Shoulder-depression_elevation_Ring-turn4.png” alt=”TMA Shoulder depression_elevation_Ring turn4″ title_text=”TMA Shoulder depression_elevation_Ring turn4″ _builder_version=”4.16″ _module_preset=”default” max_width=”74%” max_height=”370px” custom_padding=”|||0px||” global_colors_info=”{}”][/et_pb_image][/et_pb_column][/et_pb_row][et_pb_row _builder_version=”4.16″ _module_preset=”default” custom_padding=”3px|||||” global_colors_info=”{}”][et_pb_column type=”4_4″ _builder_version=”4.16″ _module_preset=”default” global_colors_info=”{}”][et_pb_text admin_label=”TIP 6: Support hold position” module_class=”content-literature” _builder_version=”4.16″ text_font=”Raleway||||” text_font_size=”24″ header_font_size=”50px” header_2_font_size=”40px” header_3_font_size=”30px” background_size=”initial” background_position=”top_left” background_repeat=”repeat” custom_padding=”20px||0px|0px||” text_font_size_tablet=”” text_font_size_phone=”16″ text_font_size_last_edited=”on|phone” custom_css_main_element=” line-height: 35px;” use_border_color=”off” border_color=”#ffffff” border_style=”solid” global_colors_info=”{}”]
Then after he does this, he’s going to stay at the top and then do a simple turn-in and turn-out of the ring is right turning in and turning out.
🤜The purpose of this is to train the retraction of the shoulders, the depression of the shoulders, and the ability to externally rotate them.
This is tackling a few of those things that are often weaknesses in the dips without actually doing the dip. So that’s the fifth exercise that we have for you to try.
☑️Coaching pointers
- Control the movements and avoid momentum
- Full range of motion
- Keep your arms locked and straight
TIP 6: Support hold position
📌The 6th tip that we have for you to help improve your ring dip is going to be around the support position again.
We’re going to go from a wide arm support position back to basically shoulder width and just alternate between the two.
[/et_pb_text][/et_pb_column][/et_pb_row][et_pb_row column_structure=”1_2,1_2″ _builder_version=”4.16″ _module_preset=”default” custom_padding=”||4px|||” global_colors_info=”{}”][et_pb_column type=”1_2″ _builder_version=”4.16″ _module_preset=”default” global_colors_info=”{}”][et_pb_image src=”https://themovementathlete.com/wp-content/uploads/Support-hold-position1.png” alt=”Support hold position” title_text=”Support hold position1″ _builder_version=”4.16″ _module_preset=”default” max_width=”80%” max_height=”496px” custom_padding=”0px|||||” global_colors_info=”{}”][/et_pb_image][/et_pb_column][et_pb_column type=”1_2″ _builder_version=”4.16″ _module_preset=”default” global_colors_info=”{}”][et_pb_image src=”https://themovementathlete.com/wp-content/uploads/Support-hold-position2.png” alt=”Support hold position2″ title_text=”Support hold position2″ _builder_version=”4.16″ _module_preset=”default” max_width=”74%” custom_padding=”|||0px||” global_colors_info=”{}”][/et_pb_image][/et_pb_column][/et_pb_row][et_pb_row _builder_version=”4.16″ _module_preset=”default” custom_padding=”3px|||||” global_colors_info=”{}”][et_pb_column type=”4_4″ _builder_version=”4.16″ _module_preset=”default” global_colors_info=”{}”][et_pb_text admin_label=”TIP 6: Support hold position” module_class=”content-literature” _builder_version=”4.16″ text_font=”Raleway||||” text_font_size=”24″ header_font_size=”50px” header_2_font_size=”40px” header_3_font_size=”30px” background_size=”initial” background_position=”top_left” background_repeat=”repeat” custom_padding=”20px||0px|0px||” text_font_size_tablet=”” text_font_size_phone=”16″ text_font_size_last_edited=”on|phone” custom_css_main_element=” line-height: 35px;” use_border_color=”off” border_color=”#ffffff” border_style=”solid” global_colors_info=”{}”]
🤜You want to strengthen in and around the support phase, because this will, of course, help you with your dip since you need to go a little bit wider as you go deep.
Let’s take a look at varying levels. We can go some that are a little bit closer to the body and then some that are further away depending on the strength demonstrated by coach Jeremy in the photos below.
[/et_pb_text][/et_pb_column][/et_pb_row][et_pb_row column_structure=”1_2,1_2″ _builder_version=”4.16″ _module_preset=”default” custom_padding=”||4px|||” global_colors_info=”{}”][et_pb_column type=”1_2″ _builder_version=”4.16″ _module_preset=”default” global_colors_info=”{}”][et_pb_image src=”https://themovementathlete.com/wp-content/uploads/Support-hold-position3.png” alt=”Support hold position3″ title_text=”Support hold position3″ _builder_version=”4.16″ _module_preset=”default” max_width=”80%” max_height=”460px” custom_padding=”0px|||||” global_colors_info=”{}”][/et_pb_image][/et_pb_column][et_pb_column type=”1_2″ _builder_version=”4.16″ _module_preset=”default” global_colors_info=”{}”][et_pb_image src=”https://themovementathlete.com/wp-content/uploads/Support-hold-position4.png” alt=”Support hold position4″ title_text=”Support hold position4″ _builder_version=”4.16″ _module_preset=”default” max_width=”74%” custom_padding=”|||0px||” global_colors_info=”{}”][/et_pb_image][/et_pb_column][/et_pb_row][et_pb_row _builder_version=”4.16″ _module_preset=”default” custom_padding=”3px|||||” global_colors_info=”{}”][et_pb_column type=”4_4″ _builder_version=”4.16″ _module_preset=”default” global_colors_info=”{}”][et_pb_text admin_label=”TIP 6: Support hold position” module_class=”content-literature” _builder_version=”4.16″ text_font=”Raleway||||” text_font_size=”24″ header_font_size=”50px” header_2_font_size=”40px” header_3_font_size=”30px” background_size=”initial” background_position=”top_left” background_repeat=”repeat” custom_padding=”20px||0px|0px||” text_font_size_tablet=”” text_font_size_phone=”16″ text_font_size_last_edited=”on|phone” custom_css_main_element=” line-height: 35px;” use_border_color=”off” border_color=”#ffffff” border_style=”solid” global_colors_info=”{}”]
With Each millimeter you go further away from the body, it just immediately gets a lot more difficult. Don’t underestimate the little change you do with your width.
[/et_pb_text][/et_pb_column][/et_pb_row][et_pb_row column_structure=”1_2,1_2″ _builder_version=”4.16″ _module_preset=”default” custom_padding=”||4px|||” global_colors_info=”{}”][et_pb_column type=”1_2″ _builder_version=”4.16″ _module_preset=”default” global_colors_info=”{}”][et_pb_image src=”https://themovementathlete.com/wp-content/uploads/Support-hold-position5.png” alt=”Support hold position5″ title_text=”Support hold position5″ _builder_version=”4.16″ _module_preset=”default” max_width=”80%” max_height=”405px” custom_padding=”0px|||||” global_colors_info=”{}”][/et_pb_image][/et_pb_column][et_pb_column type=”1_2″ _builder_version=”4.16″ _module_preset=”default” global_colors_info=”{}”][et_pb_image src=”https://themovementathlete.com/wp-content/uploads/Support-hold-position6.png” alt=”Support hold position6″ title_text=”Support hold position6″ _builder_version=”4.16″ _module_preset=”default” max_width=”74%” custom_padding=”|||0px||” global_colors_info=”{}”][/et_pb_image][/et_pb_column][/et_pb_row][et_pb_row _builder_version=”4.16″ _module_preset=”default” custom_padding=”3px|||||” global_colors_info=”{}”][et_pb_column type=”4_4″ _builder_version=”4.16″ _module_preset=”default” global_colors_info=”{}”][et_pb_text admin_label=”TIP 6: Support hold position” module_class=”content-literature” _builder_version=”4.16″ text_font=”Raleway||||” text_font_size=”24″ header_font_size=”50px” header_2_font_size=”40px” header_3_font_size=”30px” background_size=”initial” background_position=”top_left” background_repeat=”repeat” custom_padding=”20px||0px|0px||” text_font_size_tablet=”” text_font_size_phone=”16″ text_font_size_last_edited=”on|phone” custom_css_main_element=” line-height: 35px;” use_border_color=”off” border_color=”#ffffff” border_style=”solid” global_colors_info=”{}”]
So he’s just a little bit wider in our example. And because he’s extremely strong, he can start doing what looks like a mini iron cross. This doesn’t need to go this far at all, but eventually if you’re this strong, why not?
This will all help you strengthen in and around the support position. And being strong in that position will help you with your comfortability of being in the whole phase of the ring dips.
So again, this is just widening and coming back to shoulder width in the support position. That’s our 6th tip for you to try.
☑️Coaching pointers
- Gradually add the distance you travel as you grow stronger
- DO NOT underestimate the difficulty of the exercise
- Maintain standard ring dip position techniques
[/et_pb_text][et_pb_text admin_label=”Summary” module_class=”content-literature” _builder_version=”4.16″ text_font=”Raleway||||” text_font_size=”24″ header_font_size=”50px” header_2_font_size=”40px” header_3_font_size=”30px” background_size=”initial” background_position=”top_left” background_repeat=”repeat” custom_margin=”1px|||||” custom_padding=”7px|||||” text_font_size_tablet=”” text_font_size_phone=”16″ text_font_size_last_edited=”on|phone” custom_css_main_element=” line-height: 35px;” use_border_color=”off” border_color=”#ffffff” border_style=”solid” global_colors_info=”{}”]
☝️Final words
We hope you enjoy these tips and drills to help improve your rings dip.
What’s the focus on here?
👊We’re strengthening in and around the support positions and really tackling being an unfavorable position of the dip and how to correct them. The strength gains from these positions allow gradual progress to mastering the ring dips.
👊Last thing we want you to do is hurt yourself on the ring dips. So go ahead and try these tips and drills.
👊Make sure to familiarize yourself as well with the progressions and prerequisites of ring dips which will be linked below:
- Article 2 – Ring dip muscles used and prerequisites
- Aritcle 5 – The best ring dip progressions for faster progress
These will show you a good, encompassing amount of how to prepare for it, how to do it safely and then effectively.💯
But before testing out these drills, be sure that you already have mastered the calisthenics fundamentals with perfect form. By doing so, you’ll ensure faster progress in a fun and safe manner.
If you’re not yet sure you’re ready, take the free assessment with The Movement Athlete and know👇 where you are in your fitness journey.
[/et_pb_text][/et_pb_column][/et_pb_row][/et_pb_section][et_pb_section fb_built=”1″ _builder_version=”4.20.2″ custom_padding=”0px||2px||false|false” link_option_url=”https://themovementathlete.com/black-friday-2019/” custom_css_main_element=”font-family: ‘Montserrat’,Helvetica,Arial,Lucida,sans-serif;” global_module=”209500″ saved_tabs=”all” global_colors_info=”{}”][et_pb_row column_structure=”1_2,1_2″ use_custom_gutter=”on” gutter_width=”1″ make_equal=”on” custom_padding_last_edited=”on|phone” module_class=”baners-flex-row et_pb_row_fullwidth” _builder_version=”4.20.2″ use_background_color_gradient=”on” background_color_gradient_stops=”#354e65 0%|#212b35 100%” background_color_gradient_start=”#354e65″ background_color_gradient_end=”#212b35″ width=”100%” width_tablet=”100%” width_phone=”” width_last_edited=”on|desktop” max_width=”100%” max_width_tablet=”100%” max_width_phone=”” max_width_last_edited=”on|desktop” custom_padding=”0px||0|0px” custom_padding_tablet=”30px|20px|0px|20px” custom_padding_phone=”30px|20px|0px|0px” make_fullwidth=”on” global_colors_info=”{}”][et_pb_column type=”1_2″ _builder_version=”4.16″ custom_padding=”|||” global_colors_info=”{}” custom_padding__hover=”|||”][et_pb_image src=”https://themovementathlete.com/wp-content/uploads/The-Movement-Athlette-App-1.png” title_text=”calisthenics app” show_bottom_space=”off” align_tablet=”center” align_phone=”” align_last_edited=”on|desktop” _builder_version=”4.24.2″ width=”77%” global_colors_info=”{}”][/et_pb_image][/et_pb_column][et_pb_column type=”1_2″ _builder_version=”4.16″ custom_padding=”|||70px” custom_padding_tablet=”30px||30px|0px” custom_padding_phone=”30px||30px|30px” custom_padding_last_edited=”on|phone” global_colors_info=”{}” custom_padding__hover=”|||”][et_pb_text _builder_version=”4.16″ header_font_size=”24px” header_letter_spacing=”15px” header_2_font=”|700||on|||||” header_2_text_align=”left” header_2_text_color=”#ffffff” header_2_font_size=”39px” header_2_line_height=”1.1em” max_width=”87%” custom_margin=”|70px|10px|-50px” custom_margin_tablet=”|0px|10px|0px” custom_margin_phone=”” custom_margin_last_edited=”on|phone” custom_padding=”||0px|” header_2_font_size_tablet=”” header_2_font_size_phone=”29px” header_2_font_size_last_edited=”on|phone” header_2_line_height_tablet=”” header_2_line_height_phone=”” header_2_line_height_last_edited=”on|phone” global_colors_info=”{}”]
GET A FREE CUSTOMIZED TRAINING PLAN!
[/et_pb_text][et_pb_text admin_label=”Text” _builder_version=”4.16″ text_text_color=”#ffffff” text_font_size=”16px” text_letter_spacing=”-0.39px” text_line_height=”24px” header_3_text_color=”#ffffff” custom_margin=”|60px|20px|-50px” custom_margin_tablet=”|0px|20px|0px” custom_margin_phone=”” custom_margin_last_edited=”on|tablet” custom_padding=”|50px||” global_colors_info=”{}”]
Start your life-changing journey with calisthenics and get lean, strong and mobile while unlocking and mastering over 100 new gymnastics & calisthenics skills.
It only takes 5 minutes, and no credit card is required!
[/et_pb_text][et_pb_button button_url=”https://themovementathlete.com/calisthenics-assessment/” button_text=”Get a FREE, PERSONALISED TRAINING PLAN!” _builder_version=”4.16″ custom_button=”on” button_text_size=”16px” button_text_color=”#ffffff” button_bg_color=”#e02b20″ button_border_width=”0″ button_border_radius=”6″ button_letter_spacing=”1.78px” button_font=”|700||on|||||” button_use_icon=”off” custom_margin=”|||-50px” custom_margin_tablet=”||20px|0px” custom_margin_phone=”” custom_margin_last_edited=”on|phone” custom_padding=”12px|24px|10px|24px” button_letter_spacing_tablet=”1.8px” custom_css_main_element=”text-align: center;” button_border_radius_hover=”6″ global_colors_info=”{}” button_text_size__hover_enabled=”off” button_one_text_size__hover_enabled=”off” button_two_text_size__hover_enabled=”off” button_text_color__hover_enabled=”off” button_one_text_color__hover_enabled=”off” button_two_text_color__hover_enabled=”off” button_border_width__hover_enabled=”off” button_one_border_width__hover_enabled=”off” button_two_border_width__hover_enabled=”off” button_border_color__hover_enabled=”off” button_one_border_color__hover_enabled=”off” button_two_border_color__hover_enabled=”off” button_border_radius__hover_enabled=”on” button_border_radius__hover=”6″ button_one_border_radius__hover_enabled=”off” button_two_border_radius__hover_enabled=”off” button_letter_spacing__hover_enabled=”off” button_one_letter_spacing__hover_enabled=”off” button_two_letter_spacing__hover_enabled=”off” button_bg_color__hover_enabled=”off” button_one_bg_color__hover_enabled=”off” button_two_bg_color__hover_enabled=”off”][/et_pb_button][/et_pb_column][/et_pb_row][/et_pb_section]