📖 Read Time: 10 Minutes
🏆 Join the Tribe!
Join the tribe of Movement & Calisthenics Athletes – people just like you that are working with their own body weight to get strength, lose fat build muscle, recover from injuries and live their best lives!
Take our FREE Movement Assessment →
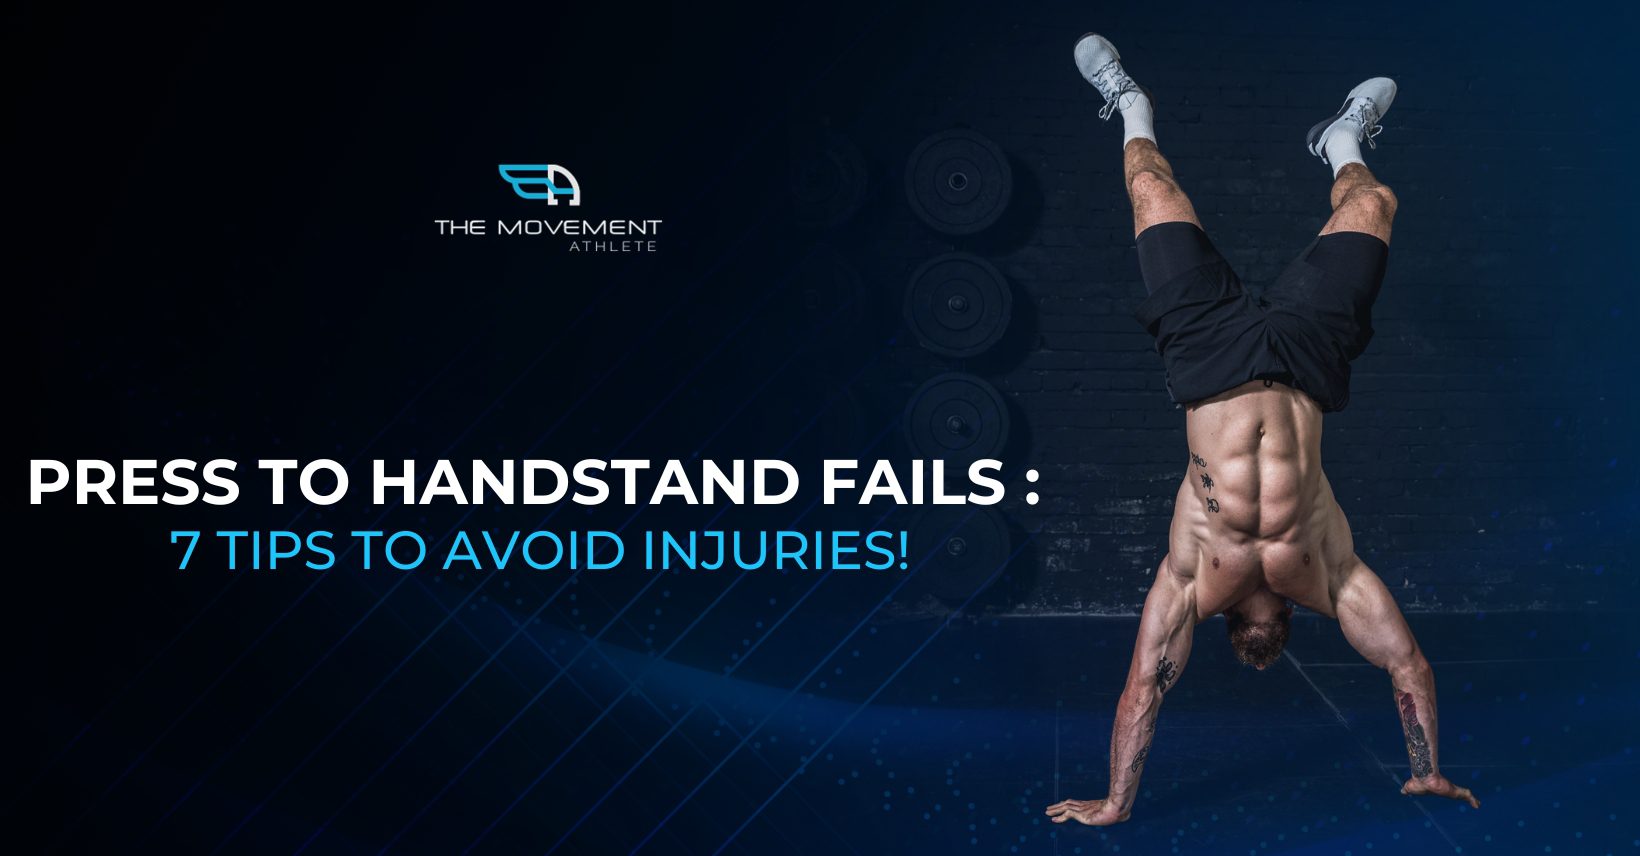
👊Here’s the truth: YOU CAN GET INJURED DOING CALISTHENICS.
Injuries are a part of life. And no matter what you do, whether you’re just walking in the parking, weight lifting, doing calisthenics, walking on stairs, etc, you still can get injured.
Don’t worry. We’re not trying to make you anxious. Sometimes, it just happens.
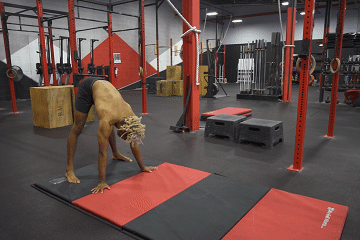
But compared to simple movements like walking or push-ups, the risk of injuries increases as you do more complex movement patterns such as the press to handstand.
In this section, we’ll be sharing with you 7 tips so you can minimize injuries when training for the press to handstand.
In This Article:
• Tip 2: Train in a Safe Environment
• Tip 3: Wrist Placement/Using Parallettes
• Tip 7: Mastering the Prerequisites
What Injuries🤕 Can You Get From Press to Handstand Training🤸
🤜Take Note: Press to Handstand is SAFE!
Even though there’s a number of ways you can get injured with press to handstands, it’s still a relatively safe exercise to perform as long as you follow the tips below.
The number one reason for you to get injured through this exercise is underestimating the skill and/or overestimating your skills.
Press to handstand is not an easy skill to learn.
Having a base level of foundations (through your calisthenics foundation training) already makes your training safe and progress meaningful. Be sure that you have the prerequisites down or at least at a good level already.
Learn more about the prerequisites here: 📍How to Press to Handstand – Technique & Prerequisites
Stay humble, and you will easily avoid these possible injuries below.
🤕Concussion
Handstand requires balance and if you lose that balance, you can hit your head on the floor. Your head is so close the floor already, but even with the low height.
🤕Body trauma
Your hands offer a small base of support especially if you don’t have enough skill and strength to balance the handstand. You can fall and hit your body on the ground which is feel like someone punching you. It’s a blunt force hitting your body.
🤕Pulled hamstrings
As mentioned in our Mobility section, the hamstrings are stretched during the pike or straddle position which are required for an efficient press to handstand. You can easily pull a muscle if your hamstrings are flexible and mobile enough or if they are not warm enough.
🤕Shoulder Injury
Shoulder injury is uncommon, but it can happen if you’re not performing the handstand with good technique.
🤕Overused wrists
Among the possible injuries, wrist pain is the most common. We’ll spend quite some time loading the wrist. It’s a very small joint which can be overloaded too much too soon.
Later in the article, we’ll address this as well as all the other injuries so you can stay safe in your press to handstand journey.
🔥Tip 1 – Learn How to Fall
Our first tip which can help you easily avoid body trauma or falling with your head first is to learn how to fall properly.
There are a few variations you can choose from. Nothing is actually better and it will depend on your preference and current situation to which you can bail from.
You can use these variations to bail from a handstand or press to handstand.
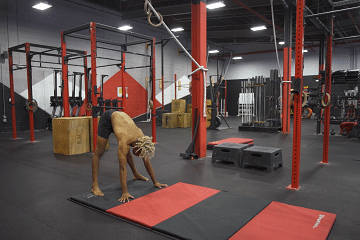
⚡️Cartwheel or Pirouette
The first one is connecting your handstand to a cartwheel or a handstand pirouette. With this variation, you will need to activate your core muscles to shift your weight to the side to bail from the handstand.
While falling, engage your obliques as your shift your weight on one arm. As you lose your balance, twist your upper torso to move so that you can turn your whole body to the side. After that, continue to a cartwheel to complete the movement.
This variation is the easiest among the other options because it doesn’t require any other skill other than having sufficient core control and shoulder stability to control the fall.
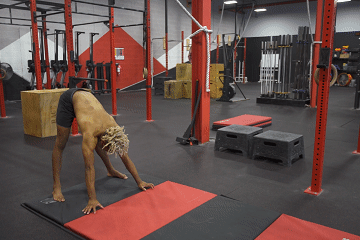
⚡️Forward Roll
The next option requires a bit of coordination and upper body strength to execute smoothly and safely. In this variation, you will have to connect the handstand into a forward roll.
To perform the forward roll, you have to tuck your chin to your chest, then let the back of your head drop to the floor then smoothly roll to your upper back and tucking your legs. It should be a smooth roll.
You also have to continually push down against the ground until you have rolled unto your upper back.
This variation requires coordination of the smooth roll and the having enough upper body strength to control the descent. Without pushing the floor, you might fall down too fast and that can hurt.
Again, smoothly roll from the back of your head to your lower back and tuck your legs to conserve momentum. Don’t forget to push against the floor.
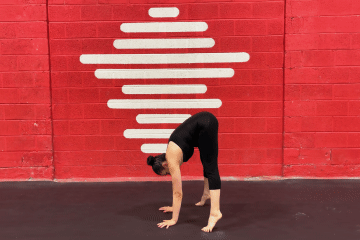
⚡️Back Bridge
The last variation to fall safely is using the back bridge. This one requires a high amount of spine, lower body and shoulder mobility.
🔥Tip 2 – Train in a Safe Environment
When training for press to handstand or even handstand in general, you would want to get enough space where you can fall safely without hitting your head or limbs on furniture. The last thing you’d want is a broken furniture + an aching leg. It burns through you mentally, physically, and through the pocket.
Keep your space nice and open. You can train in tighter spaces when you’re confident with your control. At the mean time, move your furniture or go to an open space like a park or a gym.
In terms of flooring, this will depend on where you place it. You don’t want to train understands on a soft surface like a mattress or a training pads. The soft surface will cause your hands to sink into the surface. This is not ideal for any handstand training because your wrists and fingers won’t be able to push down against the ground. In fact, training on a soft surface is dangerous.
What you can do instead is place the soft surface in front of your hands. This way, if ever you need to bail forward, the soft matting can catch you. Your hands should be on a hard surface to get more feedback.
Also, make sure the floor is flat and even. An uneven flooring is more difficult to balance on since your weight distribution will not be equal between the two hands.
Hard FLAT surface = Good
Soft surface = Bad
You can also train with slight softness on a yoga mat for added grip. Just be sure it’s not the softer kind where your hands can sink.
🔥Tip 3 – Wrist Placement/Using Parallettes
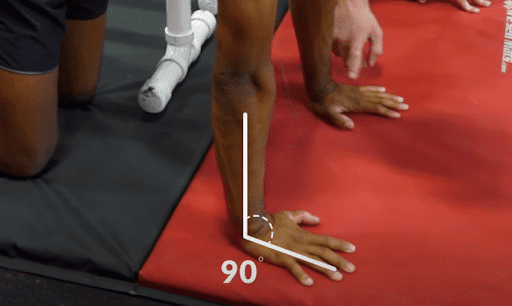
During the handstand, we place our wrist in a 90-degree angle that puts a lot of pressure on the wrist. This pressure even intensifies at the beginning phase of the press since we need to lean forward and the angle decreases.
There are two options we can choose.
First, we can place our hands in an outward angle depending on your comfortability. Although you will gain less control through your fingers, this position lessens the loading in the extended wrist position.
The next option is to train handstand presses on parallettes. This shifts your hands from a flexed/extended position into a radial or urnal position or where your palms face each other. This position is kinder to your wrists especially if you have been training on the floor for a long time.
Of course, there’s a short learning curve transitioning from the floor to parallettes. At first, we highly recommend training handstands on parallettes near a wall to get a feel for the balance.
🔥Tip 4 – Wrist Preparation
Since our wrists are heavily used in any handstand training, it’s a usual pain point when training for press to handstand and any arm balancing skill. We need to take care of wrist to further protect them from any injuries.
To do this, we need to take special attention to these joints by doing preparatory exercises for the wrists. These will condition your wrist for for the constant loading we’ll subject are wrist into.
Although we’re mostly be performing the wrist with flexion and extension, we need to improve our wrist for all of its movement function.
You can perform these exercise at the start of your workout. Just be sure to keep the volume in a moderate range.
Or you can perform these after your workout or on separate days so you can hit higher training volume for your wrist.
Again, just don’t overdo it. Your wrists are just like your any other body part. It needs time to rest and recover.
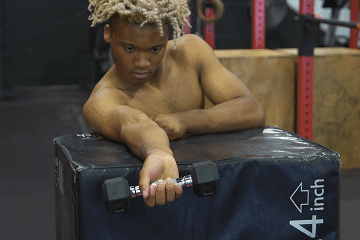
⚡️Wrist Four-ways with Dumbbell
The first exercise is the wrist four-ways with a dumbbell. While dumbbells are optimal, you can use other equipment or objects you have at home that’s roughly 1 kg to 5 kg depending on your current wrist condition. Dumbbells are just easier to hold and offers a set weight already for accurate measurement.
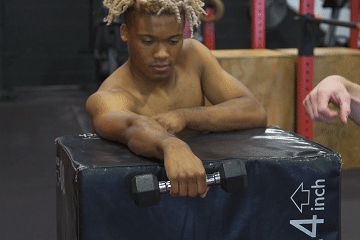
👍How to perform:
1. Prepare an elevated surface where you can place your arm.
2. Hold the dumbbell.
3. Place your arms just after the edge of the surface.
4. Begin with your palms facing down while holding the dumbbell.
5. Let the weight pull your hand down into flexion.
6. Slight pause at the bottom position.
7. Pull your wrist into full extension.
8. Slight pause at the top position.
9. Repeat the wrist motion for reps.
10. After some reps, move to the other hand.
11. Flip your hand so that your hands are facing upward.
12. Repeat the same motion and for each arm.
13. Next, turn your arm outward so that your thumbs are facing up.
14. Repeat the motion by letting your weight pull your hand then reverse the motion to reach the top range.
15. After that, the next variation, turn your arm inward so that your thumbs are facing downward.
16. Repeat for reps and repeat for the other arm.
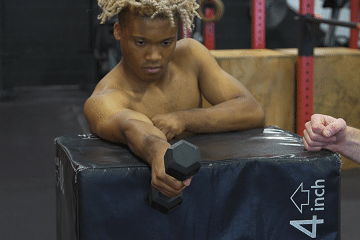

🎯Coaching pointers:
• Move with control
• Use a light weight then aim for a higher rep range to keep the exercise safe
• Use full range of motion
• Feel the stretch at the bottom position
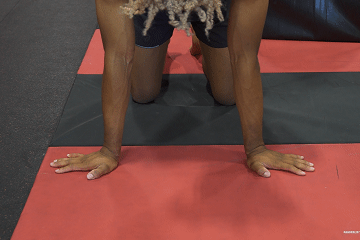
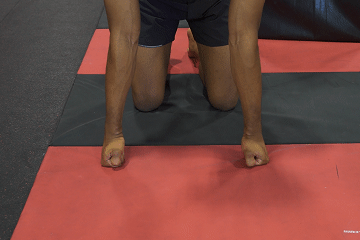
⚡️Wrist Push-ups
Another option you can use are wrist push-ups. This doesn’t need any equipment so you can train anywhere at anytime.
You can play around with the difficulty of the exercise by leaning forward or backward depending on the hand placement. When your finger tips are pointing forward, leaning forward increases the intensity. You can adjust the rest accordingly.
In addition, going into a high plank position where your feet are fully extended also increases the intensity of the exercise.
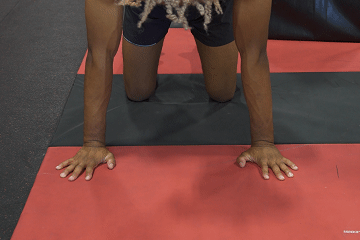
👍How to perform:
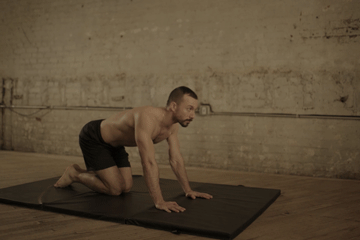
1. Begin in a quadruped position.
2. Place your hands with your finger tips facing forward.
3. Push down your knuckles so that you elevate the bottom of your palms off the floor.
4. Slight pause at the top position.
5. Lower back down to reset.
6. Repeat for reps.
7. Move your hands into different positions such:
• Fingers facing backward
• Fingers facing sideward
• The back of the hand resting on the floor then pushing into a fist with fingers facing backward
• Same position above but with your palms facing each other

🔥Tip 5 – Progressive overload
Progressive overload is the principle of adjusting your work load (meaning intensity, rest periods, frequency and training volume) GRADUALLY over a period of time.
The key word here is gradually. Not jumping into your training too fast, too soon.
It applies to all types of training, not just calisthenics and handstand presses. Respect each movement and build intensity gradually over time.
Begin with an easier progression and gradually build reps before adding sets into your training. Once you build a descent amount of working volume, only then you can move to a higher progression.
Read more here: 📍Progressive Calisthenics
🔥Tip 6 – Warming up Properly
Like any other training, you need to work on a proper warm-up before going to into the main workout.
Press to handstand is a pretty intense skill. Before going into your workout, you need to prepare your body and mind for the training.
Warm-up does this exactly by:
• 👍 Increase your body temperature
• 👍 Improve your blood flow to your muscles
• 👍 Lubricates your joints and improve elasticity
• 👍 Increases your flexibility and mobility
• 👍 Primes your neuro-muscular connection
• 👍 Primes your mind for upcoming workout
All these contribute to safely executing your workout PLUS improving your overall performance. So if safety isn’t doesn’t convenience you to do your warm-ups properly, then improving your progress through better performance will.
To properly warm-up your body, a 5-minute cardio in the stationary bike isn’t enough for press to handstand training.
You need a combination of a general warm-up and specific warm-up for this whole body workout.
Learn more on how to warm-up properly for press to handstand in this section: 📍Press to Handstand Workout Article
🔥Tip 7 – Mastering the Prerequisites
This is an encompassing tip since if you have the prerequisites of the press to handstand, then you’re probably going through every tip from tip 1 to tip 6.
What are the prerequisites?
These are moves, mobility, strength, and flexibility requirements that you first need to have to EFFICIENTLY and SAFELY progress in press to handstand.
Why are they crucial?
Prerequisites set a foundation of strength, mobility, flexibility, and body control before you move to the actual skill training.
Be sure to check the first section of the ultimate guide: How to Press to Handstand: Prerequisites & Technique
If you already have good mastery of the prerequisites then you’ll save a lot of time by progressing faster in your training as well as avoiding any injuries.
Injuries usually happen when there is a specific weakness that overloads.
For example, if you haven’t mastered your freestanding handstand yet, this means you might lack the balance or initial upper body strength to hold the position.
The press to handstand has much more balance and strength compared to the freestanding handstand. This means that you can potentially plummet down to the earth face first if you can’t hold a handstand with straight arms.
Master your freestanding handstand here: 📍The Ultimate Guide to Freestanding Handstand
Prerequisites are set for a reason. It’s for safety and good progress. Of course, it’s already mandatory to master the calisthenics fundamentals such as below before starting any press to handstand training:
• Push-ups
• Dips
• Pull-ups
• Squats
• Wall handstand
• Core work
• Bodyline
• Abs
• Sides
• Lower back
Check out the prerequisites and find any weak links you need to work on.
If everything’s checked off, then you are a lot closer to the skill!
📌Takeaway
Following these tips will allow you to progress much faster and safer in press to handstand. As they say, you’ve got to train smart, not hard.
The press to handstand is an extensive and long journey, but if you commit to it and follow the guide, you will eventually learn this amazing skill before you even realize it!
✊Final Words
Congratulations! You have made it to the end of this guide and now possess the knowledge necessary to confidently start your press to handstand journey.
Remember, it takes commitment, dedication, and practice — the results won’t happen overnight. We encourage you to take your time, trust the process, and don’t give up if things seem difficult at first.
The press to handstand is an exciting skill to work on. However, it does take time to prepare, learn, and master the movement.
This skill deserves respect.
Press to handstand🤸 is still within reach for anyone willing to put in the work required.
If you’re ready for a more individualized approach, we suggest taking our personalized program assessment today — it’s designed to help you quickly and efficiently unlock your desired movement goals.
Ready to start your journey safely? Take our TAKE THE ASSESSMENT NOW!
Thanks for joining us on this journey; if you need any additional guidance or support along the way, please reach out!
Related Articles You’ll Love:
Ready to get started?
Get your free personalized training plan now