📖 Read Time: 8 Minutes
🏋️ Join the tribe of Movement & Calisthenics Athletes
People just like you that are working with their own body weight to get strength, lose fat, build muscle, recover from injuries and live their best lives!
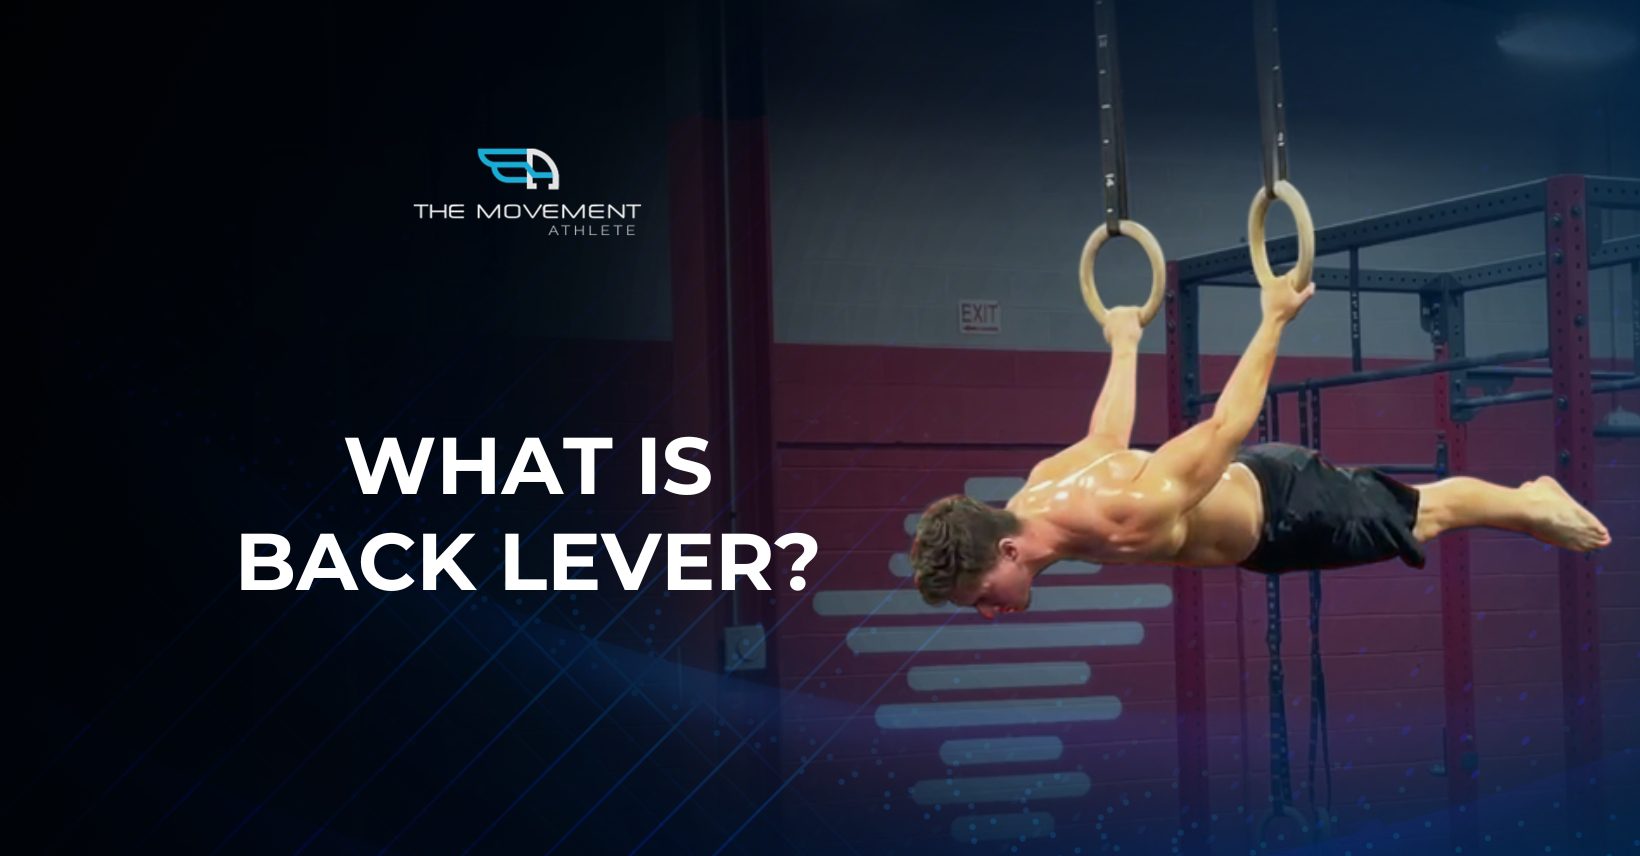
🤜 Are you looking for a new way to challenge yourself and take your fitness routine up a notch? If so, the back lever might be just the movement for you! This post will serve as your definitive guide to executing this advanced bodyweight exercise with proper form and maximizing its benefits.
The back lever isn’t just a cool party trick you can do in the gym.
This isometric hold is something you might want to consider learning if you want to further improve your shoulder strength and mobility while learning calisthenics skills. 👊
Whether you are familiar with calisthenics or just getting started, these tips will help enhance your strength-training regimen in no time. So get ready to learn more about the back lever – let’s dive into it now! 👇👇
🔥 Why You Would Want to Train Back Lever
1. 🤸 Better Shoulder Mobility & Stability – As you will notice, the back lever has a high shoulder mobility and stability requirement. The scapula play a crucial role in positioning your shoulders correctly and safely. Back lever training focuses on your shoulders for performance which can also improve general shoulder health.
2. 💪 Stronger core – To hold a straight body line of the back lever, a strong core is required. Over the back lever training, you will be able to develop stronger core muscles for the position which can also transfer to other calisthenics skills and daily life.
3. 🙌 Better Proprioception – Learning the back lever helps you build body awareness in space because you will need to be able to position your body horizontal and parallel to the ground.
4. 🏃 Increase Strength – The back lever is first and foremost a strength skill. Even with the high mobility demands, you still need to focus on the specific strength to perform the exercise. The back lever primarily targets the deltoids, core, back muscles, and chest muscles which we’ll further dive in a separate section.
5. 🎯 Full body workout – While there are specific muscles groups targeted by the back lever, this isometric hold still requires full body tension.
6. 🏆 Improves coordination – The skill component of the back lever improves the general coordination to get into the back lever position. Although this skill is an isometric hold, we also include back lever with full range of motion which will help build you strength and coordination.
7. 🔐 Unlocks more advanced movements – Unlocking the back lever opens up potential to other movement combinations and transitions especially on the rings. A popular (but high reserved for the elite) combination is the back lever to maltese to give you an example.
✨ Front Lever vs Back Lever
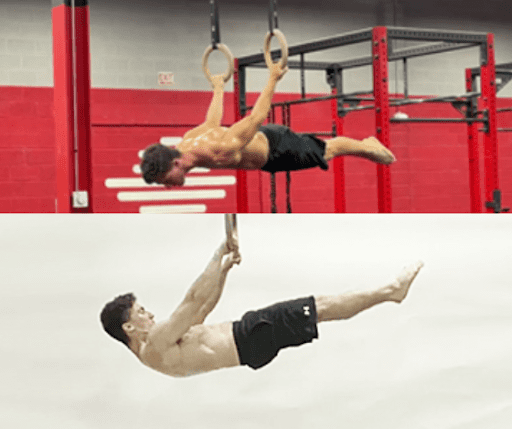
A commonly discussed topic is distinguishing the difference between the front lever and the back lever because of their obvious similarity in terms of appearance.
✅ Similarities
Both are straight-arm isometric holds that are common in gymnastics and calisthenics. These skills both require to position the body in a horizontal position. Based on the name “levers”, both make use of leverage to increase or decrease the intensity of the exercise. Body levers change the lower body position to shorten or lengthen the lever which adjusts the leverage. Athletes begin with a tuck position then progress the target goal of the full position of the lever. It’s a similar concept to adding or reducing weights in the gym to change intensity.
In terms of difference, the two have different body orientation that also changes the activated muscle groups. In the back lever, the body is facing the ground with the arms behind the body. In the front lever, the body is facing upward with the arms in front of the body.
✅ Push vs Pull
The back levers is considered a push exercise because of the action you need to perform with your shoulders from extension to flexion. In contrast, the front lever is a pull exercise since you need to move from flexion to extension.
✅ Scapula positioning

Both the back lever and the front lever require proper scapula positioning to stabilize the shoulders into a good position for the skills. In the back lever, you need to force the scapula into a protracted position to facilitate effective pushing. While in the front lever, a retracted scapula is a must to get a strong pull. In both levers, shoulders are depressed for a safer and stabilized position.
✨ Planche vs Back Lever
You might be confused why we have a section comparing these two skills. It’s because they are quite similar! While the back lever seems like a pull exercise, it’s actually a push movement that uses the same muscle groups in the planche position to hold the lever.
The chest and shoulders isometrically flex to sustain the position while the glute and core muscles help achieve a straight bodyline. The main difference is in the shoulder angle.
Since the planche is in a minimal shoulder flexion, more active tension is required for the muscles to hold the position. This also makes the move much more challenging than the back lever because of the required muscular force production.
In the back lever, the shoulders and chest are stretched in a higher shoulder flexion into extension. This stretch puts a passive tension on the shoulders which lessens the required muscular tension to hold the position.
🧐 Which one is more challenging?
It really depends on individual differences and biomechanics, lengths of limbs, muscle, muscle insertions and other factors. Some people who tend to have weaker joints and less shoulder mobility can find back levers more challenging. Others who are weaker in pulling movements and have good shoulder mobility, might find the front lever much more difficult. We cannot specifically identify which one is easier or more challenging in general.
However, the back lever can be “cheated” by resting your arms on your lats when holding the position. This will remove some of the loading onto your arms which could make the back lever “easier” in terms of strength value compared to the front lever where you’re pulling your full weight with your arms.
Then again, there’s no point in distinguishing which is which. Just train the skill you want to learn first and progress in a smart, safe manner. All is attainable with humble, and committed training.
💥 Where to Practice Back Lever: Rings vs Bars
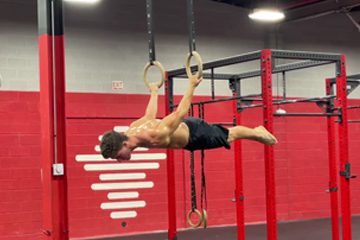
In reality, you can train the back lever virtually anywhere you can hang safely. However, for safe, efficient training, you have two options: gymnastics rings or a straight bar.
But in general, the best equipment is the one that you have access to. If you only have a bar, go for bar back levers. If you only have rings, go for rings back levers. Just keep in mind that we get stronger on the specific equipment we use. So focus only on one while you’re still learning the back lever.
However, gymnastics rings serve as an advantage for the back lever training because it’s free to move. It allows your shoulders to move to a position you are more comfortable with if you’re currently limited with your shoulder extension mobility. You can move into a wider angle which could be more comfortable for your current range of motion. In addition, rings don’t restrict your body position when starting from an inverted hang because there’s no bar blocking your body.
That being said, we’re going to teach the back lever on rings, but similar techniques and concepts can be applied using the straight bar.
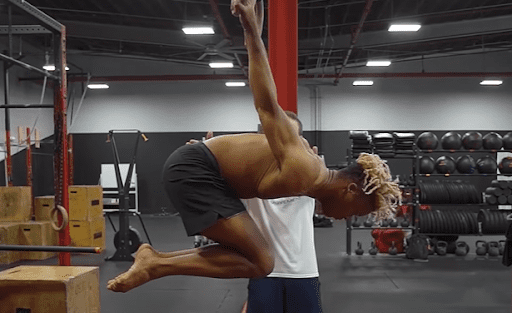
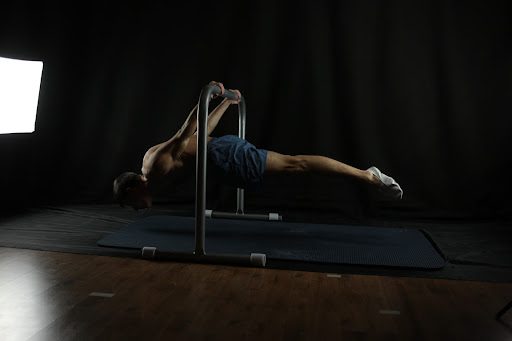
⚡️ Technique and Form
Watch this video to see how to perform the back lever: 📍 How to Perform a PERFECT Back Lever
✅ Scapula position
The scapula, or the fan-shaped bone in the shoulder joint is responsible for the foundation of straight-arm strength and other calisthenics fundamentals and skills involving the upper body. Since we’re performing the back lever with lockout arms, the role of the scapula is highlighted because of the isometric position of the rest muscle groups while in the lengthened position. A strong scapula in the correct position will help stabilize and facilitate the isometric hold.
Neglecting the scapula strength could lead to untapped potential that can slow down your back lever progress. So addressing scapula strength through isolation exercises with straight arms will help develop specific strength while the back lever hold is too challenging.
In the back lever, we need to depress our shoulders by pushing it down away from our ears as far as possible. A protracted scapula or pulling the shoulder blades apart is also a necessary position. Combining these two helps us stabilize our shoulder joints for maximum force generation for the back lever hold.
In this position, there are multiple muscle groups assisting to achieve depression and protraction. The lats, chest muscles, and serratus anterior all help in pushing the shoulders down.
✅ Hip extension
We don’t want bent or overly extended hips. The hips need to be leveled with the shoulders to achieve a fully horizontal back lever. To do so, aside from the core muscles, the glutes and hamstrings squeeze together for maximum lower body engagement.
✅ Shoulder Flexion
While flexibility and mobility is crucial for the back lever, specific strength is as important in a given range of motion. The arms are placed behind the body pushing down into shoulder flexion to sustain the isometric hold. The chest, front delts, biceps, and serratus anterior are the primary moving muscles to maintain the position.
✅ Overhand vs Underhand Grip
The overhand technique or the pull-up (pronated) grip is generally a friendlier grip orientation for the back lever. The underhand technique or the chin-up (supinated) grip, where the palms are facing your body, shifts additional tension into your biceps. This technique is better used once you’ve gained mastery of the back lever and have conditioned your connective tissues and biceps well enough to handle the demanding position. It seems like a small shift in technique, but you will definitely feel the major difference when you try it. We recommend holding back the chin-up grip for now.

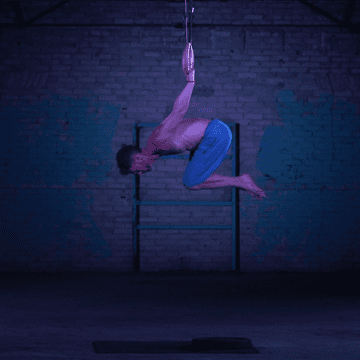
👍 How to perform:
- Begin in a hanging position from the rings with a pronated grip (palms facing away from you like in a pull-up).
- Go into an inverted hang position with legs pointing upward and upper torso pointing towards the ground.
- Lower your legs downward until they are parallel to the floor.
- Hold the full horizontal position for time.
🎯 Coaching pointers
- Posterior pelvic tilt
- Shoulders depressed and protracted
- Straight locked out arms
- Full body tension
- Toes pointed for additional leg tension
- The full body is in a horizontal position parallel to the ground
🤔 How long does it takes
Let’s go to one of the most asked questions regarding skill acquisition: “How long does it take to learn a full back lever?”
The best response we can give you is: It depends.
It depends on many factors, such as the level of strength and skill you’re going to start at. Like any other calisthenics skill, cementing a solid level of calisthenics foundation improves the rate of progress for the back lever. However, what’s unique about this isometric hold is the required shoulder extension mobility which isn’t always trained in the calisthenics fundamentals. So if you’ve been training with calisthenics for quite some time now, it may take a few months to learn the move. It’s a matter of fine-tuning certain elements and training specifically for the back lever.
If you’re a complete beginner who has no mastery of the calisthenics fundamentals and is not comfortable going upside down, then it can take a couple of years. Setting a strong foundation is the first step to any calisthenics skills.
The rate of progress for each individual is also different. Here are just some factors that can affect your learning process aside from the training protocols you will implement:
- ✊ Recovery rate and protocols
- ✊ Quality of nutrition
- ✊ Height & weight
- ✊ Body composition
- ✊ Age
- ✊ Past and current injuries
- ✊ Inclination to pushing strength
- ✊ Length of limbs
- ✊ Shoulder mobility and more
Don’t rely on others’ experiences in terms of their rate of progress when learning the back lever. It’s best to focus on your own journey, as individual differences will affect how long you will learn the skill.
Stay patient and train consistently.
💡 Key Takeaway: The back lever is a challenging skill that can take anywhere from a few months to a couple of years to master, depending on your starting level and individual factors. Focus on building a solid foundation in calisthenics fundamentals and shoulder mobility before progressing to the full back lever.
📌 Takeaway
Learning the back lever is a difficult skill requiring dedication and practice, but with continuous work, you can achieve this goal. Working on proper shoulder extension mobility is critical to success and is a good place to start. When you have this piece in place, ensure that you build the strength necessary for the back lever in your shoulder girdle, upper back, and core using specific exercises. Understanding the back lever requirements will help you improve the skill much faster.
Learn here: 📍 Benefits of Back Lever Training – Why You Should Start Your Journey
It all comes together if you are persistent with your programming, so stick with it and be proud of all the progress you make. If you’re serious about improving your back lever technique, why not take advantage of a personalized program tailored specifically to your strengths, weaknesses, and goals? Check out our free assessment to get started!
Related Articles You’ll Love:
Ready to get started?
Get your free personalized training plan now