
📖 Read Time: 4 Minutes
🏋️ Join the tribe of Movement & Calisthenics Athletes
People just like you that are working with their own body weight to get strength, lose fat, build muscle, recover from injuries and live their best lives!
👀 If you’ve watched any Youtube fitness videos and reading guides, you’ve probably heard the golden saying, “Quality over quantity.”
Focusing on quality simply means that you need to take any exercise with good form and technique. Better activation and better movement pattern is more challenging which can produce better gains.
🤜We’ll be showing you the standard gold technique for the ring dips, and you will see that the ring dip is essentially a squat for your arms. If you think about standing squat, your legs are straight, and then you eventually need to bend the hip joint and the knees. This is similar in the fact that you’re supporting on top of the rings with straight arms. You’re dipping down by bending arms and then reversing it to come back up to the top. So it’s a squat for the arms.
If you want to improve your upper body and the fundamentals get easier, ring dips are your go-to in the vertical pushing department.💯
You can learn more about the reason why you should be learning ring dips in the article below:
Introduction to Ring Dips: The exercises guide and benefits
🔥How to perform the ring dips
All right. So let’s take a look at the rings dip with Coach Jeremy. At face value, the movement pattern seems straightforward:
👍How to perform:
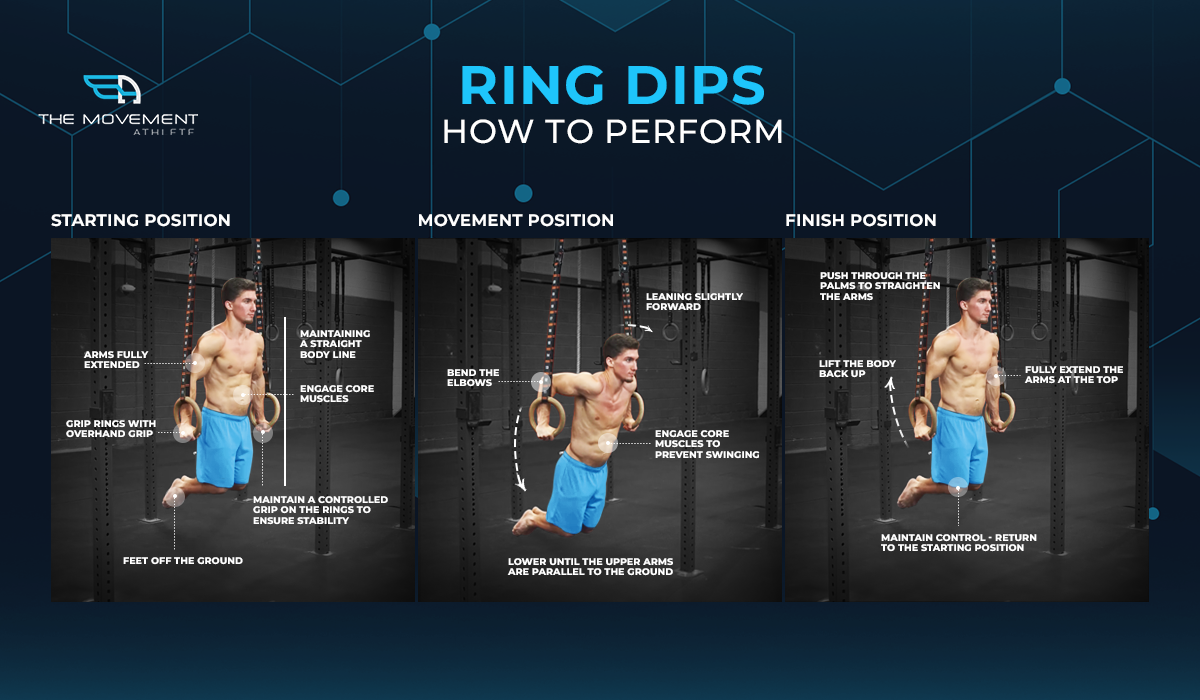
- Go into a support hold position with rings turned out.
- Lower down until down the body until the elbows are at a 90-degree angle.
- Push back up to the starting support hold position by squeezing your chest.
- Hold the starting position for a brief moment, then repeat for reps.
Coaching pointers👊
Although looking very simple, ring dips have quite many points you need to look into to perform good form and maximize chest, tricep, and shoulder activation safely.
✅Support hold position
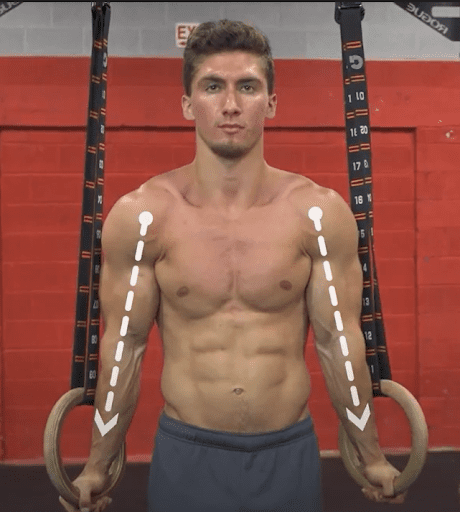
The initial position is the support position. As you can see, from top to bottom is head is in a neutral position, looking forward. Support hold is the key element for rings to make much more gains than dips on a stable surface.
When doing dips on parallel bars, you can get a brief “rest period” at the top since you can put your weight on your passive structures. Your muscles can release tension as your joints carry most of the load.
In ring dips, the instability factor forces you to work hard by keeping your chest and shoulders activated to stabilize you even if you lock out at the top support hold position. There’s no resting here. Every phase of the exercise requires you to engage and stay active with the targeted muscle groups.
The ring turn out (done by pushing your elbows pits forward) and straight-arm lockout forces you to increase the stimulation of the targeted muscles while working on your biceps and tendons.
✅Scapula position
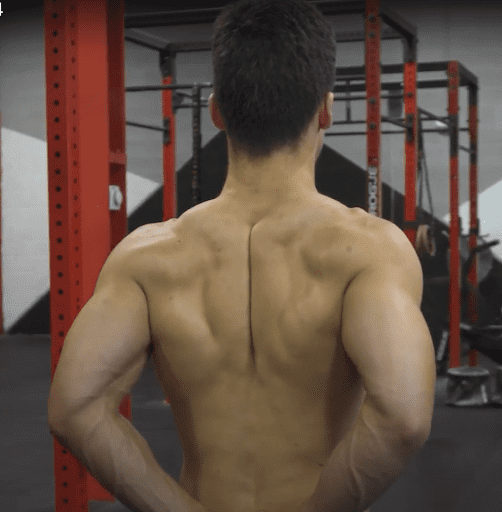
Retract your shoulder blades to get a more stabilized position throughout the range of motion. Retraction is done by pinching your shoulder blades together at the back. Again, keep the head in a neutral position and look forward to avoiding any unnecessary strain on your neck.
Depress your shoulders by pushing them down far away from your ears as much as possible. Shoulder depression adds stabilization and avoids shoulder impingement in the process.
✅Elbow movement
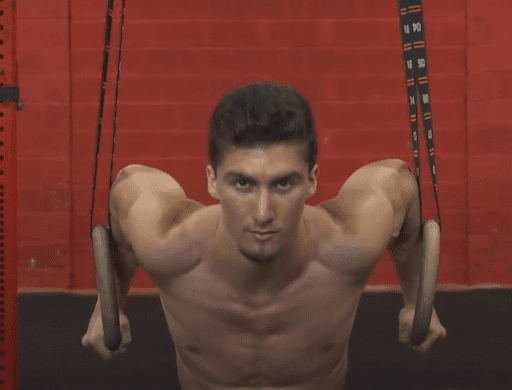
Elbow should track behind your and tuck close to your body. Similar to a push-up movement or dips on a stable surface, keeping the elbows tucked promotes good shoulder positioning. This avoids unnecessary loading, which can cause shoulder impingement.
The elbows are tracking backward, and he’s reaching about a 90-degree angle with the elbows and shoulders. The arms are locked out at the top position. The rings are turned out. There’s no contact with his body. His arms and body are away from each other.
✅Leg position
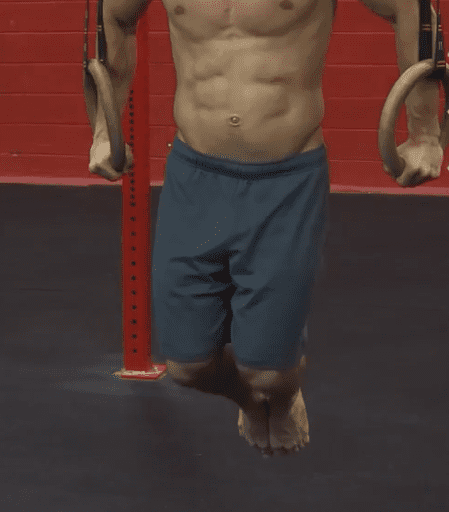
Ideally, the leg position is placed forward and straight to promote a posterior pelvic tilt (PPT) and minimize arching of the lower back.
But in case your current workout space doesn’t allow a higher gymnastic ring position to accommodate your height, you can bend your knees and place your feet backward while maintaining a PPT as shown by coach Jeremy.
“Why am I shaking?”😲
Shaking all over the place is quite natural if you’re not used to the instability of gymnastics rings. However, it takes time and mastery of the prerequisites to control the ring dip more stabilized.
Don’t worry. We all started there at some point! After building more fundamental strength and working on your weaknesses, shaking will soon disappear.
What if I can’t do the proper form yet?🤔
If you are still making mistakes and not meeting the correct technique, you might still not be used to the movement pathway. This means you need to train more until you get comfortable with the movement pattern and exercise intensity. For example, pain points in dips might just come from the lack of body awareness on how to execute the movement.
But it could also be manifestations of possible weakness in certain muscle groups or lack of shoulder or chest mobility.
If you want to execute ring dips properly, you need to pinpoint the mistakes you are making and address the issues that might be causing the problem.
You can check out the article on the Ring dip mistakes you should never make – Make faster progress and avoid injuries with ring dips to know more about the possible errors you may make and how to fix them.🤕
But remember, sometimes, working on the dips even with not the perfect form is better than not doing the ring dips at all. Just be sure that you are very close to the perfect form. When first learning, especially when fatigue sets in, the perfect form starts to drift away.
⚡️The best way to get proper technique is first mastering the dips on a stable surface. This prerequisite helps you learn the proper movement pathway and improves your strength and mobility specific for ring dips.
If you need more help building a stronger base of strength and mobility for ring dips, we invite you to take our free assessment to get a personalized training plan tailored to your current fitness level.
👊Being a movement athlete means improving your general movement and strength for a healthier body even as you grow older. This is done by training with a personalized program catered to your needs and current skill level.
Related Articles You’ll Love:
Ready to get started?
Get your free personalized training plan now
